
Let's be honest, finding dry rot in your home can feel like a punch to the gut. That initial discovery quickly turns to one big question: "How much is this going to cost me?"
The short answer? It can range anywhere from $500 for a small, cosmetic fix to well over $10,000 if there's major structural damage. The final number on the invoice really comes down to how far that sneaky fungus has managed to spread and which parts of your house it has decided to feast on.
Your Quick Guide to Dry Rot Repair Costs
Discovering dry rot is a lot like finding a slow leak somewhere; your mind immediately jumps to the potential financial hit. But here's the thing: ignoring it is simply not an option. This isn't just a surface-level problem. Dry rot is an aggressive fungus that quietly eats away at the very bones of your home, compromising its structural integrity.
Think of it like a small cavity in a tooth. Catch it early, and it's a relatively simple, affordable fix. Let it go, and it can spread deep into the structure, turning what was a minor inconvenience into a full-blown construction project.
On a national level, the average homeowner spends around $1,400 to tackle dry rot. That number is a decent starting point, but the reality is that your cost can swing wildly in either direction. A little patch of rot on a non-structural window sill might only set you back a few hundred dollars.
But if that rot has gotten into your support beams, floor joists, or roofing? That's when the costs can easily climb past $3,000. If you're looking for more detailed numbers, you can explore more data on dry rot repair costs to get a feel for all the variables at play.
Breaking Down the Numbers
To give you a clearer picture of what you might be up against, it helps to break down the potential costs by how severe the damage is. This can help you ballpark where your specific situation might fall.
Below is a quick reference table to help you understand potential costs at a glance.
Estimated Dry Rot Repair Cost by Severity
| Damage Level | Typical Cost Range (USD) | Common Areas Affected |
|---|---|---|
| Minor | $500 – $1,500 | Window sills, door frames, small deck spots |
| Moderate | $1,500 – $4,000 | Siding sections, floor joists, larger decks |
| Severe | $4,000 – $10,000+ | Support beams, roof structures, foundation |
This table provides a helpful starting point, but remember that every situation is unique.
A professional assessment is the only way to truly know what you're dealing with. What looks like a small, harmless spot on the surface could just be the tip of the iceberg, with the real damage hidden away inside your walls.
Keep in mind that these are just estimates. Other factors, like how hard it is to get to the rot—is it in an open crawlspace or buried behind a finished wall?—and the specific materials needed for the repair will also affect the final quote.
If there's one key takeaway here, it's this: early detection is your absolute best friend. Tackling the problem as soon as you spot it not only saves your home from further damage, but it also protects your wallet.
What Dry Rot Is and How It Silently Destroys Wood
Before we can even start talking about the cost to fix dry rot, we need to get one thing straight: this isn't just a bit of damp wood. Dry rot is a living, breathing fungus—its scientific name is Serpula lacrymans—and it’s incredibly destructive.
Think of it as a silent demolition crew that sneaks into your home's timber structures and eats them from the inside out.
The scary part is how little this fungus needs to get going. It only takes three simple ingredients to create the perfect breeding ground for a serious, and often expensive, infestation right inside your property.
- Wood: This is its food. The fungus devours the cellulose that gives wood all its strength.
- Moisture: It doesn't take a flood. A moisture level of just 20% is enough to wake up dormant spores and kickstart the whole process.
- Stagnant Air: Poor ventilation is dry rot's best friend. It traps damp air, creating the humid, still environment the fungus loves.
Learning to Spot the Enemy
The best way to keep repair costs down is to become your own dry rot detective. The fungus leaves behind some pretty obvious clues once you know what you’re looking for.
Keep an eye out for these telltale signs, especially in those forgotten, poorly ventilated corners of your house—think basements, crawl spaces, and around window frames where small, unnoticed leaks can occur. We often see this problem pop up near a window after a long, wet season, where moisture has been seeping in bit by bit.
You'll probably smell it before you see it. A distinct, musty, damp odor is one of the first red flags. As the fungus gets to work, you’ll see the wood develop a unique, cube-like cracking pattern called cubical fracture. The wood itself will feel brittle and crumble right in your hand.
The most alarming thing about Serpula lacrymans is how relentless it is. It sends out fine, root-like strands that can travel right through brick, plaster, and masonry just to find a new piece of wood to eat. This is how a small, localized issue quickly spirals into a major structural problem.
If you spot what looks like a soft, fleshy mushroom—often with a rust-red center—you're looking at a fruiting body. This is a five-alarm fire. It’s a sign of a severe, well-established infestation that needs immediate professional help before it spreads any further.
Key Factors That Drive Your Final Repair Bill
Trying to pin down a final cost for dry rot repair isn't as simple as picking a number off a menu. Think of it more like a calculation, where several key variables can swing the final bill from a few hundred dollars into the thousands. Once you get a handle on these factors, you'll be able to read any contractor's quote with a lot more confidence.
The single biggest driver of your repair cost is the sheer extent of the damage. A small, contained patch of rot on a window frame is one thing. That's a relatively quick fix. But if that fungus has worked its way into a main support beam or spread across multiple floor joists, the scope—and the price—of the project grows exponentially. It's the difference between minor surgery and a major operation.
Accessibility and Location of the Rot
Another huge factor is simply where the rot is hiding. If the damaged wood is out in the open—say, in an easily accessible crawl space—a contractor can get right to work. That keeps labor hours down and the job more affordable.
But the game changes completely when the rot is buried. Imagine the fungus has taken hold behind a fully tiled bathroom wall or crept underneath your finished hardwood floors. Now, the job involves careful demolition before the real work even starts. After the rot is gone, everything has to be put back together. This multi-step process adds a lot more labor and material costs to the invoice.
A good contractor will always tell you that what you can see is often just the tip of the iceberg. The real cost is determined by the damage you can't see until the walls are opened up. This is why most initial estimates include a contingency for hidden damage.
This image breaks down the main components that will shape what you pay.
As you can see, it really boils down to how bad the damage is, what materials are needed to fix it, and the going labor rates in your area.
Materials and Regional Labor Rates
The type of wood that needs replacing matters, too. Swapping out a standard 2×4 is pretty straightforward and won't break the bank. But what if the rot has destroyed custom-milled trim, a historic porch column, or specialized siding? Sourcing or recreating an exact match is a much more expensive proposition.
Finally, where you live has a major impact. Labor rates can vary dramatically from one city to the next. On top of that, your local climate can make your home a prime target for fungal growth, affecting both the likelihood of having a problem and the cost to fix it.
Take coastal areas like San Luis Obispo, California, for example. The constant moisture and "marine layer" create an ideal breeding ground for fungus. Local data shows that while a minor repair might run $500 to $1,000, moderate damage to framing can easily jump to $1,500 to $3,000. If the rot gets into serious structural elements, costs can soar past $5,000. You can get more insights on San Luis Obispo-area costs to see how prices shift by region. These numbers really show how your local environment can hit your wallet.
DIY Fixes Versus Calling a Professional
When you spot dry rot, it's tempting to grab the tool belt and try to save a few bucks. I get it. But before you rush off to the hardware store, we need to have a serious talk about when DIY is a smart move and when it's a fast track to a much bigger, more expensive headache.
Honestly, a DIY fix is only realistic in very specific, very limited situations. We're talking about a tiny, cosmetic spot on wood that isn't holding anything up. Think a small patch on a deck board, the bottom of a fence post, or a piece of decorative window trim. For those small-scale issues, you can sometimes get away with using wood hardeners and epoxy fillers.
The problem is, the risks of getting it wrong are massive. Dry rot is a fungus, and if you miss even a microscopic strand, it will come back. The biggest danger is underestimating the damage. What looks like a simple surface issue is often just the tip of the iceberg, hiding a serious structural problem inside your walls.
The Limits of a DIY Repair
Trying to tackle anything more than a minor cosmetic blemish yourself can go sideways, fast. Here's how a weekend warrior project can turn into a nightmare:
- You Don't Get It All: The fungal threads, or mycelium, are like tiny roots that spread far beyond the visibly rotted wood. A pro knows you have to cut out a generous margin of what looks like "good" wood just to be sure you've eradicated it completely.
- You Misjudge the Structure: Can you tell for sure if a floor joist, support beam, or wall stud has lost its strength? Patching a load-bearing piece of wood is a serious safety hazard. It's not worth the risk.
- You Spread the Spores: Scraping or cutting into dry rot without the right containment setup can release millions of spores into the air, effectively seeding a new outbreak somewhere else in your home.
The Professional Advantage
Hiring a professional isn't just paying for someone's time; you're investing in a permanent solution. A real expert shows up with specialized tools like moisture meters and inspection cameras to find the true extent of the rot. You can see a great example of the level of detail required for a professional siding repair in our project gallery.
Professionals follow strict containment procedures to stop the rot from spreading and use commercial-grade fungicides that you just can't buy off the shelf. Most importantly, they have the structural knowledge to replace compromised lumber correctly, keeping your home safe and sound.
Choosing a professional isn't an added expense; it's insurance against future failure. It’s the difference between slapping on a bandage and performing the surgery needed to cure the disease for good.
At the end of the day, while the upfront cost of a pro is higher, it almost always saves you money in the long run. A failed DIY job means you pay twice: once for your own materials and time, and then again for a professional to fix the original problem plus the new damage you accidentally caused.
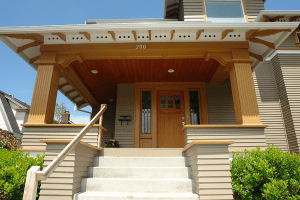
Why New Siding Is Your Best Defense Against Rot
Fixing the rotted wood in your home is a must, but it’s really only half the battle. Think of it like this: just patching the rot is like bailing water out of a boat that still has a hole in it. You’re handling the immediate mess, but you haven't stopped the leak.
That leak? It's almost always your old, failing siding.
Over time, siding develops cracks, warps, or gets brittle. Even a tiny gap from a poor installation is an open invitation for moisture to creep in and get trapped against your home's wooden bones. This turns your wall cavity into a perfect incubator for the fungus that causes dry rot, letting it silently chew away at your home from the inside out.
Modern Siding as a Strategic Shield
If you only repair the wood without addressing the source of the water, you're setting yourself up for a repeat performance. That’s why replacing your siding is one of the smartest investments you can make—it’s not just a facelift for your house, it's a permanent cure for the disease that caused the rot.
Modern materials like fiber cement or high-quality vinyl create a serious barrier against the elements. They don't absorb moisture, warp, or crack like old wood siding, which shuts down the pathways water uses to get in. You can see how a professionally installed system shields a home in this recent Breeze Siding project.
A professional siding installation isn't just about nailing up new boards. It’s about creating an entire water management system for your walls, actively preventing the conditions that allow dry rot to ever take hold again.
The Best Practices That Keep Your Home Dry
Today’s siding jobs go way beyond just the siding itself. A proper installation involves multiple layers of defense that all work together to keep your home’s structure bone-dry. This isn't just siding; it's a complete exterior envelope system.
- Weather-Resistive Barrier (WRB): This is a high-tech house wrap that goes on before the siding. It's your last line of defense, stopping any wind-driven rain that might sneak past the siding while still letting your house breathe.
- Proper Flashing: This is a crucial, often overlooked detail. Pros install precisely angled metal flashing around windows, doors, and corners. This acts like a gutter system for your walls, directing water away from vulnerable entry points instead of letting it seep in.
- Rainscreen System: This is a total game-changer, especially in damp climates. A rainscreen creates a small air gap between the siding and the house wrap. This little channel allows for constant airflow, which actively dries out any moisture that gets behind the siding before it can cause damage.
This modern, layered approach transforms your home’s exterior from a weak spot into a tough, breathable shield. It’s an investment that boosts curb appeal, increases energy efficiency, and gives you the ultimate protection against another expensive battle with dry rot.
Got Questions About Dry Rot? We’ve Got Answers.
If you think you have dry rot, your head is probably spinning with questions. That's completely normal. Getting straight answers is the first step to tackling the problem without breaking the bank. Here are the most common questions we hear from homeowners.
Can I Just Paint Over Dry Rot to Hide It?
It's tempting, I get it. A quick coat of paint and the problem disappears, right? Unfortunately, that's one of the worst things you can do.
Painting over dry rot is like putting a lid on a boiling pot—it traps the moisture inside and makes the problem explode. The fungus loves that dark, damp environment you've just created. It will spread faster and chew through the wood's structural fibers, leading to a much bigger, more dangerous, and way more expensive repair down the road.
Does Homeowners Insurance Cover Dry Rot Damage?
This is a tricky one, but the answer is usually no. Most standard insurance policies see dry rot as a maintenance issue. They figure it’s caused by slow, gradual water exposure that a homeowner should have caught and prevented. Think of it like rust on a car—it’s considered wear and tear, not a sudden accident.
There is a potential exception, though. If the dry rot was the direct result of a "covered peril," like a pipe bursting suddenly, you might have a shot. Your best bet is to pull out your policy and call your agent to be certain.
What Is the Difference Between Dry Rot and Wet Rot?
Both are wood-destroying fungi, but dry rot is the one you really don't want to meet. Think of it as the more aggressive, destructive cousin in the family.
- Dry rot is the real menace. It only needs about 20% moisture to get started and has the terrifying ability to travel through other materials like plaster and brickwork to find its next meal.
- Wet rot is a bit more stationary. It needs a much higher moisture content (around 50%) and tends to stay put in the damp area.
While you don't want either one in your home, dry rot’s ability to spread makes it a far more serious threat to your entire structure.
If you've spotted any signs of rot, don't wait and hope it goes away. The experts at Breeze Siding can give you a professional assessment, find the source of the moisture, and deliver a permanent fix. Protect your home for the long haul.
You can schedule a free on-site estimate by visiting https://breezesiding.com.
Article created using Outrank