

You can’t just slap new siding onto a house and call it a day. The real work—the stuff that makes siding replacement a lasting investment—happens long before the first new panel goes up. This preparation is the unglamorous but absolutely essential foundation for a professional, durable finish, especially here in the soggy Pacific Northwest. Opting for a full replacement isn't just about aesthetics; it's a critical opportunity to inspect your home's core structure and upgrade its weather protection, boosting curb appeal, energy efficiency, and overall property value.
Laying the Groundwork for Perfect Siding
It all starts with a full tear-off of the old siding. Some contractors might suggest saving time by installing over the existing material, but that’s a huge red flag. This shortcut completely covers up the wall sheathing—the wooden "skin" of your house. Without a direct look, there's no way to know what kind of trouble is brewing underneath, defeating a key benefit of siding replacement.
The Critical Sheathing Inspection
Once the old siding is gone, we get a clear view of your home's health. A professional installer knows exactly what to look for during this detailed inspection, a step that's crucial in our damp Puget Sound climate.
- Soft Spots and Rot: We physically probe the sheathing, searching for any soft, spongy areas where moisture has taken its toll. These spots are non-negotiable—they have to be repaired.
- Water Stains: Dark discoloration on the wood, especially around windows and doors, tells a story of past leaks. We find the source and ensure it’s fixed for good.
- Structural Integrity: The sheathing must be solid enough to securely hold the fasteners for the new siding. Any sections that are damaged or delaminating are cut out and replaced with fresh, high-quality plywood or OSB.
It's tempting to skip these repairs to trim the budget, but covering up rot is one of the worst mistakes a homeowner can make. It traps moisture and allows decay to spread, leading to massive structural damage that costs a fortune to fix later. A proper siding replacement addresses the root cause, it doesn't just cover it up.
Creating a Bulletproof Weather Barrier
With a solid, dry structure ready, the next step is to wrap the entire house in a weather-resistive barrier (WRB), or house wrap. This isn't optional; it's a core component of modern building science and a best practice we never skip. The WRB acts as a rain jacket for your home, blocking wind-driven water that might sneak behind the siding while allowing interior moisture vapor to escape.
Proper installation is everything. We start at the bottom and overlap each subsequent row by at least six inches, working our way up like shingles on a roof. Every seam gets sealed with specialized contractor’s tape, and we meticulously flash and seal around every window, door, and penetration. The goal is to create a seamless, waterproof envelope that protects your home for decades.
This meticulous groundwork truly defines a quality siding installation. While materials like vinyl siding are popular—making up about 54% of the North American market—their performance hinges on the quality of the preparation beneath. You can dig into the specifics of siding trends in this detailed industry report. Ultimately, it's this behind-the-scenes work that ensures your investment stands strong for years to come.
Essential Tools for Professional Siding Installation
Getting a professional result requires having the right tools for the job. While some basic equipment is universal, each siding material demands its own specialized gear to ensure precise cuts, proper fastening, and a clean finish.
| Tool Category | Essential for All Siding | Vinyl Specific | Fiber Cement Specific | Wood Specific |
|---|---|---|---|---|
| Measuring & Layout | Tape Measure, Level, Chalk Line, Speed Square | |||
| Cutting Tools | Utility Knife, Tin Snips | Snap Lock Punch, Zip Tool | Fiber Cement Shears, Dust-Collecting Circular Saw | Miter Saw, Table Saw |
| Fastening Tools | Hammer, Cordless Drill/Driver | Siding Nailer (with depth adjustment) | Pneumatic Siding Nailer (for blind nailing) | Stainless Steel Siding Nailer, Finish Nailer |
| Safety Gear | Safety Glasses, Gloves, Dust Mask | NIOSH-approved Respirator (for silica dust) | ||
| Specialty Tools | Ladders/Scaffolding, Sawhorses | Geared-Head Shears | Wood Sealant, Paint Brushes |
Having this arsenal ready ensures the crew can work efficiently and handle the unique challenges presented by each material, from controlling silica dust with fiber cement to allowing for expansion and contraction with vinyl. It’s a key part of doing the job right the first time.
Mastering Vinyl Siding Installation
There's a reason you see vinyl siding everywhere—it's a solid, low-maintenance choice. But its biggest advantage, flexibility, is also where most DIY installations go wrong. Vinyl expands and contracts with the temperature, and if you don't give it room to move, you'll get ugly warping and buckling.
The secret isn't complicated: hang it, don't pin it.
Unlike wood that you nail down tight, vinyl panels need to float. You'll want to drive your fasteners into the center of the nailing slot but never sink them all the way.
Here's a trade method every pro uses: leave a small gap between the nail head and the vinyl. It should be about the thickness of a dime, or roughly 1/32". That tiny bit of breathing room is the difference between a siding job that looks great for decades and one that starts rippling after the first hot summer.
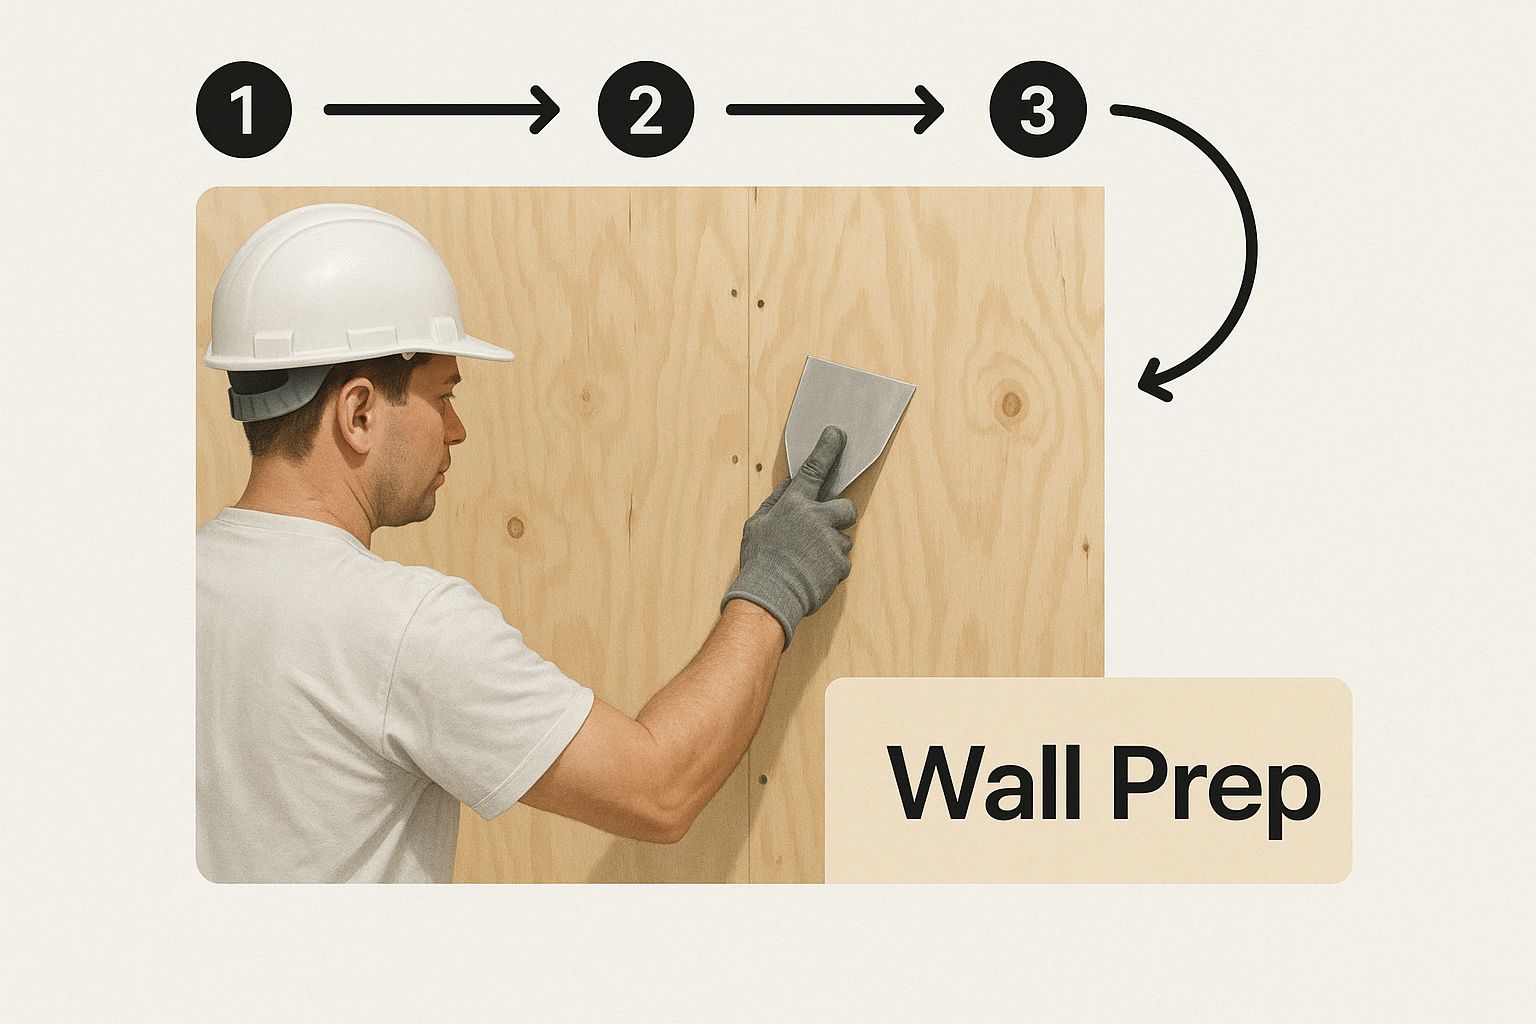
Before you even think about the siding itself, you have to get the wall surface perfectly flat and smooth. Any bumps or dips will telegraph right through the new panels.
Building the Framework First
Before the first full panel goes up, all your trim pieces have to be in place. I'm talking about corner posts, J-channels around windows and doors, and the starter strip at the bottom. These pieces create the frame that holds everything together and, just as importantly, manages all that expansion and contraction.
Corner posts are a perfect example of the "hang, don't pin" rule. You fasten them at the very top of the highest nailing slot, then center the rest of the nails in the slots below. This lets the long vertical piece hang securely while still being able to shift with temperature swings.
J-channel is the workhorse you'll use around every window and door. The key here is to leave a 1/4-inch expansion gap where the siding panels will slide into the channel. If you cut the panels to fit too tightly, they'll have nowhere to go when they expand.
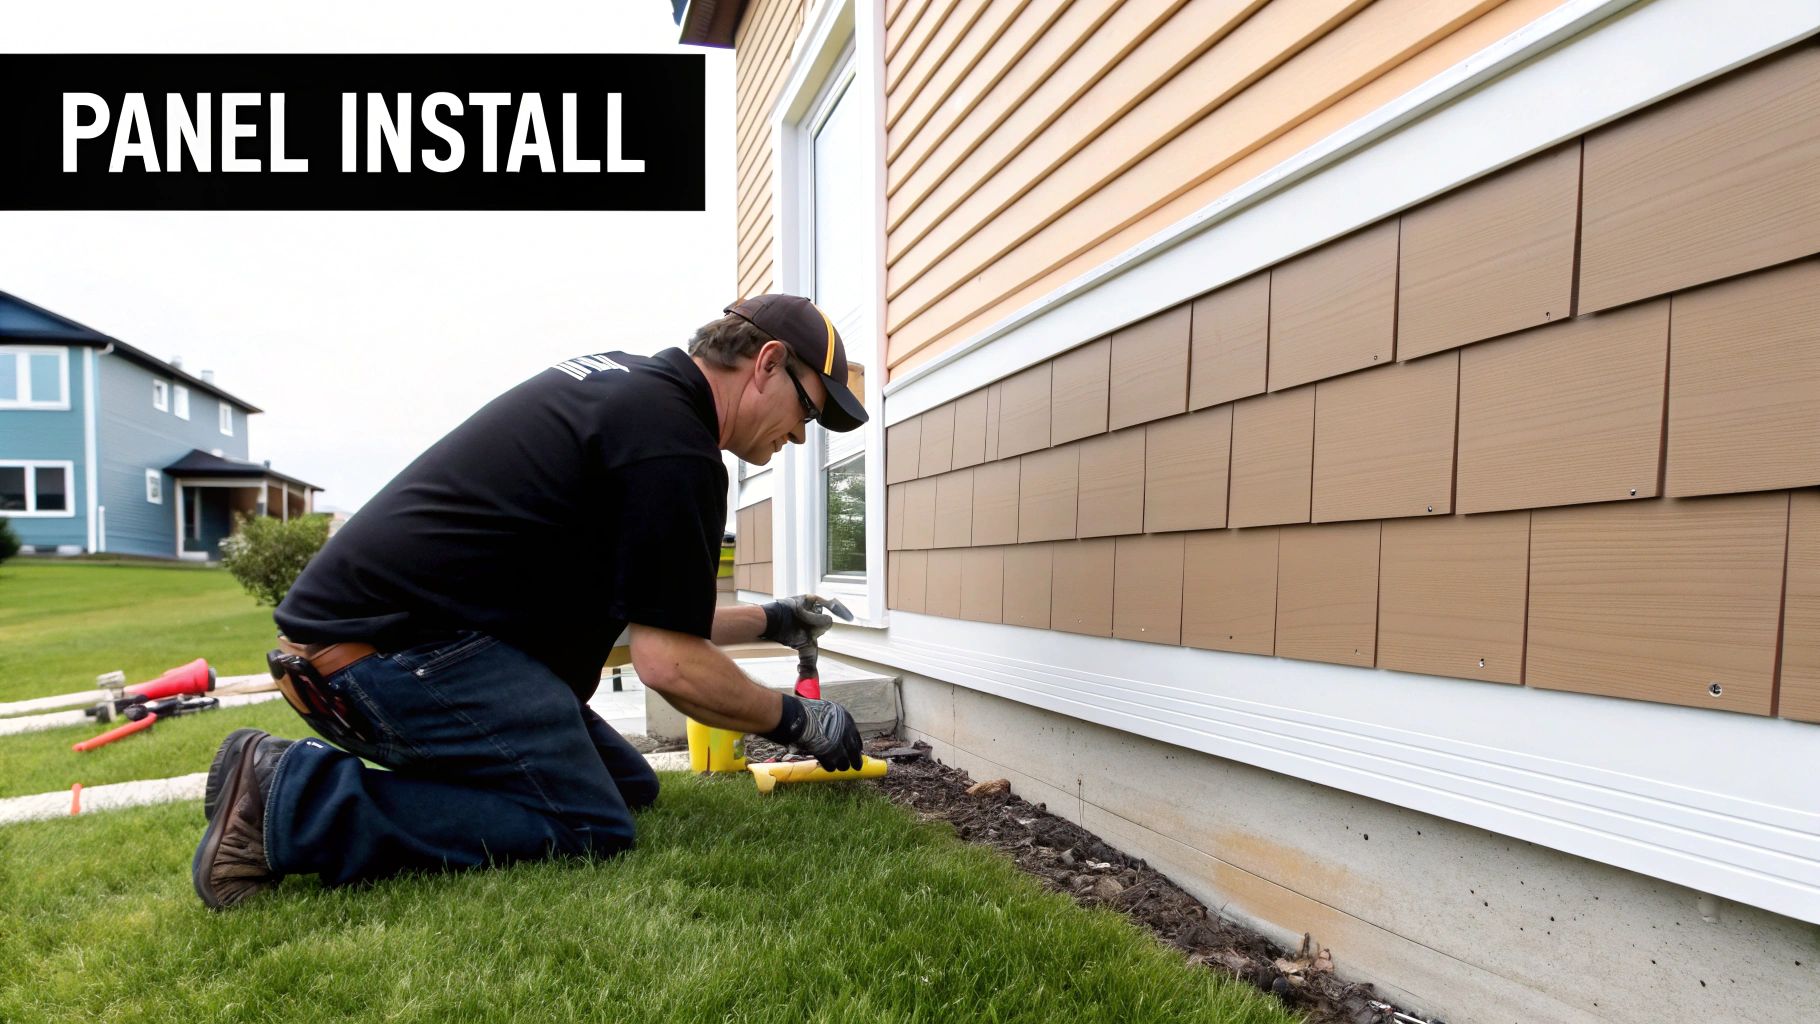
Setting the First Course and Working Your Way Up
With the trim installed, it's time to get your starting line perfectly level. We snap a chalk line around the entire base of the house for this. The first row of siding clicks into a starter strip that follows this line, which guarantees every single row above it will be dead straight.
Each panel is designed to interlock with the one below it. You just lift the new panel, engage the lock at the bottom, and then lift it slightly until you feel it hook in.
Before you nail it, check it. You should be able to slide the panel left and right pretty easily. If you can't, it's too tight and is a buckle waiting to happen.
Here are a few other pro tips we always follow on-site:
- Stagger Your Seams: Never, ever line up the seams of siding panels from one row to the next. It looks amateurish. We always stagger them so the wall has a clean, natural look.
- Get the Overlap Right: Panels need to overlap by about 1 to 1.5 inches. We also plan the direction of the overlaps so they are less visible from the curb or the front door.
- Finish Clean Under Windows: To secure that top piece of siding under a window or soffit, you'll need a special piece called undersill trim. We use a tool called a snap-lock punch to create little tabs on the cut edge of the siding panel. These tabs then snap right into the undersill trim, creating a tight, wind-resistant finish.
Getting vinyl siding right is all about the details. From that tiny dime's-width gap under the nail to planning your overlaps, every step adds up to a beautiful exterior that can handle whatever the Pacific Northwest weather throws at it.
When you move beyond vinyl, you step into a different world of siding installation. Materials like fiber cement and natural wood aren't just about looks; they demand a completely different skill set and a much higher level of precision. This is where a standard job becomes a high-end, long-lasting exterior. The game changes, and the focus shifts to uncompromised safety, dead-on accuracy, and an aggressive approach to moisture management.

Precision and Safety with Fiber Cement
Working with fiber cement, like the products from James Hardie, boils down to two critical things: controlling silica dust and perfecting the fastening. It’s that simple, and that serious.
The dust from cutting fiber cement contains crystalline silica, a major respiratory hazard. This isn’t a friendly suggestion—it’s a non-negotiable safety rule on any professional job site. Our team at Breeze Siding relies on specialized tools to keep the air clean.
- Pneumatic Shears: Think of these as heavy-duty scissors that slice through the boards, creating almost zero dust.
- Dust-Collecting Circular Saws: When a saw is the only tool for a complex cut, it’s always hooked up to a HEPA vacuum that sucks the dust away right at the blade.
- Proper PPE: Every single installer wears a NIOSH-approved respirator. A simple paper mask just doesn't cut it.
Beyond safety, the way you fasten the boards makes all the difference. We almost exclusively use a blind nailing technique. This means each nail is driven through the very top of the board, just high enough that the next piece of siding completely hides it. The result is a clean, seamless look with zero nail heads showing on the face of the siding. It takes more time and skill, but the finish is far superior.
One of the most common rookie mistakes we see with fiber cement is improper gapping. The boards expand and contract a tiny bit with temperature changes. You have to leave a small, precise gap where boards butt up against each other or meet trim. Skip this, and you’re asking for buckled boards and a failed finish down the road.
Mastering Moisture with Natural Wood Siding
Natural wood siding has a timeless beauty, but in a damp climate like the Pacific Northwest, it demands an expert’s touch when it comes to moisture. Wood is a living material; it will absorb and release water. If it’s not installed correctly, that leads to warping, cupping, and eventually, rot.
Our first line of defense happens before a single board even touches the wall. We back-prime every single piece of wood. That means applying a coat of high-quality primer to the back, front, and all cut edges of every board. This simple step seals the wood on all six sides, drastically cutting down on moisture absorption and preventing the cupping that happens when only the front is protected.
This is a step that less experienced installers often skip to save a day, but it’s absolutely essential for the long-term health of a wood exterior.
The Power of a Rainscreen Gap
For the ultimate protection—especially here in the rainy Seattle area—we always push for installing wood siding over a rainscreen system. This is a pro-level method that creates a small but mighty air gap, usually about 3/8 of an inch, between the siding and the house wrap.
Here's how it works:
- First, we install the weather-resistive barrier (like Tyvek) as usual.
- Next, we attach thin vertical strips of wood called furring strips right over the house wrap.
- Finally, the wood siding gets fastened to these furring strips, not directly to the wall sheathing.
This little gap does two huge things. It creates a path for any water that gets behind the siding to drain straight down and out. It also creates a channel for continuous airflow, helping the back of the siding dry out completely.
This is the single most effective way to prevent moisture damage and ensure a wood siding installation lasts for generations. It’s the professional standard for building a resilient, high-performance exterior.
Modern Siding Materials and Techniques
Siding installation isn't what it used to be. Gone are the days of just nailing up boards and calling it a day. Now, it’s all about creating a high-performance system for your home, especially here in the demanding climate of the Pacific Northwest. We're seeing a huge focus on energy efficiency and innovative materials that actually last.
One of the biggest shifts I’ve seen on the job site is the move toward vertical siding. It gives a house a clean, contemporary look, but you can't just install it like traditional horizontal siding. For vertical panels, you have to install horizontal furring strips first. This creates that all-important rainscreen gap, ensuring any water that gets behind the siding has a clear path to drain away instead of getting trapped.
The Thermal Performance Revolution
Another game-changer is continuous exterior insulation. Instead of just stuffing insulation between the wall studs, we’re now adding a solid layer of rigid foam insulation to the outside of the sheathing, right behind the siding itself.
Think of it like wrapping your home in a cozy, unbroken blanket. This creates a "thermal break" that stops heat from escaping through the wall studs—a weak point known as thermal bridging. Believe it or not, this can account for up to 25% of a wall's total heat loss. For anyone serious about cutting down energy bills, this is how it's done right.
This method is especially effective for upgrading older Seattle homes, bringing their energy performance into the 21st century.
The Rise of Composite and Modular Materials
The materials we're working with are also getting a lot smarter. Newer composite and modular siding products are being engineered to make the installation process smoother, cut down on waste, and give homeowners a super durable, low-maintenance finish.
These advanced materials often have interlocking systems or come in prefabricated panels. For us, that means a faster, more precise installation. For you, it means a tighter, more weather-resistant home with fewer seams and a longer lifespan.
Technology keeps pushing the industry forward. While vinyl siding is still a common choice, constant R&D is making it more durable than ever. Installation is also getting more efficient, with modular components helping to speed up project timelines and reduce waste on-site, a trend that’s catching on fast. You can dig into some of the market data and material improvements in this comprehensive siding market report.
Ultimately, these modern approaches are about more than just looks. They represent a fundamental shift toward building smarter, more resilient exteriors. By embracing new materials and focusing on energy-efficient installation, you're not just getting new siding—you're future-proofing your home.
Finishing Touches That Ensure Longevity
The big job is done, the house is wrapped, but we're not packing up the truck just yet. The last 5% of the project—the finishing details—is what separates a siding job that just looks good from one that’s built to last for decades. This is where the real pros prove their worth, focusing on the small stuff that keeps the big stuff (like water) out.
A truly professional finish starts with using the right sealant and knowing exactly where—and more importantly, where not—to apply it. Getting this wrong is one of the most common DIY mistakes I see.
The Art and Science of Sealing
The whole point of sealant, or caulk, is to create a flexible, watertight seal. We meticulously apply a smooth, even bead where the siding meets trim—think around your windows, doors, and at the corners. This simple step is your home’s first line of defense against wind-driven rain trying to sneak in.
We always opt for a high-quality polyurethane or elastomeric sealant. Why? Because it’s designed to stretch and compress as your siding naturally expands and contracts with temperature changes, preventing cracks and gaps from forming over time.
CRITICAL TIP: Never, ever caulk the bottom edge of your horizontal siding panels. This is a massive mistake. That tiny gap is a "weep hole," intentionally designed to let any moisture that gets behind the siding drain out. Sealing it shut traps water, creating a perfect recipe for rot, mold, and serious damage.
Flashing: The Unsung Hero of Water Management
Proper flashing is arguably one of the most critical parts of the entire installation, even though you’ll probably never see it. It’s a thin, waterproof material (usually metal) that gets installed over windows and doors before the siding goes up. Think of it as a tiny, angled roof that kicks water out and away from the most vulnerable spots on your walls.
This isn't an optional step; it's a non-negotiable part of any job we do. Skipping it is just asking for water to find a way into your home's structure. That tiny, hidden piece of metal prevents thousands of dollars in future water damage.
The Final Walk-Through Checklist
With all the sealing and flashing buttoned up, it's time for a final, detailed walk-through. This is our quality control pass, where we double-check that every single component is installed correctly and working as a system.
Here’s a peek at what a seasoned installer is looking for:
- Panel Play: With vinyl siding, we'll literally slide a few panels by hand. They should move back and forth about a quarter-inch without any resistance. If they’re tight, they can buckle when the temperature changes.
- Fastener Check: We scan for nails driven too tight, which restricts movement, or left too loose, which looks sloppy. Every fastener needs to be just right.
- Trim and Seams: All the finishing pieces, like J-channels and corner posts, should be seated perfectly. We also make sure the seams between panels are properly overlapped and staggered for a clean, professional look.
- The Eye Test: At the end of the day, it has to look crisp and clean. We're on the lookout for any weird gaps, misaligned panels, or messy sealant lines that detract from the final appearance.
These finishing touches are what truly maximize the life and performance of your new siding. It’s how we ensure your investment isn't just a pretty facelift, but a durable, long-lasting shield for your home.
Common Siding Installation Questions
When you're planning a siding project, a lot of questions come up. It's totally normal. Understanding why professionals do things a certain way can really help you feel confident in the process. We've pulled together some of the most common questions we hear out on the job to give you some clear, no-nonsense answers.
Can You Install New Siding Over Old Siding?
It might sound like a great way to save a few bucks on labor, but putting new siding right over the old stuff is a shortcut we strongly advise against. Pros call this a "layover," and honestly, it usually creates more headaches than it's worth.
The biggest problem is that it completely skips the chance to inspect your home's wall sheathing. Without taking the old siding off, there’s just no way to know if there's hidden rot, insect damage, or moisture getting in and wrecking your home's structure.
On top of that, layering siding almost never looks good. The new panels just follow the bumps and waves of the old layer, leading to a lumpy, uneven finish. It also makes it a real pain to properly flash and seal around windows and doors, which is basically asking for leaks down the road. The only right way to do it is a full tear-off to make sure we're starting with a solid, dry foundation for your new siding.
How Does Local Climate Affect Siding Choice?
Your local climate isn't just a small detail—it's one of the most critical factors in picking the right material and installing it correctly. Here in the Pacific Northwest, we have a very specific set of weather challenges that dictate our best practices.
- Temperature Swings: In places where temperatures bounce around, vinyl siding will naturally expand and contract. You have to fasten it just right to prevent it from buckling and warping when the weather changes.
- Persistent Rain: With our famous rain, you need materials that are champs at managing moisture. Fiber cement or natural wood installed with a rainscreen system are fantastic choices because they help everything dry out and prevent water from getting trapped.
- Coastal Exposure: If you're near the Puget Sound, that salty air is no joke. It's crucial to pick siding and fasteners that can resist salt spray to avoid corrosion and premature failure.
You always want to match the material and installation method to the real-world conditions your home faces every day.
What Are the Most Costly Installation Mistakes?
The mistakes that end up costing homeowners the most money almost always come down to two things: bad fastening and poor water management. These issues might not be obvious right away, but they lead to huge, expensive repairs later on.
The number one cause of ugly buckling and warping in vinyl siding is nailing it too tightly. The panels need to float freely to expand and contract; pinning them down creates immense stress that ruins the finish.
Another wallet-draining mistake is skimping on flashing (or installing it wrong) over windows, doors, and where the roof meets the wall. It’s a guaranteed way to let water into your walls, causing structural rot that can cost thousands to fix. Botching the house wrap installation is another classic blunder that undermines the entire system from the very beginning.
How Long Does a Siding Replacement Take?
For a typical two-story house, a professional siding replacement usually takes somewhere between one and two weeks. That's just a ballpark, though, and a few things can change the timeline.
If your home has a lot of complex angles, dormers, or tricky architectural details, it's going to add time. The same goes for discovering hidden rot or other structural damage once we get the old siding off—we have to fix that properly before moving on. And of course, here in the Seattle area, a few days of rain can always push the schedule back.
A smaller, simple home might only take a few days, while a big, custom project could easily take three weeks or more.
Ready to transform your home with a siding replacement done right? The expert team at Breeze Siding has been serving the Seattle area since 2007, delivering exceptional quality and professional service. Contact us today for your free on-site estimate!