
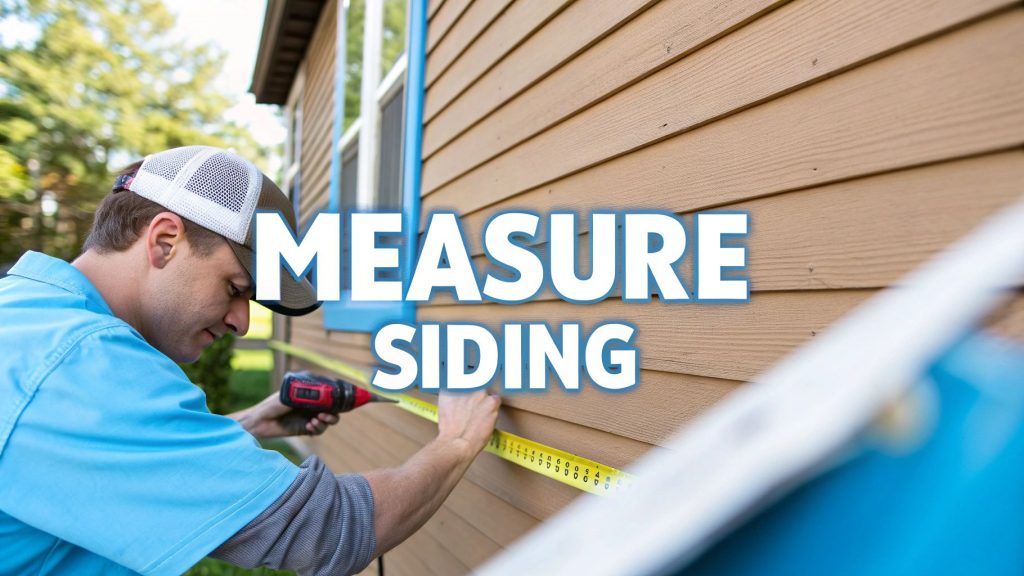
Getting your siding measurements right is the critical first step in any siding replacement project. The core concept is straightforward: calculate the total area of each exterior wall by multiplying its height by its width. Then, subtract the area taken up by windows and doors. Finally, you add a "waste factor"—a trade-standard buffer of 10-15%—to account for cuts, angles, and any minor mistakes.
Mastering this formula is the secret to a siding project that stays on budget, minimizes waste, and achieves a flawless, professional finish. More than just ordering material, accurate measurements are the foundation of a successful siding replacement, boosting curb appeal and protecting your home for years to come.
Your Blueprint for a Perfect Siding Project
Think of this initial measurement phase as creating the blueprint for your home's new exterior. Precision here saves you from the headache of costly re-orders, reduces material waste, and is the first step toward a clean installation that dramatically improves your home's appearance and value. The benefits of a well-planned siding replacement are significant, from enhanced energy efficiency to superior protection against the elements.
Before tackling the more complex math for gables or dormers, let's get the fundamentals down by gathering the right tools and adopting a professional mindset.
The Tools of the Trade
Any seasoned contractor will tell you that accuracy begins with your tools. You don't need a truck full of specialized gear, but having a few key items on hand will make the job significantly easier and your numbers far more reliable.
Before you start, make sure you have these essentials ready. Here’s a quick rundown of what professionals keep on hand for a measurement job.
Essential Tools for Measuring Siding
| Tool | Primary Use | Pro Tip |
|---|---|---|
| Rugged Tape Measure | Your go-to for all wall, window, and door measurements. | Get a 25-foot or 30-foot model with a wide, sturdy blade. It's less likely to kink when you're extending it across long spans. |
| Laser Measuring Device | Great for getting quick, accurate reads on long walls or high second-story eaves. | While not essential, it’s a huge time-saver and eliminates the guesswork that comes with a sagging tape measure. |
| Notepad and Pencil | For sketching out each wall and jotting down every measurement. | Don't rely on memory! A quick sketch of each wall helps you visualize where each number goes and prevents mix-ups later. |
| Sturdy Ladder | Absolutely non-negotiable for safely reaching upper walls and the roofline. | Make sure your ladder is on stable, level ground before you climb. Safety first, always. |
Having the right equipment on hand means you can focus on getting the numbers right without any unnecessary hassle.
A small mistake here can have big consequences down the line. In fact, it's estimated that over 80% of siding installation errors can be traced back to simple miscalculations made during this initial planning stage. That number really drives home how critical it is to get this part right.
The Core Measurement Concept
At its heart, the process is pretty straightforward: you need to find the total surface area you intend to cover. You’ll start by measuring the height and length of a wall to calculate its square footage.
For example, a simple rectangular wall that is 10 feet high and 40 feet long has a surface area of 400 square feet (10 x 40).
From that initial number, you'll subtract the square footage of any openings, like doors and windows. This simple process of addition and subtraction is what gets you to an accurate material estimate. Getting this right from the start makes budgeting easier and sets you up for a smooth installation, whether you're working on a new build or a renovation. If you'd like to see how different styles might look, you can find a handy siding visualizer here.
Calculating Your Core Siding Requirements
Alright, let's get down to the numbers. This is where you turn your home's exterior into a solid plan. We'll start with the biggest and easiest parts first: the main walls. Getting this part right sets the stage for the whole project, so take your time here.
Your first move is to find the gross square footage of each wall. Think of this as the total surface area before you worry about windows or doors. Grab your tape measure and get the height and width of one wall. Let's say you're working on a wall that's 10 feet high and 30 feet wide—a pretty common size. Just multiply those two numbers together.
10 ft (height) x 30 ft (width) = 300 square feet
Easy enough, right? Now, just do that for every flat, rectangular wall around the house. I always recommend sketching each wall on a notepad as you go, jotting down the dimensions so you don't lose track.
Accounting for Windows and Doors
Now that you have the big numbers, it's time for the most important step for saving money: subtracting the openings. Over-ordering siding is one of the most common rookie mistakes, and this is how you avoid it. You need to account for every single window, door, or vent that you won't be covering with siding.
This is where being meticulous pays off. Measure the height and width of each window and door. For instance, a standard window might be 3 feet wide by 5 feet tall, which comes out to 15 square feet. A typical front door is usually around 3 feet wide by 6.7 feet tall, giving you about 20 square feet to subtract.
This infographic lays out the whole process perfectly, showing you how to measure the wall and then remove the areas for openings.
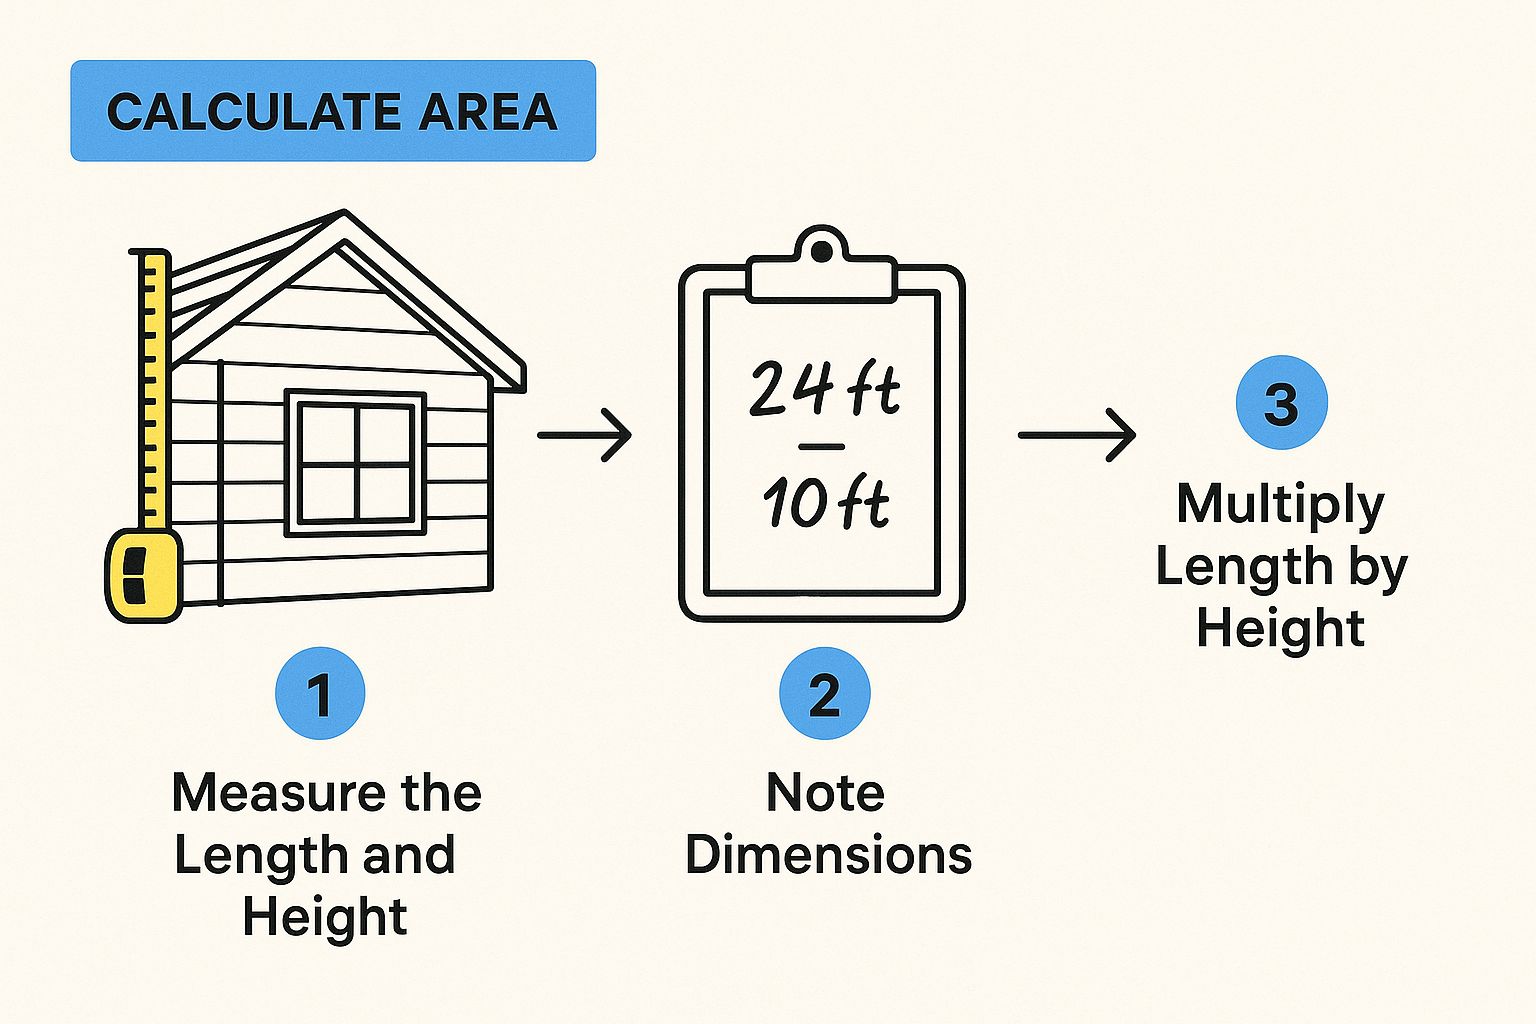
As you can see, it's a simple formula. Figure out the total area, then subtract the parts you won't be siding. That gives you the real number you need for your material order.
A Real-World Siding Measurement Scenario
Let's walk through an example I see all the time. Picture a standard two-story wall that’s 20 feet high and 40 feet wide.
- First, get your gross area: 20 ft x 40 ft = 800 sq. ft.
Now, let's say this wall has a few things on it:
- Four standard windows, each 3 ft x 5 ft (15 sq. ft. a piece)
- One big picture window that's 6 ft x 4 ft (24 sq. ft.)
- A sliding glass door measuring 6 ft x 6.7 ft (about 40 sq. ft.)
Let's add up the square footage of all those openings:
- (4 windows x 15 sq. ft.) + 24 sq. ft. + 40 sq. ft. = 124 sq. ft. of openings.
Finally, subtract that from your gross wall area to get your net square footage:
- 800 sq. ft. – 124 sq. ft. = 676 sq. ft.
For this single wall, your starting point for material is 676 square feet. Remember, this is before we add any waste factor.
This method—gross area minus openings—is exactly how the pros do it. It takes the guesswork out of the equation and makes sure you're not buying a pile of siding that's just going to sit in your yard. It’s the key to keeping your siding replacement project on budget.
Mastering Tricky Shapes: Gables and Dormers
Sure, measuring the big, flat rectangular walls is the easy part. But let’s be honest, the real charm of a home, especially the ones we see all over the Pacific Northwest, is in the details—the gables and dormers. These angles can look intimidating at first, but with a little geometry, they're not so bad.
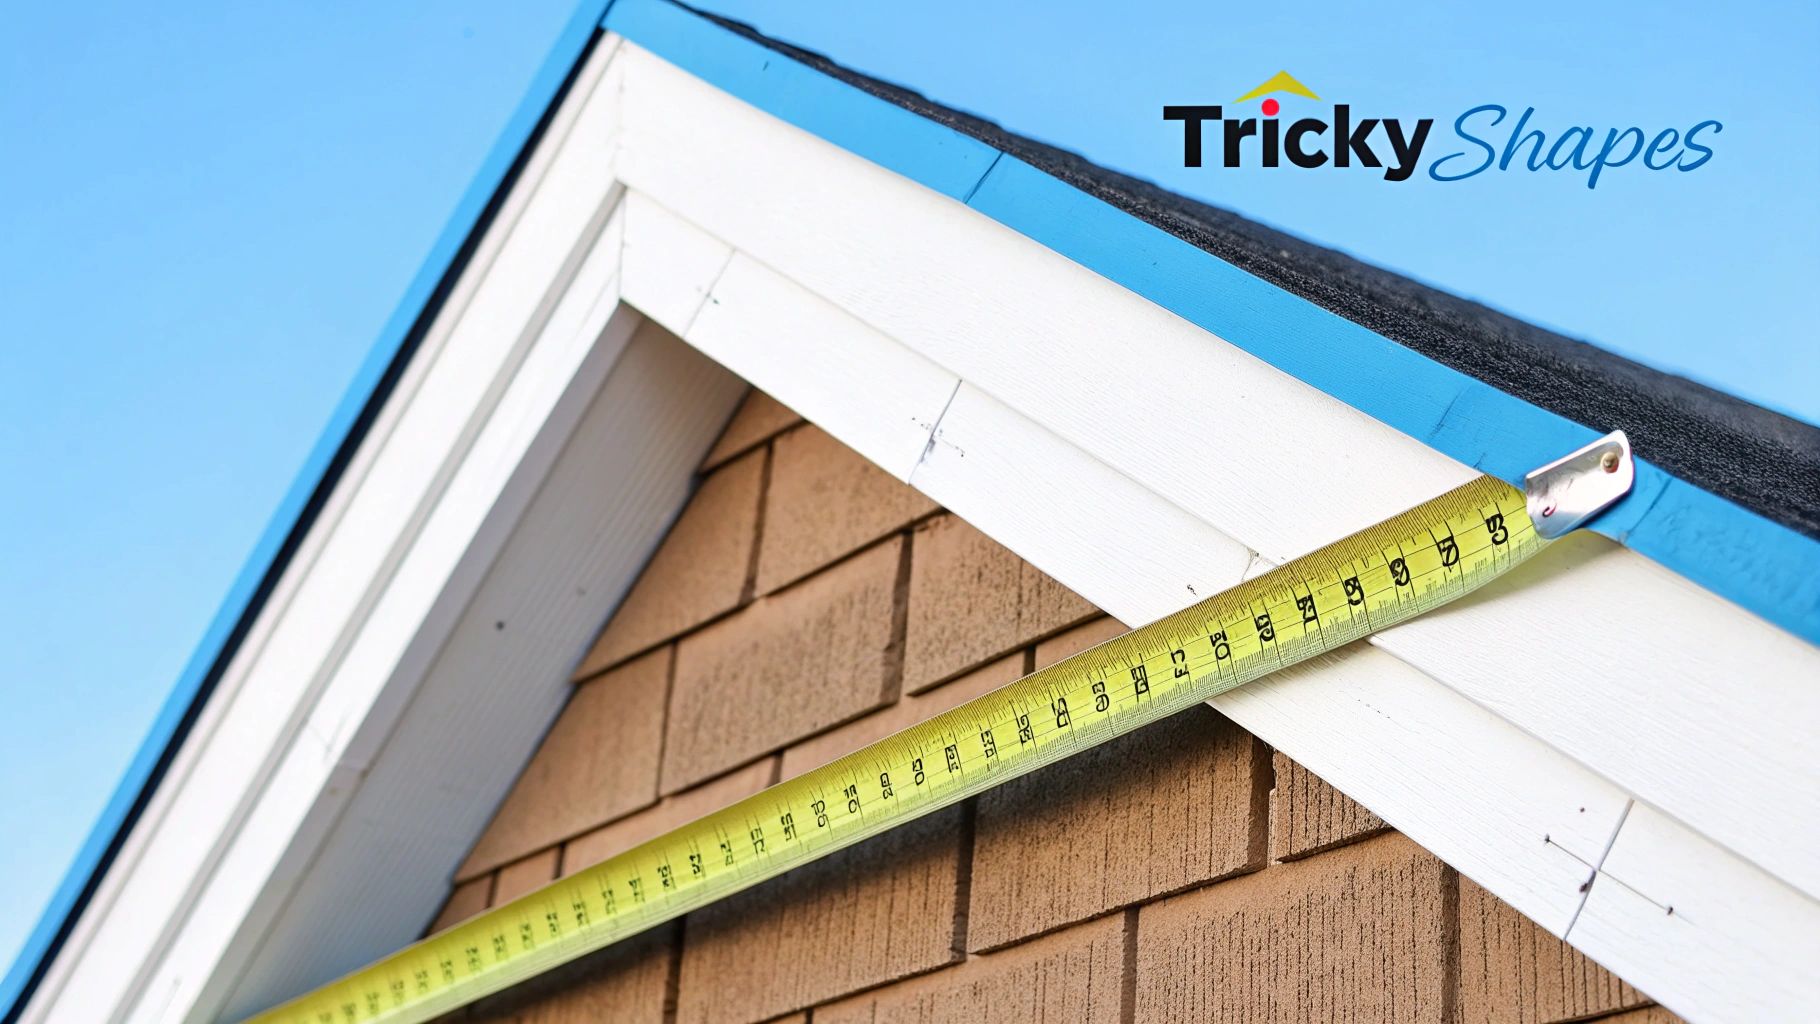
Nailing the measurements for these features is what separates an amateur guess from a professional job. It’s the difference between a clean, finished look and the nightmare of running out of material right when you're making a tough cut.
A Trade Secret for Measuring Gables
Gables—that triangular section of wall at the peak of the roof—are much simpler to measure than you might think. You can leave the trigonometry textbook on the shelf. There’s a go-to formula the pros use that works every time, regardless of the roof's pitch.
It’s just: (Base x Height) / 2
Let's break that down with a real-world example:
- First, get the Base. Measure the horizontal width of the triangle from one corner of the roofline to the other.
- Next, find the Height. Go to the center point of your base measurement and measure straight up to the gable's peak.
So, if you've got a gable with a 30-foot base and a 12-foot height, the math is (30 x 12) / 2. That gives you 180 square feet. It’s really that straightforward. Just remember to subtract any windows or vents inside the gable, the same way you did for the main walls.
How to Tackle Dormers by Breaking Them Down
Dormers are fantastic for adding light and space, but they definitely add a few wrinkles to your siding calculations. The trick is to stop seeing them as one big, complex unit. Instead, think of them as a collection of simple shapes—usually a few small rectangles and a triangle or two.
Treat every surface on the dormer as its own little wall. Most of them have three parts that need siding:
- The two "cheeks" on the sides (which can be triangular or rectangular).
- The front face, which is typically a rectangle with a window in it.
Measure the height and width for any rectangular pieces, and use that handy gable formula for any triangular parts. Add up these small areas to get the total for one dormer. If the house has multiple identical dormers, you just need to measure one and multiply.
Pro Tip: Don't forget about the extra cuts when you're figuring out material for dormers. Those tight spaces and numerous angles mean you'll likely generate a bit more waste in that specific area. I always recommend adding a little extra to your waste factor for these sections—it’s far better than coming up a few feet short.
Putting It All Together
So, let's picture a classic Seattle-area home with a big gable out front and a couple of smaller dormers. Here's how you’d put all this information to use:
- Start by calculating the square footage of all the main rectangular walls.
- Next, use the (Base x Height) / 2 formula for that big front gable.
- Then, break down one dormer into its individual faces, measure each one, and add them up.
- Since there are two identical dormers, multiply that number by two.
- Finally, add everything together—the main walls, the gable, and both dormers. This gives you your total net square footage before you add your waste factor.
By tackling each part of the house one step at a time, you make sure nothing gets missed. This systematic approach is the key to a siding job that looks seamless, professional, and really boosts your home's curb appeal.
Calculating Your Waste Factor for a Realistic Order
Okay, you’ve done the hard part. You've measured your walls, gables, and dormers and have a solid number for the net square footage. But before you pick up the phone to order your materials, there’s one last calculation that separates the pros from the amateurs: the waste factor.
No siding job, and I mean none, uses every last scrap of material. You'll have offcuts from angled pieces, material used for starter strips, and maybe a piece or two that gets mis-cut. It happens. The waste factor is your project's insurance policy against these realities.
Skipping this step is a classic rookie mistake that can bring your whole project to a standstill. Trust me, nothing is more frustrating than being just a few panels short on the last wall and having to place a small, expensive order with frustrating shipping delays.
Why Different Materials Need Different Buffers
The type of siding you've chosen plays a huge role in how much extra material you'll need. A simple, rectangular house might only require a 10% buffer, but that number can jump quickly depending on the material's properties and your home's unique layout.
Some materials are just less forgiving than others, leading to more offcuts. To help you nail down the right amount, I've put together a quick guide based on the most common siding types we see.
Recommended Waste Factor by Siding Type
A guide to help you calculate the right amount of extra material based on your siding choice.
| Siding Material | Typical Waste Factor | Notes on Complexity |
|---|---|---|
| Vinyl Siding | 10-12% | Vinyl is quite forgiving, but intricate layouts with many windows will push this number higher. |
| Fiber Cement (James Hardie) | 12-15% | Heavier and less forgiving to cut, this material often leads to more waste, especially around complex angles. |
| Wood Siding | 15% or more | Natural imperfections and the need to trim around knots mean you'll want a significant buffer. |
Keep in mind that a home with lots of corners, bay windows, or funky rooflines will naturally demand more complex cuts. If your home has that kind of detailed architecture, which is common around the Seattle area, I always recommend leaning toward the higher end of these ranges.
Don’t look at the waste factor as wasted money. It's a small investment in a smooth, uninterrupted installation. The cost of adding 10-15% to your initial order is a drop in the bucket compared to the delays and shipping fees for that one last-minute box of siding you'll inevitably need.
From Square Feet to a Supplier-Ready Order
Once you have your total net square footage and have landed on a waste factor, the final math is straightforward.
Let's say your home needs 2,200 square feet of siding and you've chosen fiber cement. Based on the chart, you'd want to add a 15% waste factor.
- First, find the waste amount: 2,200 sq. ft. x 0.15 = 330 sq. ft.
- Then, add it to your net total: 2,200 sq. ft. + 330 sq. ft. = 2,530 sq. ft.
Now for the final translation. Siding suppliers don't think in terms of individual panels; they sell material in "squares." One siding square equals 100 square feet.
To figure out your final order quantity, just divide your total by 100.
- 2,530 sq. ft. / 100 = 25.3 squares.
Since you can't order a fraction of a square, you'll round up and place an order for 26 squares. Just like that, you have a professional-grade material list ready to go.
How Accurate Measurements Create a Better Finish
Learning how to measure for siding is about more than just jotting down numbers. It’s about seeing the connection between every careful calculation and a high-quality, long-lasting finish. That obsession with inches and square feet? That's what lays the groundwork for a flawless look that truly protects and elevates your home. A siding replacement is one of the best home improvements for return on investment, and proper measurement is where that value begins.
When your measurements are dead-on, the whole project just runs better. Installers can plan their cuts with real efficiency, which translates directly into a cleaner, more professional aesthetic. You'll see fewer seams in awkward spots and avoid the tell-tale patchwork that screams "we ran out of material."
The Impact on Your Wallet and the Planet
Beyond just looking good, getting the numbers right has a real financial upside. Ordering the right amount from the get-go helps you sidestep the steep costs of a last-minute rush order for just a few more panels. It also slashes material waste. In fact, building industry studies have shown that poor planning and over-ordering can lead to waste that accounts for up to 15% of all materials purchased.
Cutting down on that waste isn't just good for your budget; it’s a much more sustainable way to approach a renovation. When you calculate precisely, you use fewer resources and send less material to the landfill. It’s a simple, responsible practice that makes a big difference.
A well-measured project is a well-executed project. The time you spend getting the numbers right pays you back in the final look, the overall cost, and the long-term performance of your new siding.
Locking In Performance and Boosting Home Value
Ultimately, precise measurements ensure your siding performs exactly as the manufacturer intended. A proper installation—which hinges on having the right amount of material on hand—is what creates that critical protective envelope around your home. Here in the Seattle area, that barrier is everything when it comes to shielding your property from our notoriously wet weather.
Siding that's installed correctly, without the compromises that come from material shortages, is key to maintaining your home's structural integrity. This focus on detail doesn't just give you instant curb appeal; it contributes to your home's long-term market value. A professional, seamless siding job is a huge green flag for potential buyers, showing them the home has been cared for and making it a solid investment.
Common Questions That Come Up When Measuring Siding
Even with a solid plan, a few questions always seem to pop up when you're out there with a tape measure. It's just part of the process. Let's walk through some of the most common snags I see homeowners run into, so you can keep your siding project on track.
First up, a big one: do you lump soffits and fascia in with your main siding calculation? Absolutely not. Think of them as separate projects. They use different materials and, more importantly, are measured in linear feet, not the square footage you're calculating for the walls. Keeping those numbers separate from the start is key to getting both your siding and your trim orders right.
Should I Round My Measurements Up or Down?
When you’re taking your initial measurements, be as precise as possible. I’m talking down to the inch. Don't be tempted to round things up or down just yet. A tiny rounding error on one wall might seem harmless, but those little inaccuracies can snowball across the entire house and lead to some serious miscalculations. You could end up short on material or, just as bad, with a garage full of extra siding.
The only time you should be rounding is at the very end. Once you've tallied up your total square footage and added the waste factor, then you can round up to order the nearest full box or "square" of siding.
A Quick Tip from the Field: If you're tackling a long wall, grab a helper. Having someone hold the other end of the tape measure stops it from sagging in the middle. That little dip can easily throw your measurement off by a few inches, which really adds up.
What If I Have an Oddly Shaped House?
Homes with funky shapes—think bay windows, turrets, or a bunch of intersecting rooflines like you see all over Seattle—can look intimidating. The trick is to stop seeing it as one complex monster and instead break it down into a collection of simple shapes.
- Bay Windows: Just treat each flat section as its own little rectangular wall. Measure the height and width of each one, calculate the area, and add them together. Easy.
- Curved Walls or Turrets: Okay, this is where I'll tell you to seriously consider calling a pro. Calculating the surface area of a curve involves some tricky geometry that's incredibly easy to mess up. It’s one of those jobs where a small mistake can lead to a big, costly problem.
No matter how complicated the architecture looks, every surface can be broken down into basic rectangles and triangles. I always recommend sketching it out on a notepad first. It really helps you visualize how to tackle each section and is a crucial step in learning how to measure siding accurately on any style of home.
If the complexity of your home's design feels a bit much, or if you'd just feel better having a professional set of eyes on it, the team at Breeze Siding is here to help. We provide free, no-obligation on-site estimates to make sure your siding replacement gets started with perfectly accurate numbers. Schedule your consultation with us today and get it done right.