
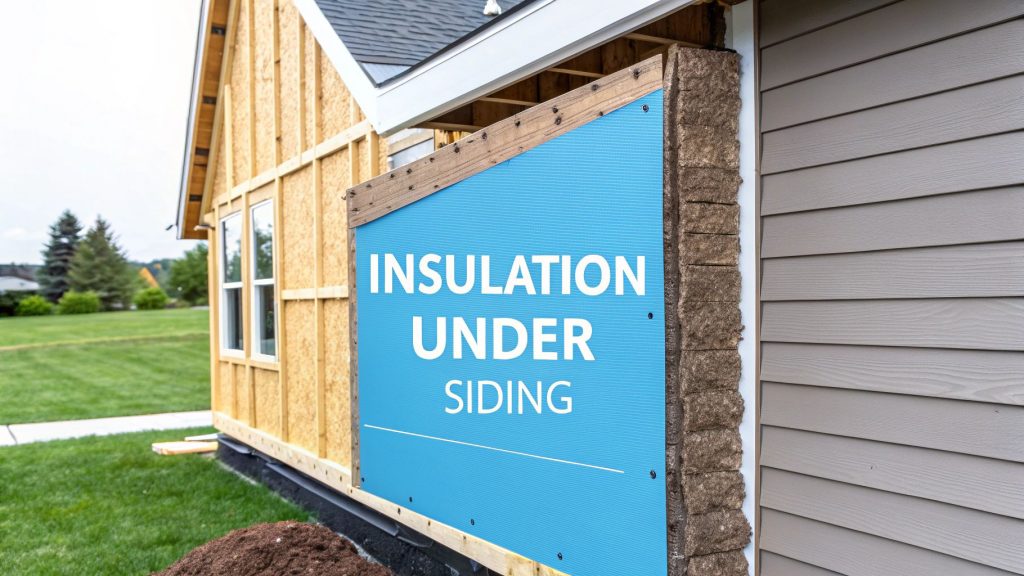
When you're replacing your siding, adding a layer of insulation underneath is one of the smartest upgrades you can make for your home. Think of it like putting a high-performance jacket on your house. It seals out drafts and keeps the air you paid to heat or cool right where it belongs: inside. This single move pays off immediately in comfort and for years to come in energy savings.
Why Insulate Under Your Siding During a Replacement
The moment your old siding comes off is a golden opportunity. Your home's wall sheathing is wide open and accessible, making it the perfect—and most cost-effective—time to add a layer of what we call continuous exterior insulation. This is the single best practice for any siding replacement project.
If you tried to do this later, you'd have to tear off perfectly good siding just to get to the wall. That means paying for labor and materials all over again. Tackling it during a replacement just makes sense. It’s not just about slapping on a new layer; it’s about building a complete, high-performance system for your home. For those of us in the Seattle, Bellevue, and greater Puget Sound area, dealing with our damp and often chilly climate, this upgrade is a game-changer.
Immediate Comfort and Long-Term Gains
The first thing you’ll notice is how much more comfortable your home feels. This upgrade gets rid of those stubborn cold spots and drafts, leading to a much more stable indoor temperature year-round.
Here’s a quick rundown of the advantages:
- Fewer Drafts and Cold Spots: A continuous blanket of insulation wraps your entire home, covering the wall studs that would otherwise act like thermal bridges, pulling cold right into your living space.
- Lower Energy Bills: When your home holds onto heat better in the winter and stays cooler in the summer, your HVAC system doesn't have to work nearly as hard. That translates directly to lower utility bills.
- Better Moisture Management: In the damp Pacific Northwest, this is huge. Properly installed exterior insulation with a rainscreen system allows your walls to dry effectively, which helps prevent the hidden rot and mold that can thrive in our climate.
- A Quieter Home: That extra layer on your exterior walls does a fantastic job of dampening outside noise, giving you a more peaceful indoor environment.
A Smart Investment in a Growing Market
Improving your home's thermal performance isn't just about your own comfort—it's a savvy financial move that puts you ahead of the curve. The demand for exterior insulation is exploding as more people catch on to its incredible value.
The global market for these types of exterior systems was valued at $92.7 billion in 2023. It’s projected to nearly double to $178.35 billion by 2030.
This isn't just a niche trend; it's being driven by homeowners like you who want more comfortable homes and lower energy bills. In fact, the residential sector makes up over half of this market. When you upgrade the insulation under your siding, you’re putting your home at the forefront of this modern energy-efficiency movement. You can find more about the exterior insulation market growth in recent industry reports.
Choosing the Right Insulation for Your Siding Project
Picking the right insulation for a siding project is a bit like choosing the perfect coat for a classic Pacific Northwest winter. Some homes might just need a light windbreaker for basic protection, while others demand a heavy-duty, waterproof parka to stay truly warm and dry. The choice you make here will echo in your home’s comfort, energy bills, and overall performance for decades.
It really comes down to a few key factors: thermal performance (we call this R-value), moisture resistance, your budget, and how complex the installation is. Getting a handle on these elements will help you have a smart conversation with your contractor and pick the ideal insulation, whether your home is in Seattle, Bellevue, or anywhere in between.
Rigid Foam Boards: The Go-To Solution
When it comes to insulating under new siding, rigid foam boards are far and away the most common and versatile choice. They come in large, manageable sheets that create a continuous blanket of insulation over your home’s exterior sheathing. Think of it as wrapping your home in a cozy, protective layer.
There are three main players in this category, each with its own personality:
- Expanded Polystyrene (EPS): This is your budget-friendly workhorse, the one you’ll recognize by its white color and beaded texture. While its R-value is a bit lower (around R-4 per inch), it offers incredible value and is highly "breathable." This means it lets moisture vapor escape from your walls, which is a huge plus in our damp climate.
- Extruded Polystyrene (XPS): Usually pink or blue, XPS is a step up in density and strength. It packs a bigger punch with an R-value of around R-5 per inch and offers much better moisture resistance than EPS. It’s a fantastic middle-ground option that perfectly balances cost and performance for Puget Sound homes.
- Polyisocyanurate (Polyiso): Often just called "iso," this is the premium choice. It typically has a foil facing and boasts the highest R-value of the bunch, clocking in at around R-6.5 per inch. That foil face even acts as a radiant barrier, reflecting heat. It’s the best option when you want to get the most insulation possible without adding a lot of thickness to your walls.
Exploring Other High-Performance Options
While rigid foam is the crowd favorite, it's not the only game in town. A couple of other solutions bring unique advantages to the table, especially for older homes or those with tricky architectural details.
One of these is spray foam insulation. It’s applied as a liquid that expands on contact, filling every single crack and gap. This creates an airtight seal that is simply unmatched by any other material. It’s a game-changer for stopping pesky air leaks, but it does come with a higher price tag and requires a specialized crew to install it right.
Another clever solution is insulated siding. This is exactly what it sounds like: traditional vinyl or fiber cement siding that comes with a layer of rigid foam insulation permanently attached to the back of each panel. It's an all-in-one system that makes the installation process smoother and guarantees a perfect, continuous layer of insulation.
Insulated siding isn't just a niche product anymore; it's becoming a major force in the industry. It tackles two homeowner priorities at once: boosting curb appeal and dramatically improving energy efficiency. This trend is a big reason the global siding market is projected to grow from around $126 billion in 2023 to $160 billion by 2030.
Making the Best Choice for Your Home
So, with all these options, how do you decide? The best insulation really depends on your personal priorities—your budget, your performance goals, and what your house is already working with. A good contractor is your best resource for a specific recommendation, but a quick comparison can help you understand the trade-offs.
Comparing Common Under-Siding Insulation Types
To make things a little easier, here’s a side-by-side look at the most popular choices. Think of this as a cheat sheet to help you narrow down the best fit for your home and budget.
| Insulation Type | Key Benefit | Best For | Average R-Value/Inch | Cost Level |
|---|---|---|---|---|
| EPS Foam Board | Most cost-effective option | Budget-conscious projects where breathability is a priority | R-4 | Low |
| XPS Foam Board | Balanced performance and moisture resistance | All-around applications in the damp Pacific Northwest climate | R-5 | Medium |
| Polyiso Foam Board | Highest R-value per inch | Maximizing insulation value with limited wall thickness | R-6.5 | High |
| Insulated Siding | All-in-one convenience and performance | Homeowners wanting a streamlined installation process | Varies (R-2 to R-5) | High |
| Spray Foam | Superior air sealing | Older homes with irregular surfaces or air leakage problems | R-6 to R-7 | Very High |
Ultimately, remember that adding any of these insulation types when you replace your siding is a massive upgrade. It's a smart investment that pays you back with a more comfortable home, a smaller carbon footprint, and real, lasting value for your property.
The Professional Installation Process Step-by-Step
Knowing what to expect when a pro crew shows up to install insulation under your siding can offer a lot of peace of mind. It’s not a chaotic demolition scene. Instead, it’s a systematic, well-practiced process designed to wrap your home in a high-performance, weatherproof blanket. Especially for us here in the Seattle area, where moisture is always part of the equation, getting every step right is absolutely critical.
Think of it as a carefully choreographed performance. It all starts with the careful removal of your home's old exterior—not just tearing it down, but methodically preparing the structure for its much-needed upgrade.
Stage 1: Siding Removal and Sheathing Inspection
The first order of business is taking off the old siding. The crew works section by section, exposing the wall sheathing that lies beneath. This isn't just about removal; it's a crucial diagnostic phase.
With the sheathing laid bare, a thorough inspection begins. The team is on the hunt for any signs of trouble—water damage, soft spots, or rot that could have been festering out of sight for years. Finding these problems now saves you from massive headaches and much more expensive repairs later on. Any damaged sheathing is repaired or replaced on the spot, ensuring a solid, stable foundation for what comes next.
Stage 2: Creating a Continuous Insulation Barrier
Once the wall surface is sound, the team starts putting up the rigid foam insulation boards. The mission here is to create a seamless, continuous insulation barrier around your entire home. It’s like building a fortress wall against the weather, leaving no gaps for drafts or moisture to sneak through.
This stage is where professional expertise really shines, with a few key techniques that set it apart from a weekend DIY job:
- Staggered Seams: Just like a bricklayer staggers bricks, insulation boards are installed with offset seams. This simple but effective method eliminates any straight-through paths for air to leak or heat to escape.
- Meticulous Taping: Every single seam where two boards meet is sealed with specialized, high-performance construction tape. This is an absolute must—it’s what turns individual panels into a single, airtight, and water-resistant layer.
- Flashing and Sealing: Windows, doors, and vents get special treatment. Pros use custom flashing and high-grade sealants to form a waterproof seal around these vulnerable spots, directing any water safely away from your wall structure.
Choosing the right insulation is a make-or-break decision for the project's success. This quick decision tree can help you match your priorities with the best material for your siding job.
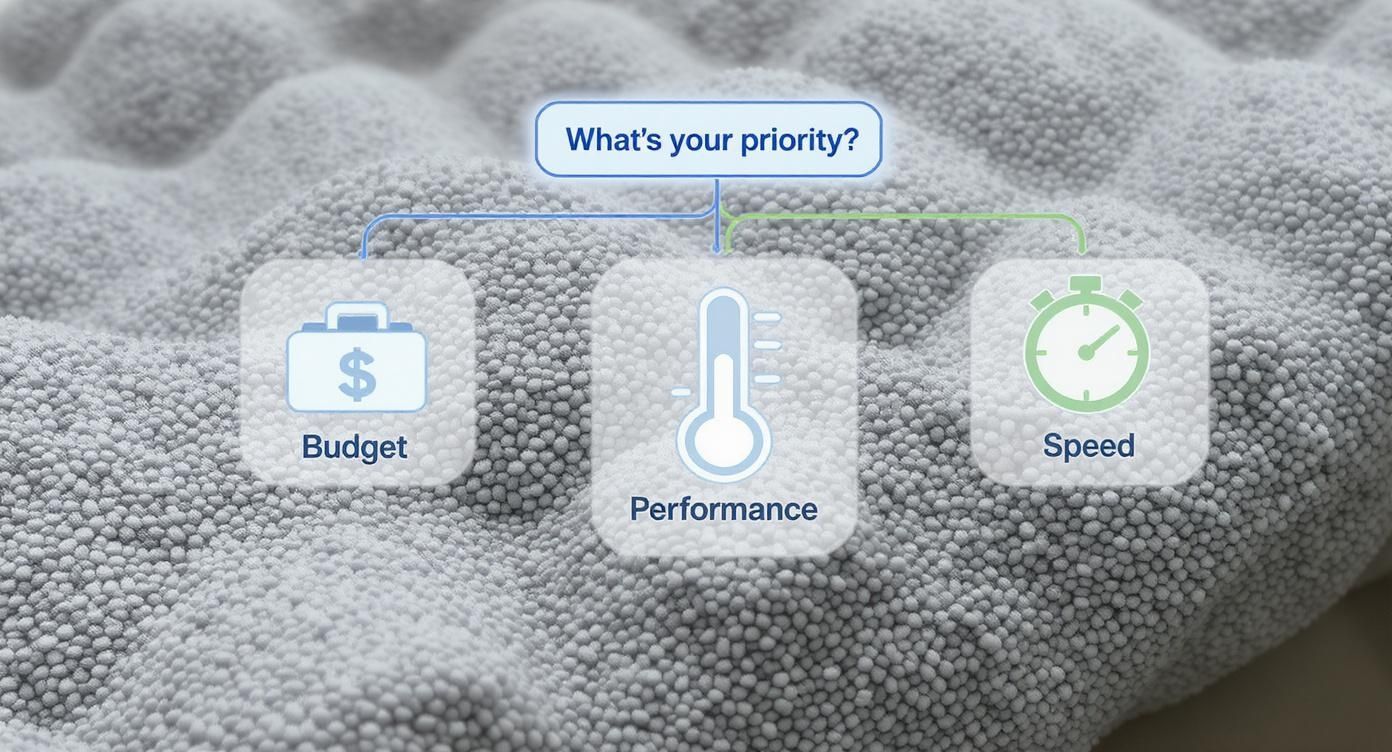
This visual guide breaks down the choice by focusing on what's most important to you, whether that's sticking to a budget, achieving maximum energy savings, or prioritizing a quick installation.
Stage 3: Final Preparation and Siding Installation
Adding an inch or more of insulation naturally makes your walls thicker, and a professional crew plans for this with precision. All the trim around your windows and doors has to be built out so it sits perfectly flush with the new, thicker wall profile. It's a small detail that makes a huge difference for both looks and weatherproofing.
A key best practice is the use of longer, specialized fasteners. Standard siding nails or screws just won’t cut it anymore; they aren’t long enough to anchor the siding securely through the new foam and into the wall studs. Using the right fasteners is non-negotiable for the long-term durability of your home’s new exterior.
Finally, if the siding manufacturer calls for it, the crew installs furring strips over the insulation. These strips create a small but mighty air gap known as a rainscreen—a gold-standard practice in the Pacific Northwest that helps with drainage and allows the wall to dry out. It’s a perfect example of how a professional siding contractor's process focuses on durability.
Once this perfectly level and secure base is ready, the new siding goes on, completing the transformation of your home's exterior into a beautiful, high-performance shield.
How Exterior Insulation Stops Hidden Energy Loss
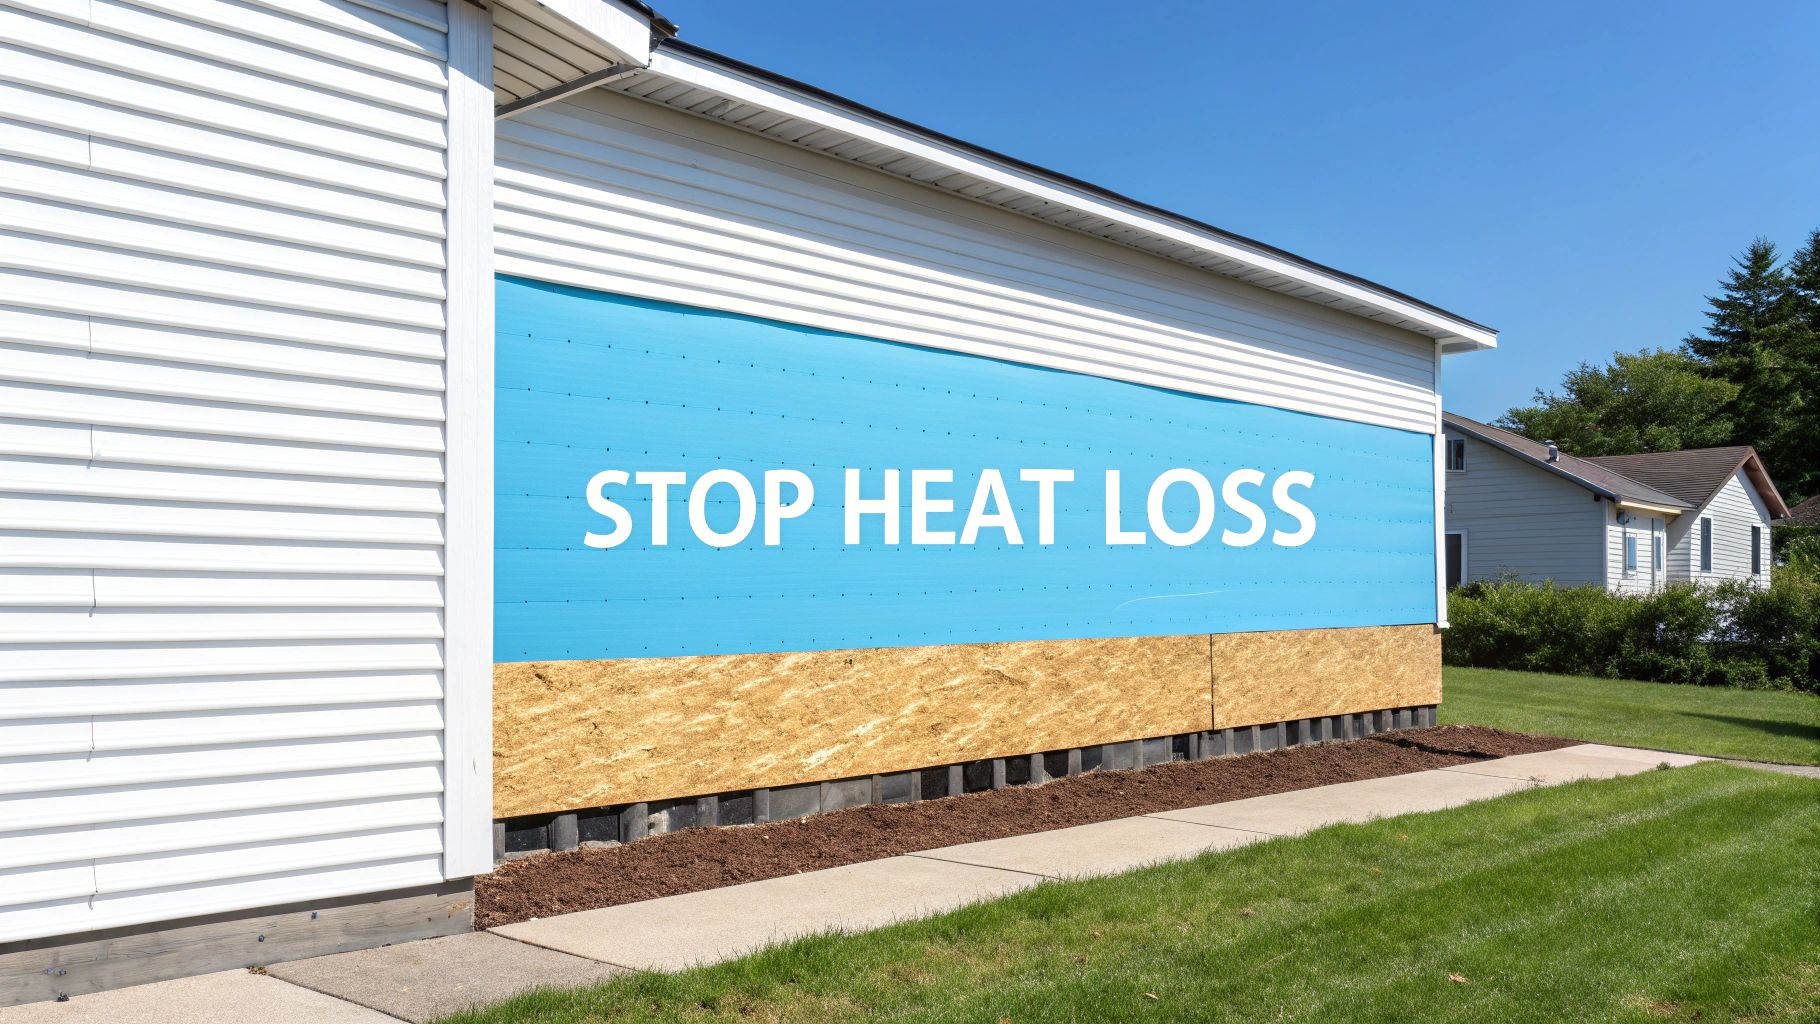
Even if you think your home is well-insulated, there’s a good chance it's still leaking a surprising amount of energy. The culprit is something we see in the field all the time: thermal bridging. It's the primary reason your heating bills creep up during a classic damp Seattle winter, and it happens right inside the structure of your walls.
Think of your wall like a high-quality winter jacket. The fluffy insulation is the down that keeps you warm, but the zipper is a solid line of metal. On a truly cold day, you can feel the chill coming right through that zipper, creating a path for your body heat to escape. In your walls, the wood studs act just like that cold zipper.
Uncovering the Problem of Thermal Bridging
Wood, while a solid building material, is a much better conductor of heat than the insulation packed between the studs. This means heat naturally sidesteps the fluffy stuff in the wall cavities and zips right through the framing. These "bridges" create dozens of escape routes for your home's warmth. In fact, studies show that thermal bridging can slash a wall's overall R-value by 15% or more.
This is why you might feel drafts or cold spots even in a "fully insulated" room. Your furnace is constantly working overtime to make up for these small, continuous energy leaks. Adding insulation under your siding is the single most effective way to solve this problem for good.
By wrapping your home's exterior in a continuous layer of rigid foam insulation, you effectively break all those thermal bridges. It's like putting a seamless thermal sleeve over a coffee mug—every square inch is covered, stopping heat from escaping and creating a truly efficient, comfortable home.
Creating a Healthier, More Resilient Wall
Beyond big energy savings, exterior insulation builds a much healthier wall system. This is absolutely critical here in the Pacific Northwest, where managing moisture is a year-round concern.
A continuous blanket of insulation keeps your home’s structural sheathing warmer and, more importantly, drier. When the sheathing stays above the dew point, you prevent condensation from forming inside your wall cavity. It’s a simple change in physics that has a massive impact on your home's long-term durability.
A properly designed system will:
- Stop Condensation: By keeping the skeleton of your wall warm, it prevents moisture from turning into damaging droplets.
- Let Walls Breathe: Many modern rigid foam products are vapor-permeable. This allows any trapped moisture to dry to the outside instead of getting stuck where it can cause problems.
- Prevent Mold and Rot: A dry wall is a healthy wall. By cutting off the moisture that mold and rot need to thrive, you're protecting your home's structure and your family's air quality.
The Shift Toward High-Performance Siding
Homeowners and builders are finally catching on to these benefits, and it’s driving a huge shift in the siding industry. The focus is no longer just on curb appeal; it's about creating integrated systems that deliver both fantastic looks and real-world performance.
Insulated vinyl siding, in particular, is one of the fastest-growing products in the exterior cladding market. The market for insulated vinyl siding is expected to grow at a 5.1% CAGR from 2025 to 2035, a trend pushed by updated energy codes and savvy homeowners demanding better performance. You can read more about the growth of insulated siding products to see how the industry is adapting.
This all points to one thing: adding insulation under siding isn't just a niche upgrade anymore—it's quickly becoming the new standard for a smart, modern home.
The Cost and Return on Your Siding Insulation Investment
Let's talk numbers. Adding insulation under new siding isn't just another line item on a project quote; it's one of the smartest financial moves you can make for your home. Yes, there's an upfront cost, but this is a true investment—one that starts paying you back from day one, especially here in the Pacific Northwest.
Think of it less as an expense and more like buying a high-efficiency furnace. You pay a bit more initially, but the month-over-month savings and improved comfort quickly make it clear you made the right call.
Breaking Down the Costs
So, what does it actually cost? The honest answer is: it depends. The price for adding insulation during a siding replacement isn't a flat fee.
Your contractor will need to account for a few key variables when putting together your estimate:
- Your Home's Footprint: A sprawling two-story house with lots of corners and gables is a more complex job than a straightforward, single-story rambler. More complexity means more labor and materials.
- The Insulation You Choose: As we covered, there's a price difference between standard EPS foam board and premium, high-R-value materials like polyiso or spray foam.
- Insulation Thickness: Going from a half-inch board to a full inch will increase material costs, but it will also supercharge your energy savings down the road.
- Prep Work: What's the condition of your walls underneath the old siding? If there's rot or damage that needs repairing before the new insulation and siding can go on, that will add to the labor costs.
Calculating Your Return on Investment (ROI)
This is where things get exciting. This is the part where the investment starts putting money back in your pocket through lower bills, a higher home value, and even a little help from Uncle Sam.
Right off the bat, you’ll feel the difference in your monthly energy bills. A proper continuous insulation blanket can slash your heating and cooling costs by 15-25%, sometimes even more. For a typical home in the Seattle area, that can easily mean hundreds of dollars back in your bank account every year.
Think of it this way: the money you don't spend on energy bills is your home paying you back for the upgrade. Over the years, those savings can completely offset the initial cost of the insulation.
But the payback doesn't stop with your utility bills. Energy-efficient homes are a hot commodity on the real estate market. When it comes time to sell, having a well-insulated, comfortable home is a major selling point that can directly increase your property's value.
Finally, don’t forget to look into rebates and tax credits. Many local Puget Sound utilities and federal programs offer incentives for making your home more energy-efficient. A knowledgeable contractor, like the team at Breeze Siding, stays on top of these programs and can help you find and apply for incentives that make the upfront cost even more manageable.
Why You Should Never DIY Insulation Under Siding
Look, I get it. The DIY spirit is alive and well, especially here in the Pacific Northwest. But when it comes to wrapping your home in a blanket of insulation before putting on new siding, this is one job you absolutely need to leave to the professionals.
This isn't like painting a room or building a deck. We're talking about fundamentally altering your home's thermal and moisture barrier—its protective skin. Getting it wrong doesn't just look bad; it can lead to catastrophic problems that cost a fortune to fix later on.
The Expert Touch: Craftsmanship That Protects Your Home
Think of a professional siding crew as specialists who understand the complex science behind how a wall breathes and sheds water. Installing that continuous layer of insulation isn't just about tacking up foam boards; it's about creating a perfectly integrated system, which is critical in a climate as damp as Seattle's.
A seasoned pro brings a level of know-how you just can't get from a YouTube video:
- Building Code Mastery: They live and breathe local codes. They know the exact R-value requirements and fire safety standards your project must meet to pass inspection, no questions asked.
- Waterproofing Wizardry: This is where the real magic happens. Professionals are masters of flashing—the intricate work around windows, doors, and vents that channels every drop of PNW rain away from your home's structure.
- Protecting Your Warranty: Siding manufacturers like James Hardie have incredibly specific installation rules. A certified installer follows them to the letter, ensuring your valuable product warranty isn't voided by a simple mistake.
The High Stakes of Getting It Wrong
Trying to tackle this project yourself is a huge gamble. The margin for error is razor-thin, and the potential fallout is serious.
The single most common DIY blunder we see is improperly sealed insulation seams. Even a tiny gap creates a highway for air and moisture to get into your wall cavity. This completely undermines the insulation's purpose and rolls out the welcome mat for hidden mold and rot.
And the risks don't end there. An amateur installation often leads to a wavy, lumpy finish on your brand-new siding. Worse, using the wrong fasteners could cause entire panels to pull away from the house over time.
When you hire a team like Breeze Siding, you’re buying more than just labor. You're investing in the confidence that the job is done right—a weather-tight, expertly executed installation that will perform flawlessly and protect your home for decades to come.
Common Questions About Under-Siding Insulation
When you're thinking about adding insulation under your siding, a few questions always pop up. It's smart to get these sorted out upfront so you can feel confident you're making the right call for your home. Let's tackle the most common ones.
Can You Insulate Under Existing Siding?
The short answer is yes, technically. You can have something like blown-in cellulose injected behind siding that's already there. But honestly, it's a approach I rarely recommend.
This method is a bit of a band-aid. It doesn't solve the problem of thermal bridging (heat loss through the studs), and worse, it can trap moisture against your home’s structure. In a place like Seattle, that’s a recipe for trouble.
For a job done right, the insulation needs to go on when you're replacing the siding. That's when we can add a continuous layer of rigid foam, creating that seamless thermal blanket your home really needs to stay warm and dry.
Will My House Look Bulky?
I get this question all the time. Homeowners worry their house will look chunky or odd after adding a few inches of insulation. When done correctly, the opposite is true—it looks fantastic.
The secret is in the finish work. A good crew doesn't just slap on thicker trim; they skillfully build out all the details around your windows, doors, and corners. This technique, sometimes called "picture framing," makes the added depth look intentional and sharp. Your home ends up looking robust and well-built, not bulky.
The key is meticulous finish work. A skilled team ensures that every detail, from window casings to corner boards, is extended to match the new wall depth, maintaining your home’s curb appeal.
What Should I Look for in a Contractor?
This isn't a job for a standard siding installer. You're not just re-siding; you're creating a high-performance building envelope. You need a contractor who lives and breathes this kind of work.
When you're interviewing companies, ask them some specific questions:
- Continuous Insulation: Have them walk you through their process. Can they clearly explain how they ensure a truly continuous, airtight barrier with no gaps?
- Flashing Techniques: Ask how they handle waterproofing around windows and doors, especially with the extra thickness. This is where many projects fail.
- Local Code Knowledge: Your contractor absolutely must be an expert on Washington's specific energy codes for exterior insulation.
Finding a team that specializes in these integrated siding and insulation projects is your best bet for a result that performs well and looks great for decades.
Ready to transform your home’s comfort and efficiency with expertly installed insulation and siding? The team at Breeze Siding has the specialized skills to protect your investment and deliver flawless results. Get your free, no-obligation estimate by visiting Breeze Siding's website today.