
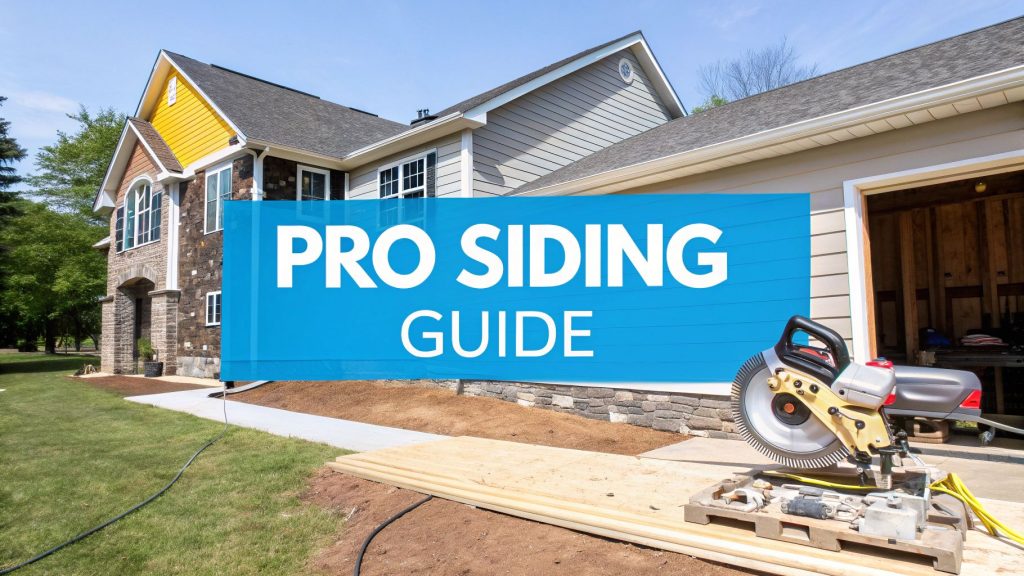
When you decide to install James Hardie siding, you're not just picking a new color for your house—you're making a serious investment in its future. We're going to walk through the same process the pros use, covering everything from the unique benefits of the material itself to the final touches that guarantee a beautiful, long-lasting finish.
Why Do So Many Pros Swear By James Hardie Siding?
Before we get into the nuts and bolts of the installation, it’s worth understanding why so many contractors, especially here in the Seattle area, put their trust in James Hardie products. It’s not just a popular name; it’s a material chosen for its proven track record and the real, tangible value it brings to homeowners.
The secret is in the fiber cement itself. Wood siding looks great, but it can be a magnet for termites and carpenter ants, and it will eventually rot or warp in the damp Pacific Northwest climate. Fiber cement, on the other hand, is completely unappealing to pests and won't swell or break down from constant exposure to moisture. This resilience means less time and money spent on repairs down the road.
A Reputation Built on Durability
James Hardie has built its reputation on one thing: reliability. This siding can handle everything from our freezing winters to humid summers without losing its shape or strength. It’s that toughness that has made it the number one choice for both new homes and siding replacement projects.
In fact, James Hardie is so dominant that it holds about 90% of the market share for fiber cement siding in North America. A huge part of that comes from renovation work, as homes often need new siding every 40 years or so. That kind of market control speaks volumes about the industry's trust in the product. You can learn more about James Hardie's market position and what it means for homeowners like you.
A Smart Move for Your Wallet
Choosing James Hardie siding is more than just protecting your home from the elements; it's a strategic financial decision that truly pays off.
- Boosts Your Property Value: A home with James Hardie siding has instant curb appeal and is a major selling point for potential buyers who know they're getting a low-maintenance, high-quality exterior.
- High Return on Investment: Year after year, replacing old siding with fiber cement is one of the top home improvement projects for ROI. It looks fantastic and offers decades of solid protection.
- Possible Insurance Discounts: Because it's non-combustible and stands up incredibly well to hail and wind, many insurance carriers offer lower premiums for homes with fiber cement siding.
Before we dive into the installation process, it's helpful to see how James Hardie stacks up against other common siding materials.
James Hardie Siding vs Common Alternatives
| Feature | James Hardie Fiber Cement | Vinyl Siding | Wood Siding |
|---|---|---|---|
| Durability | Exceptional resistance to rot, fire, pests, and impact. Lasts 50+ years. | Prone to cracking in cold weather, can melt or warp from heat. | Susceptible to rot, pests (termites), and woodpecker damage. |
| Maintenance | Requires repainting every 10-15 years. Easy to clean. | Low maintenance, but difficult to repair if damaged. Color can fade. | Requires frequent staining or painting (3-7 years) to prevent decay. |
| Fire Resistance | Non-combustible. Will not ignite when exposed to direct flame. | Melts and can release toxic fumes when burned. | Highly combustible unless treated with fire retardants. |
| Aesthetics | Can mimic the look of wood, stucco, or stone with deep, authentic textures. | Often has a plastic appearance with visible seams. Limited texture options. | Offers a classic, natural beauty but can be inconsistent. |
| Cost | Mid-to-high initial investment, but low long-term cost. | Lower initial cost, but may need replacement sooner. | Varies widely by wood type, can be very expensive. High maintenance costs. |
As you can see, while vinyl and wood have their places, James Hardie fiber cement offers a superior balance of performance, aesthetics, and long-term value that's hard to beat.
A professional installation is what turns a good product into a great investment. Getting the details right ensures you get every ounce of performance out of your James Hardie siding, transforming a simple home upgrade into an asset that will protect and beautify your home for decades. This guide is your first step toward that professional-grade result.
Getting Your Site and Gear in Order
Any seasoned pro will tell you that a top-notch James Hardie siding job starts well before you even think about cutting the first plank. The real secret to an exterior that looks flawless for decades—without waves, gaps, or water problems—is all in the prep work. Nailing this pre-flight checklist is what sets a professional installation apart.

Before a single tool comes out, take a walk around your property. Clearing the immediate area around your home’s foundation does more than just protect your stuff; it makes the entire job site safer and more efficient. Move the patio furniture, roll the grill out of the way, and relocate any potted plants. If you've got prized rose bushes or delicate landscaping right up against the house, cover them with tarps to keep them safe from debris.
The Right Tools for a Precision Job
You wouldn't use a butter knife to cut a steak, right? The same logic applies here. Trying to muscle through fiber cement with standard woodworking tools is a recipe for disaster. You’ll end up with chipped boards, a mountain of dust, and a finish that looks anything but professional. It’s not just about getting the job done faster—it’s about safety and achieving that clean, factory-perfect look.
Here's the essential gear any professional crew, like the team at Breeze Siding, will have on hand:
- Cutting Tools: For most of your straight cuts, nothing beats the clean, low-dust performance of fiber cement shears. But for those inevitable angled or tricky cuts, you'll need a circular saw armed with a polycrystalline diamond (PCD) blade. That specialized blade is designed to slice through this dense material smoothly, without creating the friction and hazardous dust clouds you'd get from a standard blade.
- Fastening Tools: A pneumatic siding nailer is absolutely non-negotiable. The key is to dial in the pressure just right. You want the nail head to sit perfectly flush with the siding's surface—drive it too deep, and you risk cracking the board and ruining its integrity.
- Safety Gear: Don't even think about skipping this. Fiber cement dust contains crystalline silica, which is a serious respiratory hazard. Every cut you make requires a NIOSH-approved respirator (at least an N95). And, of course, always have safety glasses on to protect your eyes.
Prepping the Wall for Siding
Once your tools are ready, your attention needs to turn to the house itself. Your brand-new siding is only going to be as good as the wall it’s attached to, so a thorough inspection of the sheathing is your first move.
Get up close and look for any red flags: rot, water stains, or delamination. Pay extra attention to the usual suspects, like the areas under windows and along the roofline. If you find any compromised sheathing, it has to be cut out and replaced. No exceptions. Fastening beautiful new siding to a weak, spongy substrate is just asking for it to fail down the road.
With the sheathing solid, it’s time for the next critical layer: the weather-resistive barrier (WRB). Here in the damp Pacific Northwest, a premium WRB like HardieWrap® is your home’s frontline defense against moisture. The installation has to be perfect, with all seams lapped correctly and taped securely to create a single, unbroken shield.
Pro Tip: Don't just wrap the walls; you have to think like water. Every single opening—windows, doors, vents, even the spigot for your garden hose—needs to be meticulously flashed. This creates a complete drainage plane that channels any water that might sneak behind the siding down and out, away from your home's structure.
Finally, grab a long level or a straightedge and check that the wall surface is flat. You’re looking for high and low spots in the framing that can throw off your siding lines. You can plane down any high spots, and low spots can be built out with shims. A flat, clean wall is the canvas you need for a siding job that will look straight and sharp for years to come.
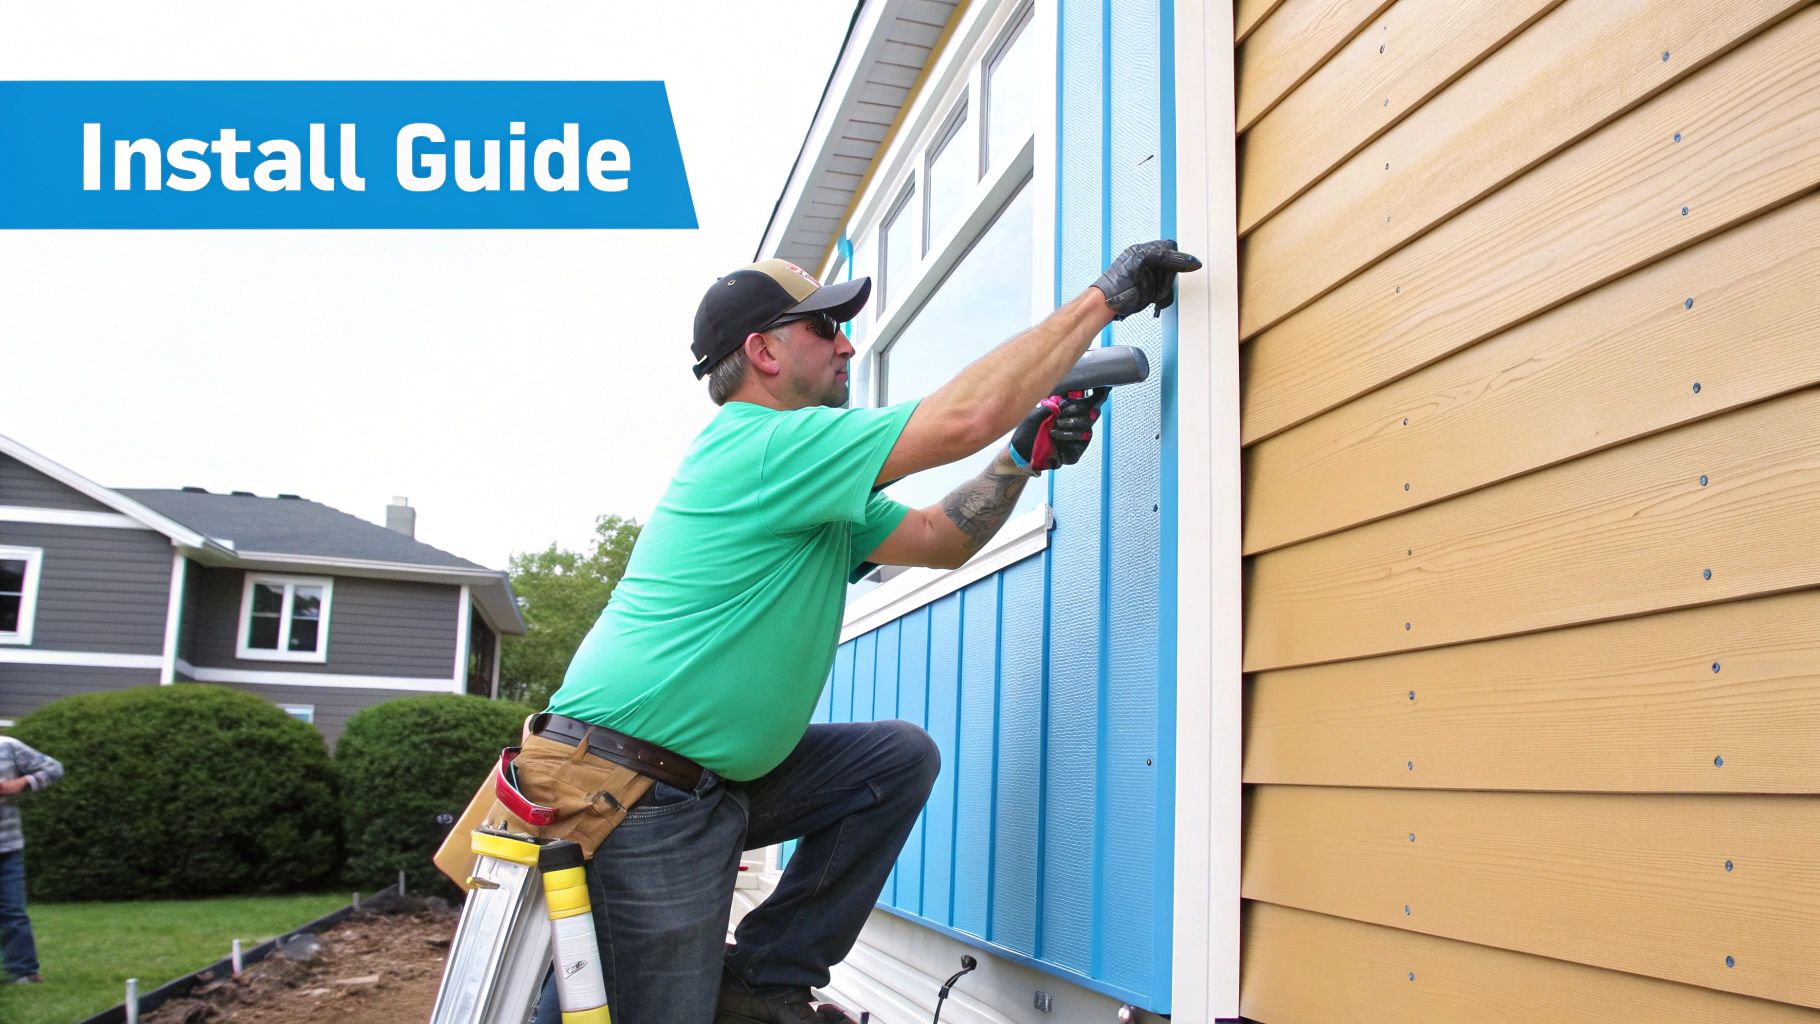
Pro Techniques for Cutting and Fastening Siding
Alright, your walls are prepped and the tools are laid out. Now we get to the part where real craftsmanship makes all the difference. How you cut and fasten James Hardie siding is what separates a decent job from a truly professional one—it’s where precision meets technique to build an exterior that looks fantastic and performs for decades.
The quality of your cuts directly shapes the final appearance. While you might get away with a simple score-and-snap on a thin backer board, that's not the right move for HardiePlank® siding. You’re aiming for clean, factory-perfect edges with every single cut.
This is especially true when you're working around tricky spots like light fixtures, outlets, or hose bibs. Sloppy, chipped cuts in these highly visible areas are a dead giveaway of an amateur job. Getting a tight, clean fit takes a little patience and the right gear.
Mastering the Art of the Cut
For most of your straight cuts, pros lean on two main tools, and each has its place. Fiber cement shears are a game-changer for minimizing dust. They work like a powerful pair of electric scissors, snipping through the board cleanly with almost zero airborne particles. That makes them perfect for working in enclosed spaces or anywhere dust control is a major concern.
But for the ultimate in precision, nothing beats a circular saw or miter saw equipped with a polycrystalline diamond (PCD) blade. This blade is specifically engineered to slice through fiber cement without chipping, leaving a perfectly crisp edge. Pair it with a HEPA dust extraction system, and you’ve got the best blend of speed, accuracy, and safety.
The goal is to make every cut look like it came straight from the factory. A clean edge isn't just about looks; it ensures a tighter fit against trim and allows for a proper seal when caulking, which is a critical part of your home's water management system.
The following infographic drives home just how critical these initial prep steps are for setting the stage for flawless cutting and installation.
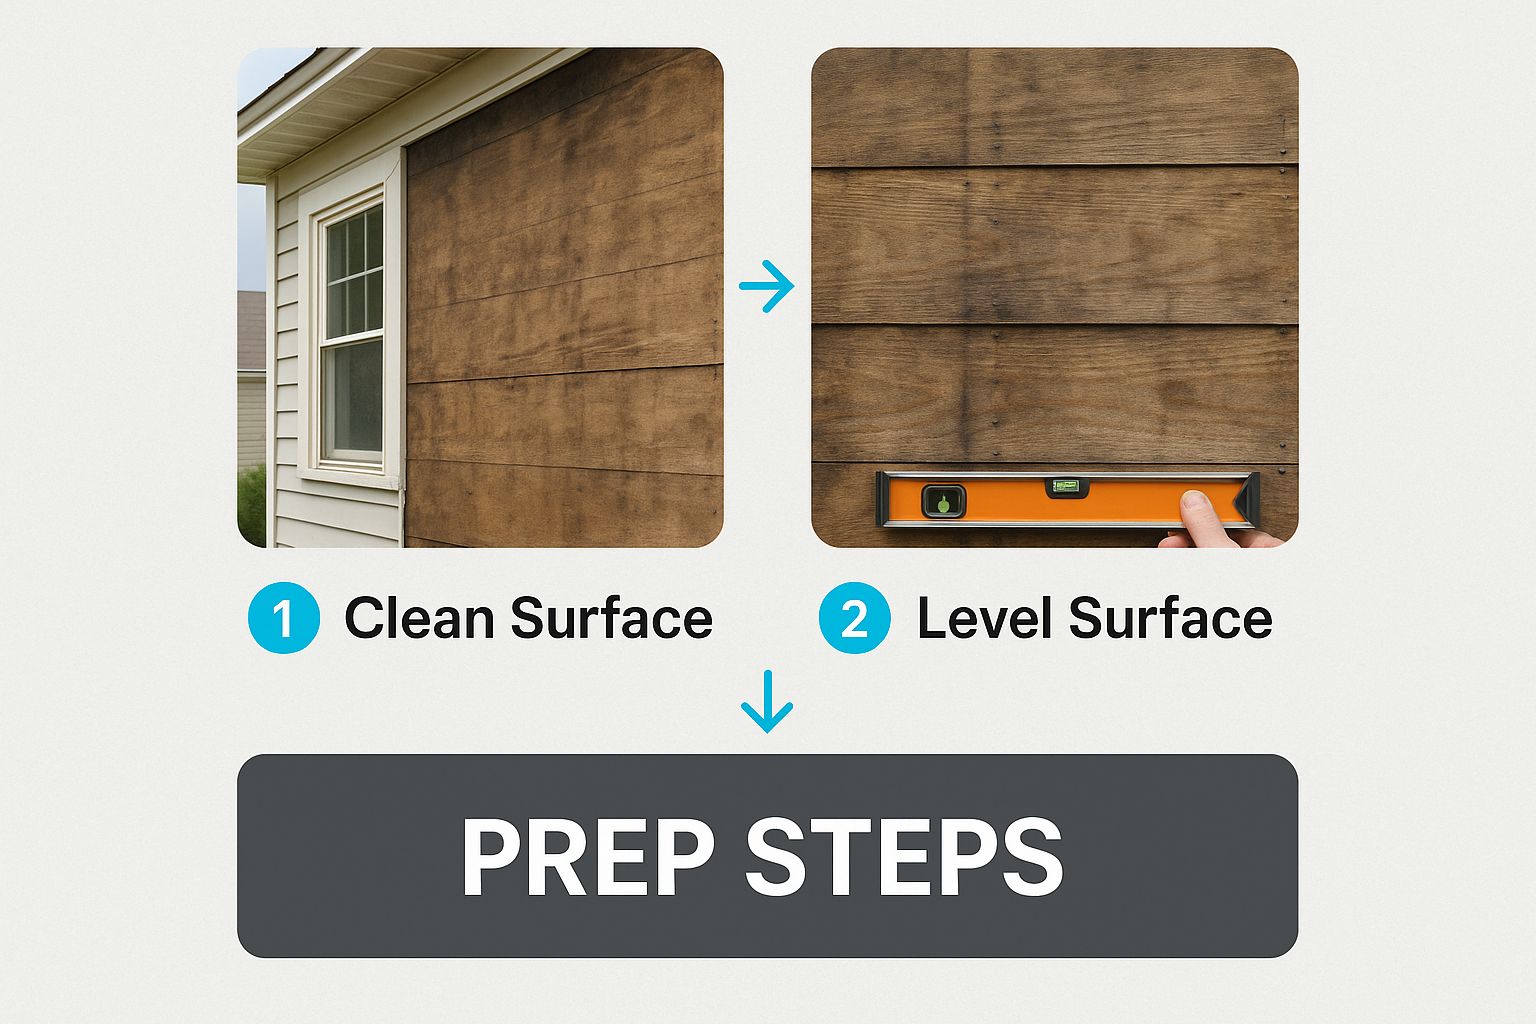
As you can see, a clean and level surface is the non-negotiable foundation for every step that follows, including getting those cuts just right.
The Secrets of Secure Fastening
Cutting is only half the battle. How you attach the siding to the wall is the real secret to its longevity. In fact, improper fastening is one of the most common reasons siding fails and can easily void the product’s 30-year warranty. It’s a detail you absolutely have to get right.
First rule: use the right fasteners. James Hardie specifies corrosion-resistant nails—either hot-dip galvanized or stainless steel. Here in the damp Seattle climate, I always recommend stainless steel. It’s the best defense against rust streaks and ensures the fasteners will last as long as the siding.
Nailing Techniques That Pros Use
Getting the hang of your pneumatic siding nailer is key. The idea is to drive each nail so the head sits perfectly flush with the plank's surface.
- Over-driven nails are a huge no-no. Sinking the nail head too deep fractures the board, creating a weak spot where moisture can get in. It also leaves an ugly dimple that’s impossible to hide, even with paint.
- Under-driven nails cause their own set of problems. A nail head that stands proud will push the next course of siding out, preventing it from lying flat and creating a noticeable bump on the wall.
To dial it in perfectly, always test your nail gun on a scrap piece of siding before you start on the wall. A pressure of around 80-100 PSI is usually the sweet spot, but you may need to adjust based on your specific nailer and the sheathing you're fastening into.
It's no surprise that fiber cement is gaining ground. The total U.S. siding market was valued at around $26 billion in 2023. While fiber cement currently holds about 9% of the repair and remodel market, it boasts a much stronger 25% share in new home construction. This points to a major growth trend as these newer homes eventually need updates, which will only increase fiber cement's popularity. You can dig into more North American siding market trends to see where things are headed.
Blind Nailing for a Flawless Finish
For HardiePlank® lap siding, the go-to professional method is blind nailing. This technique is exactly what it sounds like: you place the fastener near the top of the plank, where it will be completely covered—or hidden—by the overlapping plank that goes on next. The result is a clean, smooth finish with no visible nail heads.
To pull this off, your nail placement has to be precise. Fasteners should be placed 1 inch down from the top edge of the plank and at least 3/8 of an inch in from the side edges to avoid fracturing the board. And remember, every single nail has to hit a stud. If you miss a stud, that plank isn't secure, which can lead to rattles or even failure down the line.
Now, in some high-wind zones or on specific parts of a building, face nailing might be necessary for extra holding power. This means driving the nail through the face of the board near the bottom. If you have to do this, make sure your nail placement is perfectly consistent to keep the lines clean. These nail heads will, of course, need to be touched up with paint.
Planning Your Layout for a Professional Look
The real difference between an okay siding job and a truly professional one isn't just in the cuts or fasteners—it's all in the layout. This is where you move from just covering a wall to creating a visually stunning facade. A thoughtful, well-planned layout makes every plank flow together, giving your home a balanced, cohesive look that just feels right.
Everything hinges on that first row. The very first course of siding, often called the starter course, sets the stage for the entire project. It absolutely must be perfectly level. Even a tiny mistake here will telegraph up the wall, getting worse with every row and leaving you with crooked lines that are impossible to hide.
Establishing Your Baseline with Precision
Experienced installers know better than to trust the foundation or old siding lines for a reference. The only way to guarantee a perfect start is with a laser level. This tool lets you shoot a dead-level chalk line around the whole house, giving you an unwavering guide for the top of your starter strip. This strip is what kicks that first course of siding out at the proper angle.
Once that baseline is locked in, the pros create a story pole. It’s a simple but brilliant tool: just a long, straight board marked with the exposure of each siding course. By holding the story pole up against the wall next to windows and doors, you can see exactly where your lines will fall before you ever nail up a single board.
This simple check gives you the chance to make small adjustments. For example, you can tweak the plank exposure just slightly to avoid ending up with a tiny, awkward-looking sliver of siding right above a window. A little planning here makes the final result look clean and intentional.
The Art of Staggering Butt Joints
Nothing gives away an amateur job faster than poorly placed butt joints. When the vertical seams where two planks meet are lined up or form a repeating pattern, it completely breaks the visual flow. You're aiming for a random, natural look where the joints almost disappear.
James Hardie has some clear rules to help you get this right:
- No H-Joints: Never let butt joints stack directly on top of each other in back-to-back courses.
- Keep Them Apart: Make sure butt joints are separated by at least two stud bays, which is typically 32 inches.
- Mix It Up: Across any three consecutive rows, the joints should never align.
A great trick of the trade is to start each new row with the leftover piece from the row you just finished (as long as it’s long enough). This technique naturally creates the random stagger you need, minimizes waste, and gives the entire wall a seamless appearance.
Getting these details right is more important than ever. James Hardie products have been installed on over one million homes a year recently, with the average house taking about 2,600 square feet of siding. With some experts projecting their siding could be on 25 million U.S. homes by 2035, the standard for a quality installation is high.
Planning Around Architectural Features
A home with complex gables and multiple stories is a perfect example of why layout planning is so crucial. You need the siding courses to wrap around corners and stay perfectly level across every wall section. That takes some careful measurement and thinking ahead.
Take a gable, for instance. You have to decide ahead of time how those angled courses will meet at the peak. Will they form a clean "V," or will you use a trim piece to cover the joint? Planning this out ensures your cuts are dead-on and the final look is polished. You can see how a well-planned project comes together by looking at this example of a professional siding installation.
The same logic applies to windows and doors. Your layout needs to ensure the siding planks overlap the side trim, not just butt up against it. This creates a more finished look and, more importantly, a better barrier against the weather.
Always maintain the correct lap exposure—a minimum of 1.25 inches for HardiePlank®—for both looks and performance. This overlap is what creates those crisp shadow lines that give the siding its classic character and effectively sheds water away from your walls. When you take the time to plan your layout carefully, every single detail adds up to a flawless, durable finish.
Applying the Finishing Touches and Sealants
Putting up the last plank feels like the finish line, but we're not quite there yet. The real craftsmanship shines through in the final steps: sealing, caulking, and painting. This is what separates a decent siding job from a truly professional one—the kind that looks great and stands up to the weather for decades.
Here in the Seattle area, water is the enemy. It will find any gap, no matter how tiny. That’s why getting the sealing details right isn’t just a recommendation; it’s absolutely critical to protect the structure of your home.
Choosing and Applying the Right Sealant
Don't just grab any old tube of caulk from the hardware store. James Hardie is very specific about this. You need a high-quality, permanently flexible, paintable elastomeric sealant that meets ASTM C920 standards. This isn't just a suggestion to keep the warranty intact; it's because this type of sealant can handle the expansion and contraction that comes with our temperature swings without failing.
When you're ready to apply it, aim for a clean, consistent bead. Here's a quick rundown of where to focus your attention:
- Vertical Joints: Hit every spot where the siding meets trim—think windows, doors, and all the inside and outside corners.
- Penetrations: Carefully seal around anything that pokes through the siding, like vents, electrical boxes, and hose bibs.
- Avoid Horizontal Joints: This one is crucial. Never caulk the horizontal joints between the siding planks. These gaps are designed to let the wall breathe and allow any moisture that gets behind the siding to escape. Sealing them is a recipe for trapping water and causing major problems down the road.
Pro Tip: Want a super clean, professional-looking caulk line? After you lay down the bead, run a damp finger or a small caulking tool over it to smooth it out. It's a simple move that makes a huge difference in the final look once everything is painted.
Painting Best Practices for Primed Siding
If you went with James Hardie's primed siding, you've got a fresh canvas. But painting fiber cement isn't quite the same as painting wood. That factory primer is ready for paint, but you have a window—you need to get it painted within 180 days of installation to keep the warranty valid.
For the paint itself, always go with a 100% exterior acrylic latex. It's the only type that has the adhesion and flexibility needed to stick to fiber cement and move with it through the seasons without cracking. Before a single drop of paint touches the wall, give the siding a quick wipe-down to make sure it’s clean, dry, and free of any installation dust.
The ColorPlus® Technology Advantage
Of course, the easiest way to handle painting is to not do it at all. That’s where James Hardie’s ColorPlus® Technology comes in. These products show up at your job site completely pre-finished with a durable, factory-baked-on color.
Choosing ColorPlus® just makes life easier and gives you a better result in the long run.
- Time Savings: You completely skip the entire painting process. No waiting for good weather, no hiring painters, no extra time. When the last board is up, the job is done.
- Unmatched Durability: The finish is applied and cured in a controlled factory setting, creating an incredibly tough bond that you just can't replicate in the field. It resists chipping and peeling far better than a site-painted job.
- UV Resistance: The finish is engineered to fight off sun fading, so the color you choose stays rich and true for years.
- Finish Warranty: This is a big one. ColorPlus® products come with a 15-year limited warranty that covers both the paint and the labor to fix it. You don't get that kind of guarantee with a can of paint.
Ultimately, the choice between primed and ColorPlus® siding is about weighing custom color flexibility against superior, warrantied performance right out of the box.
We've all seen projects where a small mistake during installation leads to a big headache later. To help you avoid those common pitfalls, here’s a quick troubleshooting guide based on what we see out in the field.
Common Installation Mistakes and How to Avoid Them
| Mistake | Potential Consequence | The Pro Solution |
|---|---|---|
| Over-tightening Fasteners | Cracks or "dimples" in the siding, compromised water resistance. | Drive fasteners snug against the siding, but don't sink the head. The fastener should sit flush with the board's surface. Use a nail gun with a depth adjustment. |
| Face Nailing Too Close to the Edge | Chipping or cracking of the plank corners, especially during seasonal shifts. | Keep all face nails at least 3/4 inch away from the edges of the siding plank. |
| Improper Butt Joint Flashing | Water gets behind the siding at the seams, leading to rot in the wall sheathing. | Always place a strip of weather-resistant barrier or joint flashing behind every butt joint. Never rely on caulk alone to seal these joints. |
| Ignoring Clearance Requirements | Siding wicks up moisture from the ground or roof, causing swelling and deterioration. | Maintain a minimum 6-inch clearance from the ground and a 2-inch clearance from roofs, decks, and patios. |
| Caulking Horizontal Lap Joints | Traps moisture behind the siding, preventing the wall from drying out and leading to water damage. | Never apply caulk to the horizontal seams between planks. This is by design to allow for proper drainage. |
Paying close attention to these details is what ensures a James Hardie installation not only looks great on day one but performs flawlessly for decades to come.
Answering Your James Hardie Installation Questions
Even the best-laid plans run into questions on the job site. It's just part of the process. Here are answers to some of the most common things we hear from homeowners around Seattle, based on years of hands-on experience.
Can I Really Install James Hardie Siding Myself?
Honestly, while a very skilled DIYer might be able to pull it off, this is one of those jobs we strongly recommend leaving to the pros. We're not just saying that—this material is a different beast entirely. It requires specialized gear like PCD blades for cutting and specific siding nailers for fastening, not to mention a certain knack for handling the boards without snapping them.
More than that, it's the tiny details that protect your home and your warranty. Getting the clearance gaps perfect or installing the water management system just right isn't optional; it's essential for the siding to perform for decades. One simple mistake, like using the wrong fasteners or placing them incorrectly, can void the entire 30-year product warranty. When you think about it that way, hiring a James Hardie Preferred Contractor is a pretty solid investment.
What Are the Most Critical Clearance Gaps to Pay Attention To?
Getting the gaps right is probably the single most important part of the job. These aren't just arbitrary numbers; they are your home's main defense against moisture, and James Hardie is strict about them for warranty claims.
Here are the ones you absolutely can't fudge:
- From the Ground: You need a minimum of 6 inches of space between the ground (or any landscaping) and the bottom edge of your first course of siding. This is crucial for preventing moisture from wicking up into the boards.
- From Hard Surfaces: Leave a 1-2 inch gap between the siding and any flatwork like decks, patios, steps, or driveways.
- Above Flashing: Wherever you have horizontal flashing (think over windows, doors, or where a roofline meets a wall), you must leave a 1/4-inch gap between the top of that flashing and the siding plank above it. This lets trapped water escape instead of getting stuck behind your walls.
What’s the Safest Way to Deal with Dust When Cutting?
Managing dust isn't just about cleanliness—it's a major safety issue. The dust created when cutting fiber cement contains crystalline silica, which you do not want to breathe. The gold standard for this is a "guillotine" style fiber cement shear. It makes a clean cut with virtually zero dust.
If you have to use a circular saw, make sure it’s fitted with a proper PCD blade and, most importantly, hooked up to a HEPA vacuum dust collection system. Always cut outside in a well-ventilated area, and wear your safety glasses and a NIOSH-approved N95 respirator. Don't even think about cutting this stuff indoors.
Following these dust control measures is non-negotiable. It's about protecting your long-term health and the health of anyone else nearby. When it comes to respiratory safety, there are no shortcuts.
I Have Primed Siding. How Soon Does It Need to Be Painted?
If you go with the primed-but-unpainted boards, the clock starts ticking the moment they're up. The James Hardie warranty gives you 180 days from the installation date to get it painted. To make sure that paint job lasts, you’ll want to use a top-tier, 100% acrylic exterior paint.
A much better route, in our opinion, is to spring for James Hardie's ColorPlus® Technology siding. It comes from the factory with a baked-on finish that’s way tougher than anything a painter can apply on-site. You get to skip the painting process entirely, and it’s backed by a separate 15-year finish warranty that covers chipping, peeling, and fading. It’s a fantastic value for the performance and peace of mind you get right from day one.
Installing James Hardie siding the right way takes a deep understanding of the material and a serious commitment to detail. If you're ready to make sure your project is done perfectly the first time, trust the certified professionals at Breeze Siding. We are a James Hardie Preferred Installer serving the greater Seattle area.