
Before you can even think about repairs, you have to know what you're up against. The first step is always proper identification. You're looking for wood that looks dark, feels brittle, or has cracked into a distinct cube-like pattern. Often, there's a musty smell that comes along with it. Catching these signs early is the absolute key to stopping a small problem from turning into a massive structural headache.
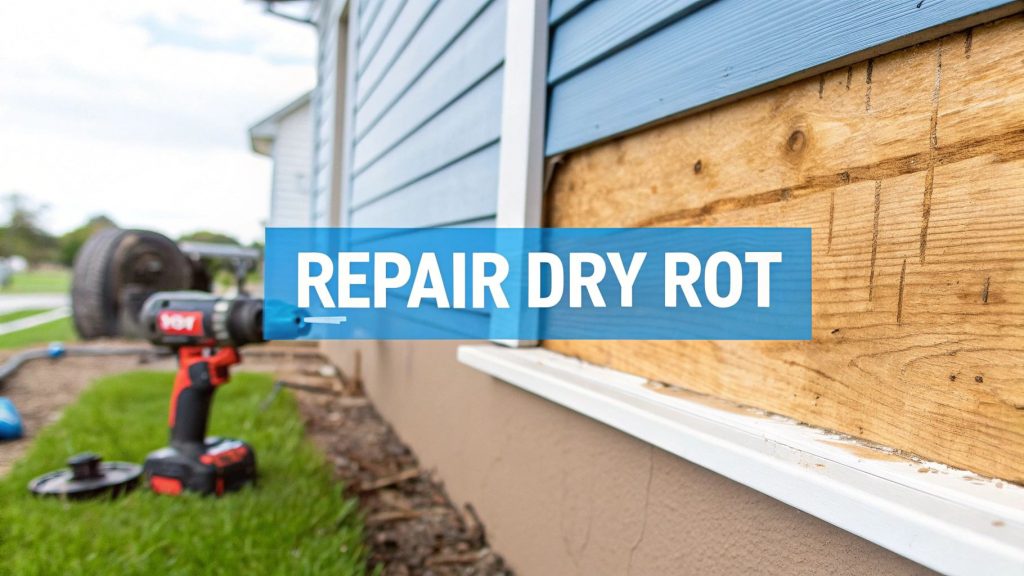
How to Spot Dry Rot Before It's Too Late
So many homeowners I've worked with in Seattle and across the Eastside wait until they see wood physically crumbling off their house before they call for help. By that point, the damage is already severe. The real trick to a manageable repair is learning to spot the subtle, early warnings that we pros look for, especially in a damp climate like we have in the Pacific Northwest.
Dry rot isn’t just an ugly spot on your siding; it's a wood-eating fungus that actively destroys the integrity of your home.
The fungus responsible, Serpula lacrymans, is particularly nasty because it doesn't just need existing moisture to survive—it can actually transport water to dry areas of wood, helping it spread with alarming speed. This is a far cry from a simple water stain, which is usually just surface discoloration. Dry rot is an active infection, breaking down the wood from the inside out.
Distinguishing Dry Rot from Other Wood Issues
It’s surprisingly easy to mistake dry rot for other common problems, like termite damage or its cousin, wet rot. But each leaves its own unique fingerprint.
Termites, for instance, tend to hollow out wood from the inside, leaving a honeycomb-like pattern and sometimes little mud tubes. Wet rot makes wood feel soft and spongy to the touch, but the good news is it generally doesn't spread far beyond the initial wet spot.
Dry rot is a different beast entirely. Its classic calling card is a deep, brittle cracking pattern called cuboidal cracking. The wood looks almost like it's been charred in a fire, breaking apart into these little cube-shaped chunks. In some cases, you might even see fine, gray, web-like strands called mycelium spreading across the surface like a spider's web.
Pro Tip: Trust your nose. One of the most reliable ways I identify active dry rot is by the smell. It has a very distinct, musty, and earthy odor—think of a damp forest floor or the smell of mushrooms. If you notice that specific smell concentrated in an area around your siding or trim, it's time to investigate.
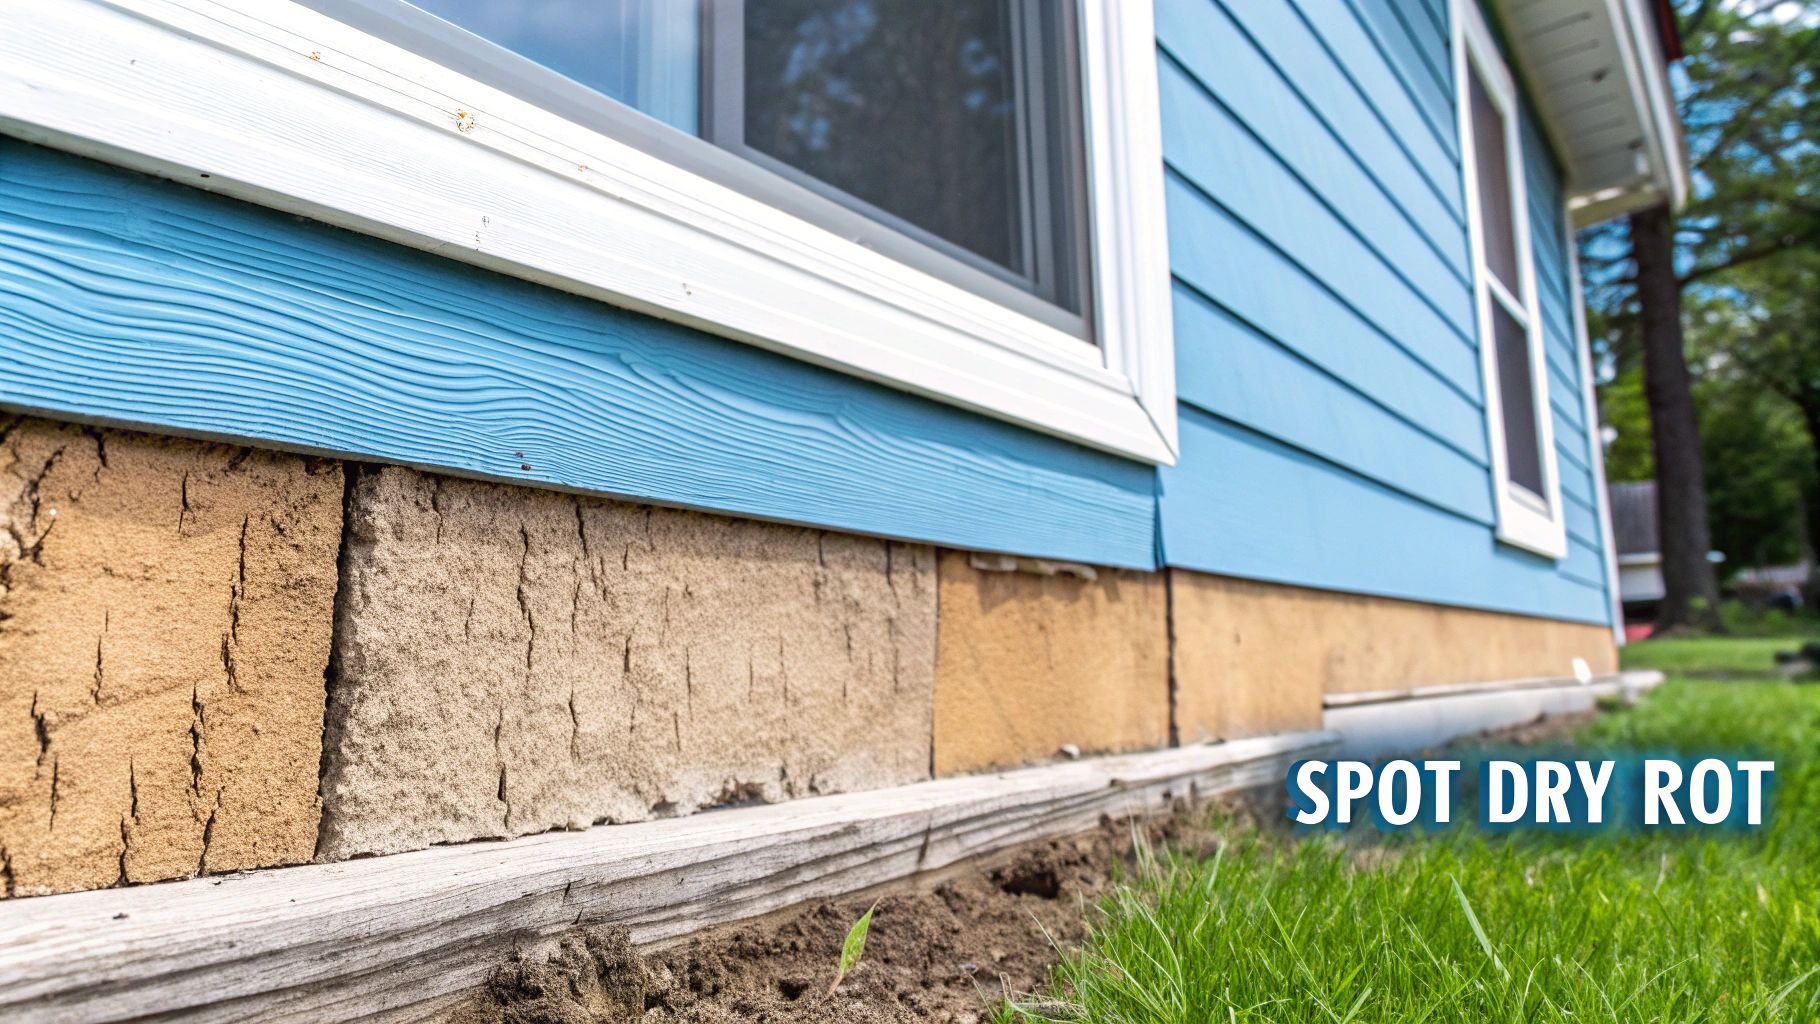
Your High-Risk Inspection Checklist
Your best defense is a good offense, and that means regular inspections. Here in the Puget Sound, from Everett to Tacoma, you want to focus on any spot where moisture can collect and linger. Grab a bright flashlight and a screwdriver; you'll use the screwdriver to gently probe any wood that looks suspicious. If it sinks in easily, you’ve got a problem.
Here’s a practical checklist of the high-risk zones I always inspect first:
- Window Sills & Door Frames: Pay special attention to the lower corners where rain tends to pool. Look for paint that’s cracking or bubbling, soft spots, and any dark discoloration.
- Roof Eaves & Fascia Boards: Clogged and overflowing gutters will saturate these boards, creating the perfect environment for rot to take hold.
- Where Siding Meets the Foundation: This is a classic trouble spot. It often traps moisture from rain splashing back up from the ground, especially if the grading is poor.
- Deck Connections: The ledger board—where your deck bolts to the house—is a notorious failure point. Water gets trapped between the two surfaces and wreaks havoc.
By regularly checking these key areas every season, you can catch the fungus while the damage is still small and localized. A minor dry rot repair can be a manageable weekend project. But letting it go? That can quickly escalate into a full-blown siding replacement and thousands in structural repairs.
Gearing Up: The Tools You'll Actually Need for a Pro-Level Repair
Let's be honest, walking into a hardware store for a project like this can be overwhelming. It's easy to grab things you don't need or, worse, miss the one or two items that make all the difference. A real dry rot repair is less about brute force and more like surgery—you need precision tools for a clean removal and a rock-solid rebuild. Forget the hand saw and a tub of all-purpose wood putty; we're going to do this the right way.
This infographic breaks down the essential gear. Notice it's not a huge list, but every item has a specific, crucial role.
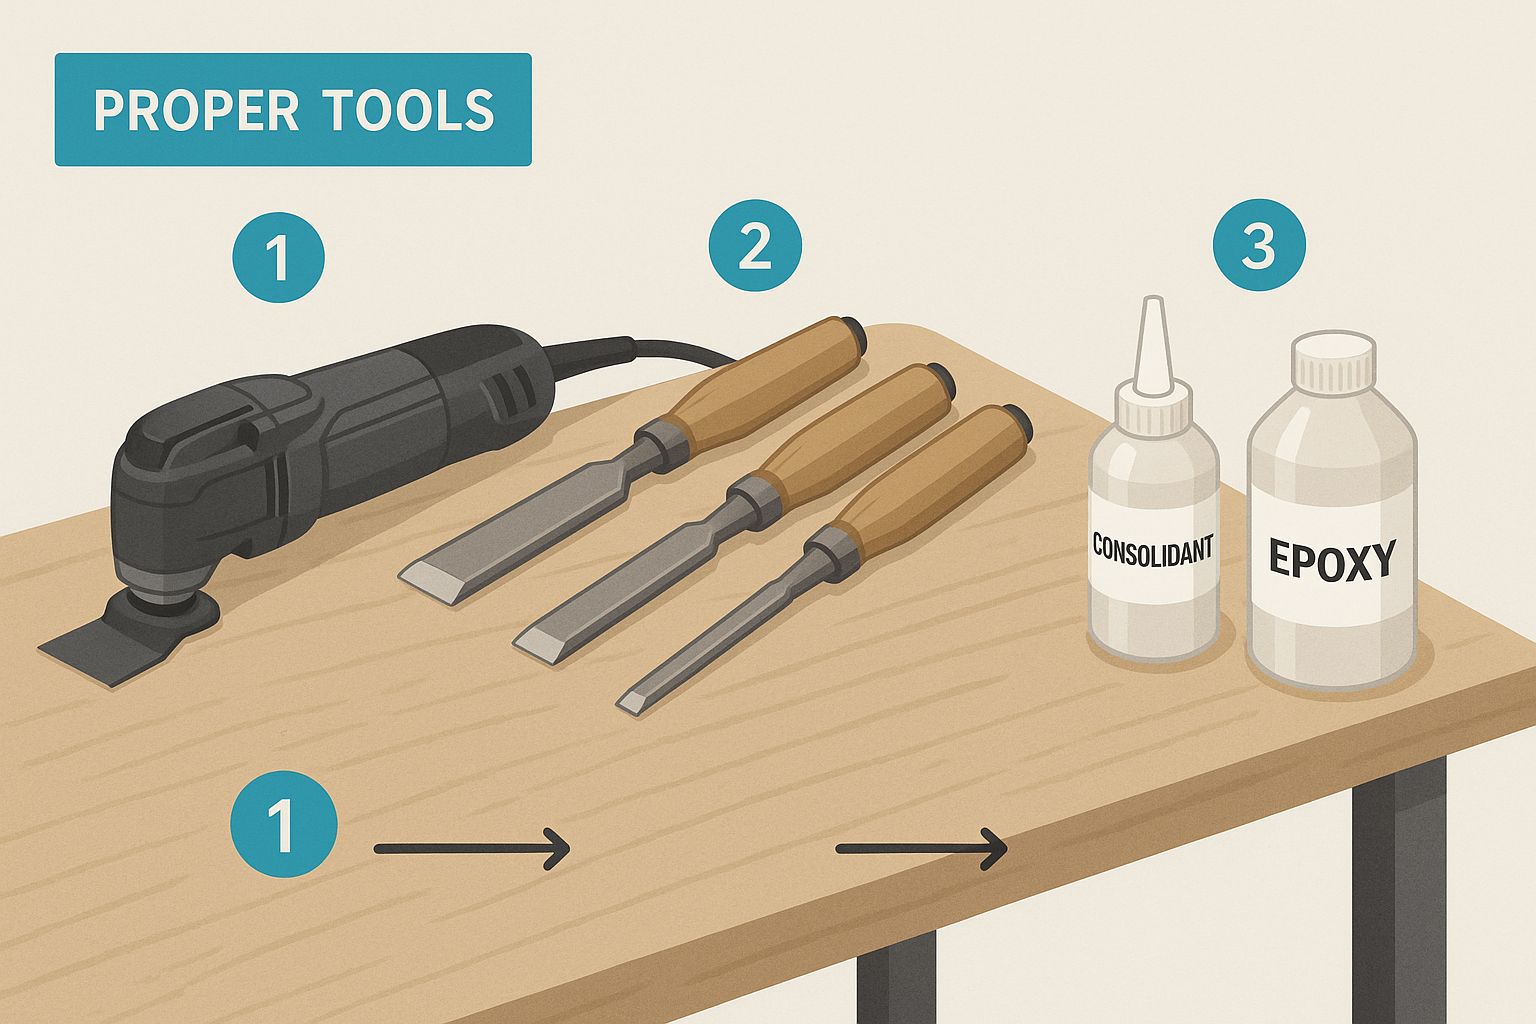
The key takeaway here is the two-stage process: precise removal of the bad wood, followed by a chemical treatment and rebuild that makes the area stronger than it was before.
For Precise Wood Removal
When it comes to cutting out the rot, big, clumsy tools are your enemy. They'll chew up healthy wood and siding, creating an even bigger repair job. That's why the pros reach for an oscillating multi-tool. Armed with a plunge-cut blade, this thing is a game-changer. It lets you make surgical cuts, removing only the rotted section without collateral damage.
You’ll also want a good, sharp set of wood chisels. These are perfect for getting into tight corners and methodically clearing out every last bit of soft, punky wood fiber that the multi-tool can't reach.
The Two-Part System for a Permanent Fix
This is the step that separates a temporary patch from a permanent repair. So many DIY fixes fail because they just fill the hole. We need to stabilize the surrounding wood and then fill it with something that's basically indestructible.
- Liquid Wood Hardener (Consolidant): Think of this as the primer. It’s a super-thin liquid that you brush onto all the exposed, raw wood after you’ve dug out the rot. It soaks deep into the wood fibers, solidifying any remaining soft spots and creating a rock-solid foundation for the filler.
- Two-Part Epoxy Filler: This is not the wood putty you used in shop class. It's a high-strength polyester resin that you mix with a hardener right before you use it. It becomes a thick, sculptable paste that cures into a waterproof, permanent material that won't shrink or crack like cheap fillers do.
Pro Tip: Skipping the wood hardener is one of the most common mistakes I see. If you apply epoxy directly to slightly-soft wood, the bond is only as strong as those weak fibers. Stabilize the wood first, then fill. It’s a non-negotiable step for a lasting repair.
Don't Forget Your Safety Gear
This is serious stuff. The dust you kick up from rotted wood is loaded with fungal spores, and you do not want to be breathing that in. The chemicals in the epoxy system are no joke, either. Your safety kit is non-negotiable.
Here’s the bare minimum:
- A good respirator: An N95-rated mask is essential to protect your lungs from mold spores.
- Safety glasses: Keep wood chips, dust, and chemicals out of your eyes.
- Durable gloves: You need to protect your hands from splinters and the sticky, hard-to-remove epoxy.
A Pro’s Guide to Cutting Out Rotted Wood
Alright, you’ve got your tools, and now we’re at the make-or-break stage of any dry rot repair: getting rid of the infected wood. Think of this as surgery, not demolition. The entire goal is to cut out every last trace of the fungus while saving as much healthy wood as you can. If you rush this part, you're just setting yourself up for a repeat problem down the road.
First things first, you need to map out the battlefield. Grab your screwdriver or a dental pick and start probing the area around the rot you can see. You’re feeling for the transition from that soft, punky wood back to solid, healthy material. It's almost always worse than it looks; the decay loves to hide just beneath a thin layer of paint.
Once you think you've found the edge, you need to go further. This is where most DIY repairs go wrong. Mark a cutting line at least one full inch into the healthy wood on all sides of the rotten section. I know it feels aggressive, but this is an absolute must. You have to get rid of the microscopic fungal strands, called hyphae, that are already working their way into the good wood. This is the single biggest secret that separates a pro repair from one that fails in a year.
Making the Cut and Clearing the Damage
With your repair zone clearly marked, it's time to bring in the oscillating multi-tool. This tool is perfect for making precise plunge cuts, letting you remove the damaged section cleanly, almost like a surgeon taking out a tumor. Follow your lines carefully and keep your cuts as clean and square as possible. This precision pays off later by making the epoxy fill stronger and neater.
After you've cut the perimeter, switch to a sharp chisel and hammer. Start methodically clearing out the rotted wood from inside your cut lines. Don't just whale away at it; work in small, controlled chunks. As you expose fresh surfaces, keep probing with your pick to hunt down any last soft spots. You have to be meticulous here—a tiny pocket of infected wood is all it takes to start the whole process over again.
A professional dry rot repair isn't just about filling a hole; it's about sterilizing the wound. We have to assume the fungus has spread invisibly and treat the area accordingly to prevent a comeback.
The All-Important Sterilization Step
Once you're confident the cavity is completely free of soft wood, it’s time to sterilize. This is how you kill off any spores left lurking in the wood grain. Using a disposable paintbrush, apply a generous coat of a borate-based wood preservative to every single exposed surface inside the cavity. Get it into every nook and cranny.
Let that preservative really soak in. This chemical treatment is your insurance policy. Borate is lethal to wood-destroying fungi but has low toxicity for people and pets once it’s dry, which is why it’s the go-to choice for pros on residential jobs. Skipping this is like a doctor performing surgery without disinfecting—you're just inviting reinfection.
And that reinfection can be costly. The financial hit from repeated repairs adds up quickly. In the U.S., the average cost to repair dry rot is between $502 and $2,354, but I’ve seen severe cases climb well over $6,500. You can find more data on the nationwide impact of wood decay at nachi.org.
To help you keep these critical steps in order, here's a quick summary of the process.
Dry Rot Repair Stages and Key Actions
This table breaks down the critical stages of the repair process. Following these steps methodically is the key to ensuring the rot doesn't return.
| Repair Stage | Primary Goal | Essential Action |
|---|---|---|
| Assessment & Marking | Define the full extent of the damage. | Probe for soft wood and mark a cut line 1 inch into healthy material. |
| Surgical Removal | Excise all infected wood cleanly. | Use an oscillating tool for precise cuts and a chisel to clear the cavity. |
| Sterilization | Eradicate any remaining fungal spores. | Liberally apply a borate-based wood preservative to all exposed surfaces. |
| Drying & Curing | Prepare the wood for a permanent repair. | Allow the preservative to dry completely, typically for at least 24 hours. |
By mastering these stages, you transition from simply patching a problem to truly solving it.
Let the treated area dry completely according to the manufacturer's instructions—give it at least 24 hours. Once it’s bone dry, you're finally ready to start rebuilding with epoxy, knowing you've done everything possible to stop that rot for good.
Rebuilding Trim And Siding With Epoxy
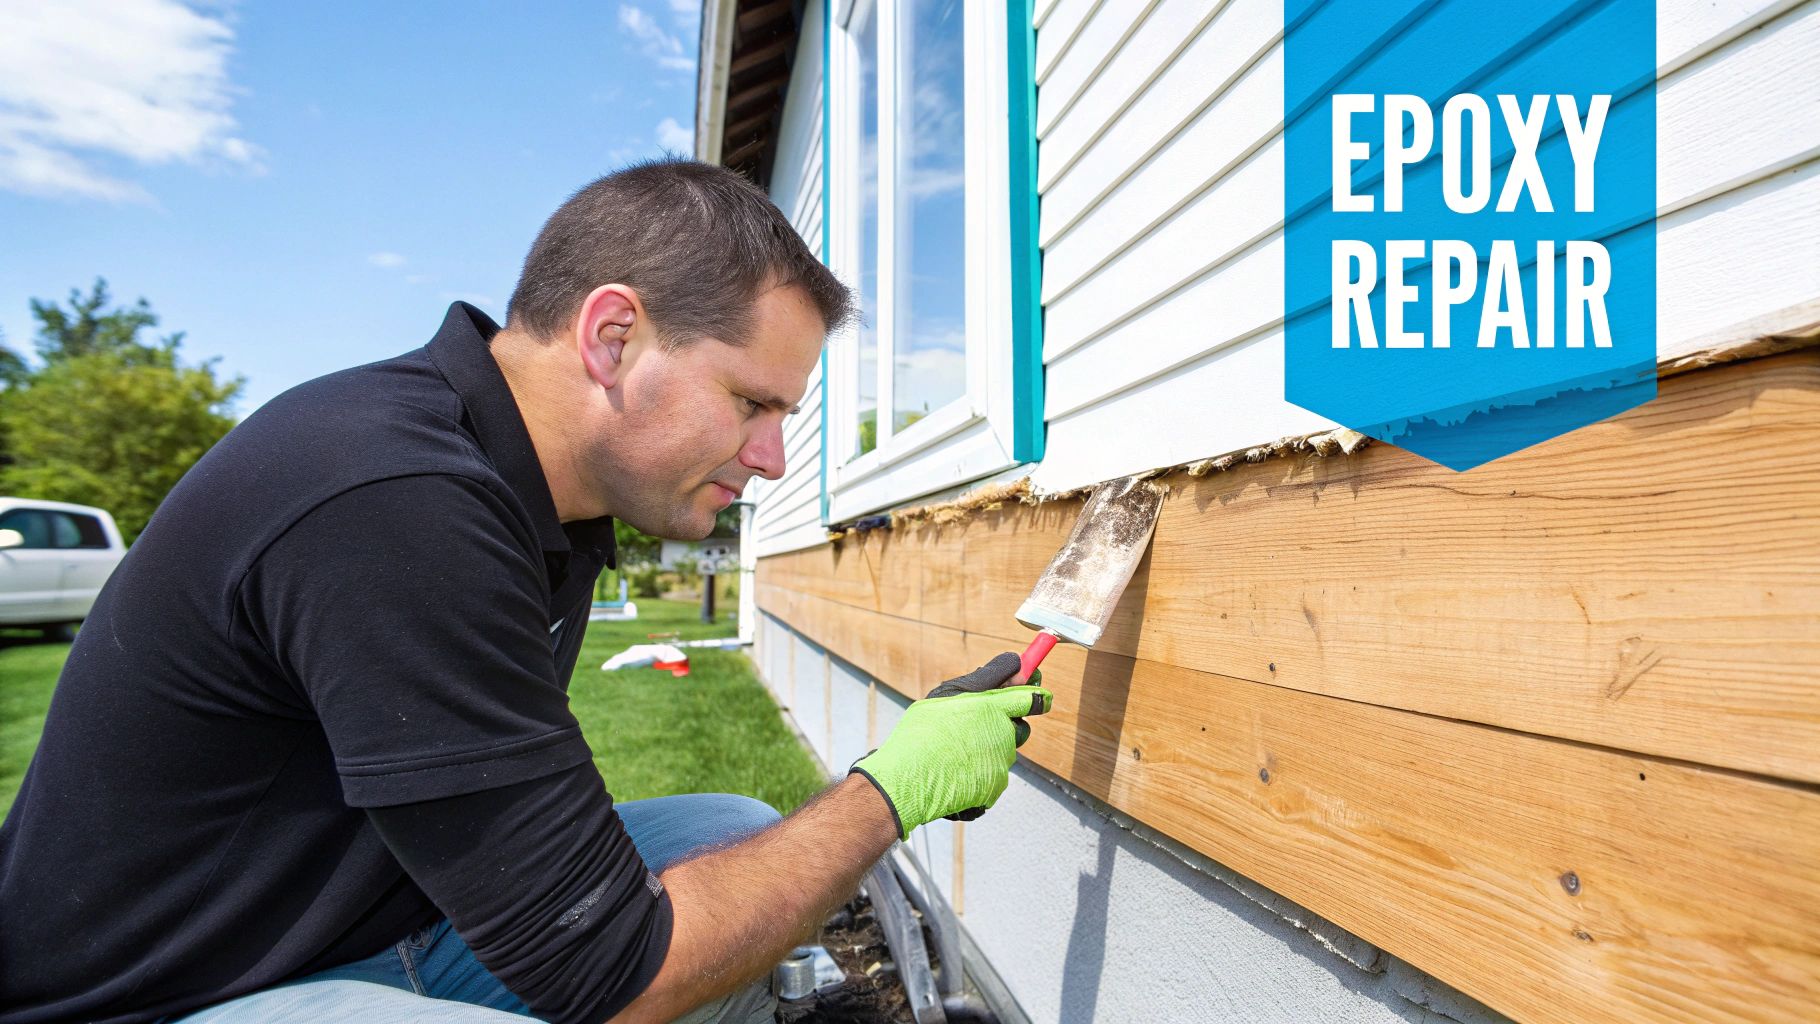
With the rotted wood gone and the area treated, you're looking at a clean cavity. Now for the fun part: making the damage disappear. This isn't a job for some cheap wood putty from the hardware store. We're going to rebuild the section with a material that's actually stronger and more water-resistant than the original wood.
Our go-to for this is a high-quality, two-part wood epoxy. This stuff isn't just a filler; it’s a structural repair material that hardens into a rock-solid, permanent patch. Its effectiveness is no secret; the global market for these products hit $395.9 million in 2023 and is still growing. Homeowners and pros alike know it's better to invest in a lasting fix. When professional dry rot repairs can easily run between $1,500 and $2,800, learning this skill yourself is a serious money-saver. You can learn more about the growth of the wood repair market to see why epoxy has become the industry standard.
Mixing And Applying The Epoxy Filler
Getting the epoxy to work its magic all comes down to the mix. It comes in two parts: a resin (Part A) and a hardener (Part B). Grab a clean putty knife and scoop out equal amounts of each onto a disposable surface like a scrap of wood or cardboard.
Now, mix them together like you mean it. Keep folding and pressing the material until it’s one uniform color with zero streaks. You're aiming for a consistency like smooth peanut butter—stiff enough to hold its shape but pliable enough to work into the repair area.
Time to get it in place. Work quickly but don't rush. Your first move is to press the epoxy deep into the cavity, forcing it into every nook and cranny. A rookie mistake is just slathering it over the top, which traps air pockets and creates a weak bond. Use your putty knife to really pack it in there.
Trade Secret: Always overfill the damaged area slightly. You want a small mound of epoxy sitting proud of the wood surface. You'll be sanding this down later, and the extra material ensures you can create a perfectly flush, invisible transition.
Sculpting And Shaping For A Seamless Finish
Once the cavity is packed, it's time to play sculptor. Your goal is to shape the epoxy to match the original profile of the siding or trim while it's still workable. This is where having a few different putty knives really pays off.
- For Flat Surfaces: A wide, flexible knife will help you smooth the filler evenly.
- For Detailed Trim: Use a smaller, more specialized tool or even the sharp corner of your main putty knife to recreate those curves and sharp edges.
It doesn't have to be perfect at this stage. Just get the basic shape right. As the epoxy starts to set up, it becomes easier to shave and fine-tune with a sharp edge. For recreating more complex trim profiles, our team uses some of the same techniques you can see in our siding repair photo gallery, where we bring intricate designs back to life.
Final Sanding And Priming
Let the epoxy fully cure. This usually takes about 24 hours, but always check the manufacturer's instructions. Once it's hard as a rock, you can start the finishing process.
Begin sanding with a medium-grit paper, something around 80-grit, to knock down the excess material and get the patch flush with the surrounding wood.
Next, switch to a finer paper like 120-grit or 150-grit to smooth everything out. Run your fingertips over the transition; you shouldn't be able to feel a seam. That's when you know you're done sanding.
The final, absolutely critical step is priming. Don't skip this. You need to use a high-quality oil-based exterior primer. Water-based primers just don't grip epoxy well and won't provide a good seal. This primer coat is the key to ensuring your topcoats of paint adhere properly and that your repair dry rot project is completely invisible once finished.
Protecting Your Home from Future Dry Rot
A successful dry rot repair is one you only have to do once. After all the effort of digging out decay and meticulously rebuilding the wood with epoxy, the last thing you want is a repeat performance in a few years. Thankfully, preventing dry rot isn't about some secret formula; it’s simply about controlling moisture.
The fungus that causes dry rot needs water to survive. So, your entire long-term defense strategy boils down to keeping the wood on your house dry. Think of your home's exterior as a raincoat. Every unsealed crack, peeling paint chip, or clogged gutter is a hole in that coat, letting water soak in and giving the fungus the foothold it needs.
Mastering Moisture Control
In my experience here in the Seattle area, the number one cause of dry rot is rainwater going where it shouldn't. It sounds simple, but managing it properly makes all the difference.
Your gutter system is your first line of defense. When gutters get clogged with leaves and debris, they essentially become a reservoir, overflowing and constantly soaking your fascia boards, roof eaves, and the top of your siding. A simple cleaning twice a year—once in the spring and again in the fall—is non-negotiable.
Just as important are your downspouts. They need to actively move water away from your house, not just dump it at the foundation. Make sure you have extenders that carry water at least five to ten feet away. If water is allowed to pool right against the home, it will saturate the lowest rows of siding and trim, creating a perfect incubator for rot.
A solid coat of paint and well-maintained caulk lines are the cheapest insurance you can buy against water damage. They form the most critical barrier between a downpour and the vulnerable wood underneath.
The Long-Term Fix: When to Consider New Siding
Sometimes, especially with older homes in places like Bellevue or Kirkland, you might feel like you're just playing whack-a-mole with rot. You fix one spot, and another one pops up next year. If you find yourself in this frustrating cycle, it's probably time to think about a more permanent solution: replacing the siding altogether.
This move is about more than just a fresh look; it's a fundamental upgrade to your home's armor. Modern siding materials offer a level of resilience that older wood products just can't compete with, providing immense benefits.
- Fiber Cement Siding: For a damp climate like ours in the Pacific Northwest, this is my top recommendation. It's a composite of cement, sand, and cellulose fibers, making it completely impervious to rot, moisture, and pests. You get the beautiful, classic look of wood siding without any of its weaknesses. The benefit here is longevity and reduced maintenance, which increases your home's value.
- Engineered Wood Siding: This is a fantastic option that offers the authentic look of real wood but is treated with waxes, binders, and zinc borate to resist moisture and fungal decay. It's a best-of-both-worlds solution that provides incredible durability against the elements.
- Vinyl Siding: A very practical and budget-friendly choice. Vinyl will never rot, warp, or peel. While it might not have the same premium feel as fiber cement, its design is incredibly effective at shedding water and keeping the structure behind it bone-dry. The primary benefit is low cost and zero maintenance.
Replacing old, failing siding is a major project, no doubt. But it’s an investment that truly pays for itself by breaking the expensive cycle of rot repairs for good. It secures your home’s structural integrity for decades and gives you the peace of mind that you've addressed the root of the problem, not just the symptoms.
Got Questions About Dry Rot? We’ve Got Answers.
Even with the best guide, you’re bound to have questions when you start a project like this. And when you’re dealing with something as serious as dry rot, you need straight answers. Here are a few of the most common questions our team hears from homeowners around Seattle, along with the no-nonsense advice we give them.
Can I Just Paint Over Dry Rot To Stop It?
No, and you should never try. Painting over dry rot is one of the worst things you can do—it’s like putting a small bandage on a major wound.
A coat of paint actually traps moisture against the wood, which creates the perfect humid environment for the fungus to go into overdrive. The surface might look okay for a little while, but underneath, the wood is decaying at an alarming rate. It will spread, unseen, until the damage is severe and potentially structural.
The only real fix is to cut out every last bit of the rotted wood, treat the area to neutralize any lingering spores, and then make a solid repair with epoxy or new wood. Only after all that is done should you even think about reaching for a primer and paint.
What's The Difference Between Dry Rot And Wet Rot?
This is a great question. While both are types of fungal decay, the main difference comes down to moisture and aggression.
- Dry Rot: This is the one you really need to worry about. It’s the more destructive of the two and only needs about 20% moisture content to get started. Its scariest feature is its ability to travel through other materials, like masonry and plaster, in search of more wood to eat. It leaves behind that classic deep, cube-like cracking pattern.
- Wet Rot: This fungus is more common but far less aggressive. It needs a much higher moisture level—think 50% or more—and it stays put, only affecting the wood that is actively wet. It makes the wood feel soft and spongy but won't creep through your walls looking for its next meal.
You have to deal with both, but a dry rot problem demands a much more thorough and widespread treatment to make sure it’s gone for good.
Should I Repair The Wood Or Just Replace The Whole Board?
This really comes down to a judgment call based on how bad the damage is.
If you’ve got a small, contained spot of rot—say, something affecting less than a third of a siding board or a piece of trim—a high-quality epoxy repair is an fantastic fix. When you do it right, the repaired section is actually stronger and more waterproof than the original wood ever was.
On the other hand, if the rot has taken over a large area, compromised the board’s strength, or popped up in several places along the same piece, replacement is the smarter long-term move.
Think of it this way: replacing the board isn't just a repair, it's an upgrade. It’s your chance to put in a better, more rot-resistant material like fiber cement. In a damp climate like ours here in the Puget Sound, making that kind of switch can solve recurring moisture problems for good and protect your home for decades.
If you're looking at a dry rot problem that feels bigger than a DIY project or you want to explore a permanent fix with rot-proof siding, Breeze Siding is here to help. Our team offers expert assessments and professional siding replacement all over the Seattle area, including Bellevue, Kirkland, and Redmond. Contact us today for a free, no-obligation estimate.