
When you’re thinking about a major home update, putting your money into a vinyl siding installation gives you one of the best returns you can get. It’s a smart move that pays you back in both a beautiful-looking home and real financial savings down the road, which is why it’s so popular with homeowners across Seattle and the greater Pacific Northwest. A professional siding replacement is about more than just curb appeal; it's about protecting your home from our unique, often damp, climate.
Why Vinyl Siding Is a Smart Investment

Choosing new siding is a bigger deal than just picking a new color. This is a decision that will affect your home's value, how much time you spend on upkeep, and even your energy bills for years to come. While materials like wood or fiber cement have their place, vinyl consistently comes out on top for its blend of practicality, aesthetic versatility, and long-term financial sense—especially for homes in the Seattle area.
The first thing you’ll notice is the visual upgrade—it’s immediate. A professional vinyl siding replacement can completely transform your home's exterior, making it look modern and sharp practically overnight. But the real value shows up over the long haul, long after the installation crew has driven away.
The Low-Maintenance Advantage
Let's be honest, one of the best benefits of siding replacement is breaking free from the endless cycle of scraping, priming, and painting. If you've ever had wood siding, you know it needs a fresh coat of paint or stain every few years to survive the damp Pacific Northwest climate. That’s a job that costs a lot of time and money.
Vinyl, on the other hand? It just needs a simple wash with soap and water every so often to look brand new.
This means you get your weekends back and save thousands of dollars over the life of the siding. You can finally put away the paint scrapers and ladders for good.
Durability and Modern Technology
This isn't your grandma's vinyl siding. The stuff they make today is a world away from the product you might remember from a few decades ago. Modern manufacturing has created a material that’s not only gorgeous but incredibly tough. With new textures and grain patterns, it can look just like premium materials—think cedar shake or painted wood—without all the maintenance headaches.
The science behind it has come a long way, too. The global vinyl siding market was valued at around USD 7.45 billion and is expected to keep growing, which tells you a lot about its popularity. That growth is all thanks to innovations in its makeup, which blends polyvinyl chloride (PVC) resin with ingredients that add strength, prevent sun-fading, and keep colors true in climates like ours in Washington. If you’re curious about the numbers, you can find more market trend data from Zion Market Research.
Pro Tip: When you’re choosing siding, pay close attention to the warranty, especially for fading and weathering. A strong warranty is a sign of a quality product and gives you peace of mind that your color will stay vibrant for years, even on the side of your house that gets blasted by sun or our famous Seattle rain.
To quickly see why so many people choose vinyl, here's a simple breakdown of its key benefits.
Vinyl Siding Benefits at a Glance
| Benefit | Impact on Homeowner | Long-Term Value |
|---|---|---|
| Low Maintenance | No more scraping or painting. Just a simple wash now and then. | Saves thousands of dollars and countless hours over its lifespan. |
| Durability | Resists dents, scratches, and weathering from rain, wind, and sun. | Lasts for decades without needing costly repairs or replacement. |
| Cost-Effective | Lower upfront installation cost compared to wood or fiber cement. | High return on investment; less money spent on upkeep. |
| Aesthetic Versatility | Huge range of colors, textures, and styles to match any home. | Boosts curb appeal, increasing the home's resale value. |
This table really highlights how vinyl delivers value from day one and continues to pay you back for years.
A Powerful Return on Investment
Looking at it from a purely financial angle, vinyl siding is consistently one of the smartest upgrades you can make to your home. Every single year, remodeling impact reports confirm that siding replacement projects recover a huge chunk of their cost when you sell—often more than a fancy kitchen or bathroom remodel.
Think about it from a buyer's perspective. New siding is a huge green flag. It tells them the house has been cared for and, more importantly, that they won't have to deal with a big exterior project right after moving in. That peace of mind adds real, tangible value to your home.
Getting Your Tools and Materials Together
Let's be honest, a great siding job doesn't just happen. It all starts with having the right gear on hand before you even think about pulling a panel off the wall. I always think of it like setting up a workshop—having every tool and piece of material ready to go is the first real step toward a job you'll be proud of. This isn’t just about making a shopping list; it’s about knowing why you need each item.
Putting up vinyl siding is all about precision and working smart. The right equipment doesn't just make your life easier; it directly affects how good the final product looks. Trying to make do with the wrong tool is a surefire way to get sloppy cuts, cracked panels, and a finish that just looks… off.
The Tools That Make a Real Difference
You simply can't get those clean, factory-like cuts with a pair of rusty snips from the bottom of your toolbox. Investing in a few specific tools is a must if you're serious about getting this right. These are designed for the way vinyl behaves, making sure every cut is clean and every piece fits snugly.
Here are the non-negotiables that separate a pro job from a DIY headache:
- A Dedicated Vinyl Siding Saw Blade: Pop this on your circular saw or miter saw, and you’ll wonder how you ever lived without it. The fine teeth slice through vinyl without chipping it, giving you a perfectly straight edge that tin snips can't hope to match, especially on long runs.
- Snap-Lock Punch: This little tool is a trade secret for a reason. You'll use it to punch raised tabs along the top edge of a panel that’s been cut to fit under a window or soffit. Those tabs snap securely into the utility trim, which keeps the panel from ever sagging or pulling loose. It's a game-changer.
- Zip Tool (Siding Removal Tool): This is your get-out-of-jail-free card. Whether you need to fix a mistake or replace a damaged panel down the road, this simple tool lets you unlock and separate panels without breaking them. Invaluable.
- Tin Snips (Aviation Snips): While the saw is your workhorse for straight cuts, you'll need a quality pair of snips for the detailed work—cutting around outdoor faucets, electrical outlets, and other tricky spots. A good set gives you the control you need for those custom fits.
I see it all the time: people try to save a few bucks by using all-purpose tools for specialized jobs. A snap-lock punch costs less than $20, while a single replacement siding panel can be more. It’s an easy investment for a secure, professional finish.
Of course, you’ll also need your standard construction gear. Make sure you have a sturdy ladder, a good 4-foot level, a hammer, a chalk line for snapping long, straight guidelines, and a tape measure you can trust. Having all this ready means you can get into a good workflow without stopping to hunt for something.
Understanding Your Siding Materials
Once your tools are lined up, it’s time to get familiar with the different pieces of the siding system. Think of them as a puzzle—each component has a specific job in making your home look great and, more importantly, keeping water out.
Knowing what each piece does is the key to a smooth installation.
- Starter Strip: This is the foundation for everything that follows. It’s a mostly hidden piece that goes along the very bottom of the wall, and the first course of siding locks into it. Getting this strip perfectly level is absolutely critical. If it’s off by even a little, that error will get worse with every row you add.
- J-Channel: This is the most common trim piece you'll use. It goes around every single window, door, and along the roofline. Essentially, it creates a clean, finished pocket for the cut ends of the siding panels to slide into, hiding any imperfections.
- Corner Posts: You'll use these on both the inside and outside corners of your house. They provide a neat channel for the siding to terminate into, giving you a clean, weatherproof corner without having to mess with tricky miter cuts.
- Utility Trim (or Undersill Trim): This piece works hand-in-hand with your snap-lock punch. You’ll install it at the very top of the wall or tucked under a windowsill to secure that final, custom-cut course of siding. It creates that tight, locked-in finish.
Figuring out how these parts work together is what makes a siding job both watertight and attractive. Every piece is designed to not only look good but also to let the vinyl expand and contract with temperature changes, which is crucial for preventing buckling and warping down the line.
Getting Your House Ready for a Perfect Finish
Here’s a little secret from someone who's done this a hundred times: the real key to a durable, great-looking vinyl siding job has almost nothing to do with the siding itself. It’s all about the prep work. The entire project's success hinges on what you do before that first panel ever clicks into place. You simply can't get a beautiful, long-lasting finish without a solid, well-prepared surface underneath.
Think of this stage as your chance to fix all the hidden problems that could turn into major headaches later. Skipping these steps is like building a house on a shaky foundation—it might look okay for a little while, but you're just asking for trouble. Getting the prep right is what ensures your new siding will look good and protect your home for decades to come.
Tearing Off the Old Siding and Checking What's Underneath
First things first, you need a clean slate. That means the old siding has to go. As you pull off each plank or panel, you’re not just clearing the way; you’re also getting a rare chance to inspect your home's sheathing—that's the plywood or OSB layer that serves as its main line of defense.
Keep a sharp eye out for anything that looks off. You're hunting for signs of water damage, which usually show up as dark stains, soft spots, or flat-out rot. I always keep a screwdriver handy to poke at any suspicious areas. If the wood is soft and gives way easily, you’ve found rot, and that section has to be cut out and replaced. This is non-negotiable. Slapping new siding over rotten sheathing is a disaster waiting to happen; the rot will just keep spreading.
It's tempting to take a shortcut and install new siding right over the old stuff. Please don't. You're trapping any existing moisture and, worse, you're hiding potential structural problems. Take the time to strip it down to the sheathing. It’s the only way to protect your home and your investment.
Once the old siding is gone and you’ve patched up any bad spots in the sheathing, you're ready for the next layer of defense.
Wrapping the House in a Weather-Resistant Barrier
Before a single piece of trim or siding goes up, you have to wrap the entire house in a weather-resistant barrier, which you probably know as house wrap. This stuff is basically a high-tech raincoat for your home. Its job is to block liquid water from reaching the sheathing while being breathable enough to let water vapor from inside the house escape.
This two-way action is crucial for preventing mold and moisture buildup inside your walls. Especially in damp climates like we have in the Puget Sound region, a quality house wrap isn't just a good idea—it's one of the most important parts of the whole system. As a bonus, it also cuts down on air drafts, which can help make your home a bit more energy-efficient.
Flashing Windows and Doors the Right Way
With the house wrap on, it's time to focus on the weakest links for water intrusion: your windows and doors. Believe it or not, improper flashing is the culprit behind over 90% of home water leaks. This is one area where professional technique really makes a difference.
You need to create layers that shed water, just like shingles on a roof.
- Start at the bottom. Always apply a self-adhering flashing tape across the window's bottom sill first. Run it up the sides by about six inches to create a "pan" that will catch any water that might sneak in.
- Move to the sides. Next, run flashing tape up the vertical sides of the window, making sure you overlap the sill flashing you just installed.
- Finish at the top. The last piece of flashing tape goes across the top of the window, overlapping the side pieces.
This shingle-style layering guarantees that any water running down the wall is always directed over the piece below it and safely away from the opening. It’s a critical detail that amateurs often get wrong.
Snapping Chalk Lines for a Dead-Straight Layout
Your final prep step is to give yourself a perfectly level guide for the siding. Never assume your foundation or eaves are perfectly level—they almost never are. A chalk line is the only way to ensure your siding courses look straight and professional.
First, find the absolute lowest corner of the sheathing where the siding will start. From that low point, measure up based on the siding manufacturer's instructions for placing the starter strip. Snap a level chalk line from that mark all the way around the house. This line is your guide for installing the starter strip, which is the foundation for every single panel that follows. Get that first course perfectly level, and every course above it will be, too.
A Practical Guide to Installing Vinyl Siding
With your home prepped and ready, the real transformation begins. This is where you start to see your vision come to life, panel by panel. The installation process is a series of logical steps, but real success is in the details—those little techniques pros use to make sure the siding looks fantastic for decades, not just on day one.
The whole process kicks off with setting up the trim, which acts as the frame for all your siding panels. Getting this frame perfectly square and level is the bedrock of a flawless finish.
Setting Your Trim and Starter Strip
Before a single piece of siding goes up, you need to install your corner posts and J-channel. The outside and inside corner posts go on first. Use a level to get them perfectly plumb, then fasten them loosely at the top of their nailing slots. You'll want to leave a 1/4-inch gap where the post meets the soffit—this gives it room to expand vertically when the weather changes.
Next up is the J-channel. This gets installed around every window and door, and also along any sloped rooflines. Think of it as a finished pocket that the ends of your siding panels will slide into, hiding the raw cuts and creating a clean, weatherproof seal.
With the trim in place, it’s time for arguably the most crucial step of the entire job: installing the starter strip. This piece runs along the very bottom of the wall, and it’s what your first course of siding will lock into.
Trade Secret: Your starter strip must be perfectly level. An error as small as 1/8 of an inch will magnify into a glaringly obvious mistake by the time you reach the top of the wall. Use your level and the chalk line you snapped earlier as your guide, and then check it again before you drive a single nail.
The Golden Rule: Hang It, Don't Nail It
Here’s the single most important thing to remember about vinyl siding installation: you have to hang the panels, not nail them tightly to the wall. It sounds counterintuitive, but this is the secret to preventing the ugly warping and buckling that plagues so many DIY jobs.
Vinyl expands and contracts a surprising amount with temperature swings. A single 12-foot panel can grow by as much as half an inch from the dead of winter to a hot summer day.
To allow for this movement, every nail needs to be driven into the center of the nailing slot, never at the ends. Even more important, you have to leave a small gap—about the thickness of a dime—between the nail head and the siding. The panel must be able to slide freely from side to side.
- Center Your Nails: Always aim for the middle of the slot.
- Leave a Gap: Don't hammer the nail all the way down. It should be snug, but not tight.
- Check for Movement: After nailing a panel, give it a gentle nudge sideways to make sure it can move.
This technique is what allows the siding system to "breathe." Nailing it tight traps the panel, and when it expands in the summer heat, it has nowhere to go but out, causing it to buckle.
This visual guide shows the essential prep work that sets you up for a successful vinyl siding installation.
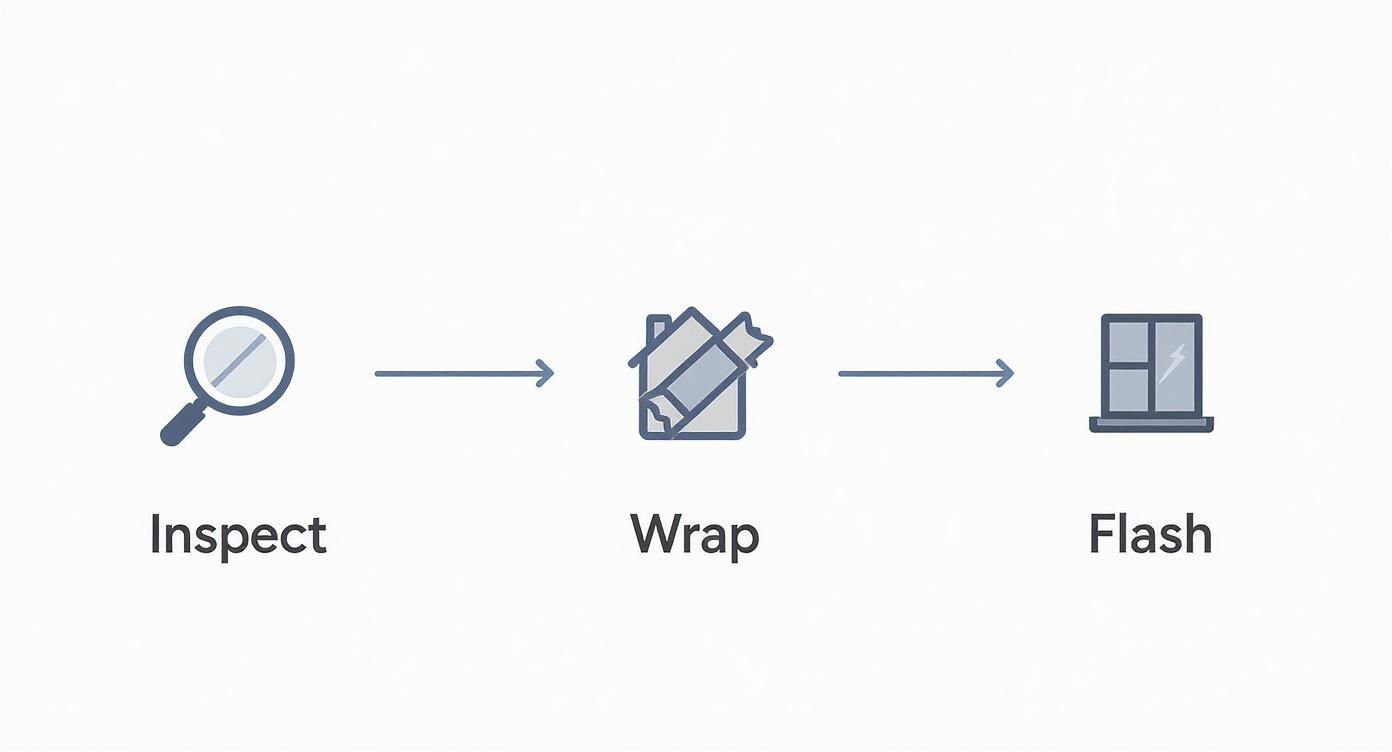
As the flow chart shows, a proper inspection, putting up a moisture barrier, and meticulous flashing are non-negotiable first steps.
Overlapping Panels and Working Around Obstacles
As you work your way up the wall, you'll need to overlap panels to cover the full length. The trick to making these overlaps look invisible is to stagger them. You never want to stack the seams directly above each other from one course to the next. A good rule of thumb is to separate seams by at least three courses and several feet horizontally.
When you do overlap panels:
- Make sure each overlap is about 1 to 1 1/4 inches.
- Snip back the nailing hem of the top panel by about an inch so it doesn't get in the way.
- Always think about the main viewing angles of your home. You want to install the panels so the overlaps are least visible from your driveway or front door.
Sooner or later, you'll run into things like outdoor faucets, electrical outlets, or dryer vents. Don't panic; this is where your tin snips and a little patience come in handy. Just hold the siding panel up to the obstacle and carefully mark the area you need to cut out.
For a faucet, you might just need a small square or circular cut. For bigger things like vents, you can use trim pieces like J-channel to frame the opening neatly before installing the siding around it. The goal is always a clean, snug fit that keeps water out.
The steady growth in the vinyl siding market really speaks to its proven performance and homeowner appeal. The U.S. market is projected to grow at a steady annual rate of 1.6%, reaching a volume of 25.8 million squares valued at roughly USD 1.8 billion. This resilience comes from vinyl’s affordability, durability, and how well it suits the diverse climates across the United States. You can read more vinyl siding market trend insights from Custom Market Insights.
Adding Professional Finishing Touches
You can always tell the difference between a decent siding job and a truly professional one. It’s all in the finishing touches. Once the main runs of siding are up, the final details are what create that polished, clean look that makes the whole project pop and guarantees it will last. This is where real craftsmanship shines through.
We're talking about creating crisp lines, seamless transitions, and a completely watertight envelope for your home. Every last piece, from the final course under the eaves to the trim around your windows, needs to be handled with care. These details aren't just for show—they're what make the entire system perform correctly.
Securing the Final Top Course
When you get to the very top of a wall, you’ll almost certainly have to rip (cut lengthwise) that last panel to fit it neatly under the soffit. Since you're cutting off the nailing hem, you can't fasten it the traditional way. This is where a couple of specialty tools, the snap-lock punch and utility trim, become your best friends.
First, you'll want to install a piece of utility trim (some old-timers call it "undersill trim") right up against the soffit. This piece has a little channel designed specifically to grab and hold the top edge of your siding panel.
Next, measure the space from the locking leg of the panel below it up to the bottom of that utility trim. Be sure to subtract about a 1/4-inch to give it room to expand and contract. Once you've cut the panel to size, grab your snap-lock punch. You'll use it to create little raised tabs—we call them "lugs"—every 6 to 8 inches along that freshly cut edge. Make sure these tabs face outward.
Now for the magic. As you push the panel up into position, those lugs will click right into the utility trim. It's a surprisingly strong connection that holds the panel tight without any visible nails or fasteners. This is a trade secret for a clean, sag-free finish that looks great for years.
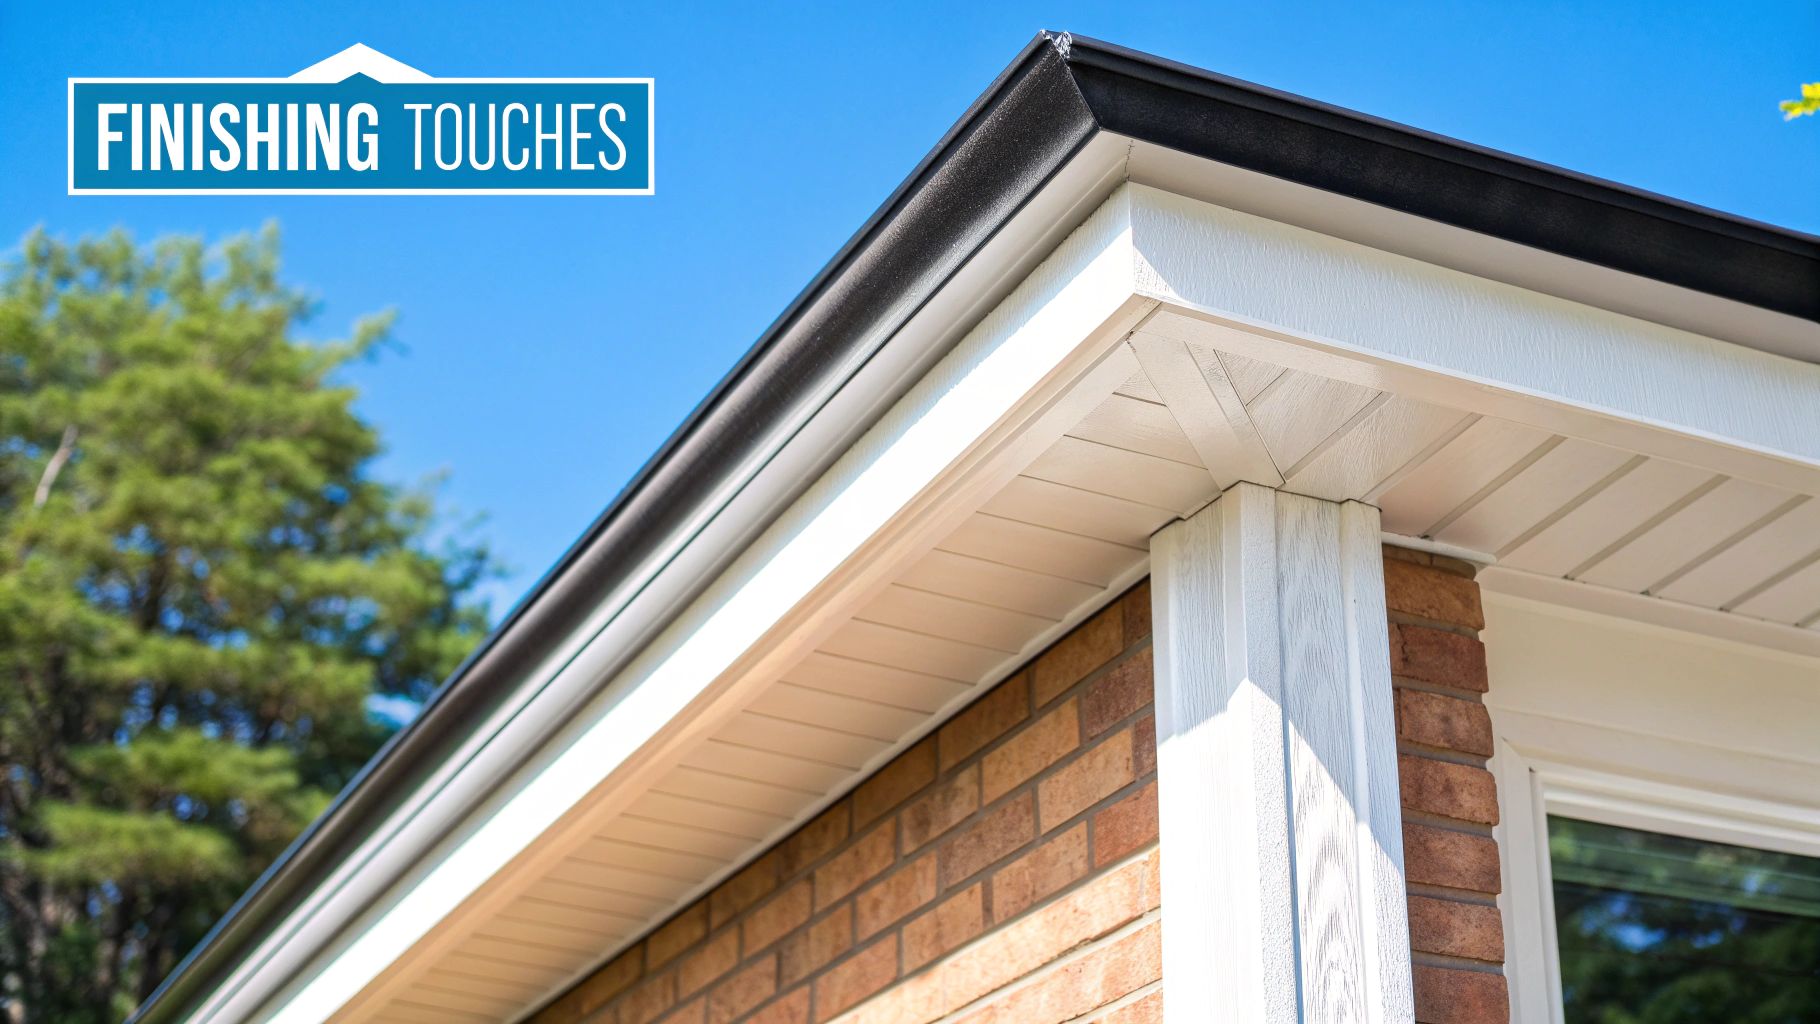
Installing Soffit and Fascia for a Cohesive Look
The areas under your roof's overhang—the soffit (the underside) and the fascia (the front-facing board)—are crucial for a complete look. Most of the time, we use vented soffit panels here. It's not just for looks; it allows your attic to breathe, which is a huge deal for managing heat and moisture buildup.
Here’s the basic rundown of how it works:
- Install Receiving Channels: You’ll need to mount J-channel or F-channel against the house wall and also out on the fascia board. This creates a track for the soffit panels to slide into.
- Cut Soffit Panels: Measure the distance between your channels, then cut the soffit panels about 1/4-inch shorter. That gap is non-negotiable for expansion.
- Slide and Secure: Pop the panels into the channels, locking each piece into the next. They shouldn't be jammed in; they need to float freely to handle temperature swings.
Once the soffit is in, you cover the wooden fascia board with a pre-formed vinyl or aluminum fascia cover. This protects the wood from rot and gives you a crisp, maintenance-free edge that perfectly matches the siding. When done right, the soffit and fascia tie the whole project together.
The goal is a unified system where every component works together. The soffit, fascia, and siding should look like they were always meant to be a single, cohesive unit, protecting your home from the elements while looking sharp.
Capping Corners and Trims with Precision
The final act is making sure every corner, window, and door looks absolutely perfect. This means capping the bottom of your corner posts to keep pests from making a home inside.
It also means carefully sealing around J-channels with a high-quality, flexible caulk. While the siding system is designed to shed water, a good bead of caulk is extra insurance against wind-driven rain. For some inspiration on what a truly finished project looks like, check out this gallery of finished siding projects. It really shows how taking the time to nail these final details is what makes a home look its best for decades to come.
Common Installation Mistakes to Avoid
You can learn a lot by seeing where others have gone wrong. When it comes to vinyl siding installation, a few common slip-ups can turn a promising project into a wavy, buckling mess. Knowing what these pitfalls are ahead of time is the best way to get a professional finish on your first try.
The absolute biggest mistake I see, time and time again, is nailing the siding down way too tight. It's a natural instinct—you want everything locked down solid. But with vinyl, that’s the worst thing you can do. This material needs room to breathe.
Forgetting Vinyl Needs to Move
Vinyl siding isn't static; it's constantly expanding in the heat and contracting in the cold. A single 12-foot panel can grow or shrink by as much as 1/2 inch over the course of a year. If you pin it tightly to the wall, that movement has nowhere to go. The result? Ugly waves, ripples, and buckles as the siding fights against the nails.
This brings us to the golden rule of siding installation: you hang it, you don't nail it down.
Getting this right is simple if you follow three rules for every single nail:
- Place the nail right in the center of the nailing slot.
- Leave a gap the thickness of a dime (about 1/16th of an inch) between the siding and the nail head.
- Check that the panel can still slide back and forth a bit after it's fastened.
Mastering this one technique is what separates a professional-looking job from an amateur one. It lets the siding move with the seasons, keeping your walls looking straight and clean for years.
Using the Wrong Fasteners (Or Nailing in the Wrong Place)
Beyond just nailing too tightly, your choice of fastener and where you put it makes a huge difference. The wrong nails will rust and stain your siding, while poor placement can cause panels to sag or even crack.
Make sure you're using corrosion-resistant nails, like galvanized steel or aluminum. The heads should be at least 5/16-inch wide to properly hold the panel, and the nail itself needs to sink at least 3/4-inch into solid wood. Always drive them in straight, never at an angle.
One "shortcut" you should never take is face-nailing—driving a nail directly through the face of the siding instead of using the slot. It completely locks the panel, guarantees it will buckle, and punches a hole for water to get in. It's a major no-no.
Proper fastening is everything. Get it right, and your siding will perform exactly as it was designed to.
Botching the Overlaps and Seams
Nothing screams "DIY job" like sloppy, visible seams where panels meet. When done right, the overlaps should practically disappear, giving your home a clean, uniform look.
The most obvious error is stacking seams—placing the overlap in one course directly above the seam in the course below it. This creates a vertical line running up your wall that catches the eye immediately. Instead, you need to stagger your seams so they are at least three to four feet apart from the rows directly above and below.
For the overlap itself, aim for 1 to 1 1/4 inches. Here's a pro tip: think about where people will stand when they look at your house, like from the driveway or the front sidewalk. Orient the overlaps so the top panel faces away from that main viewpoint. It’s a small detail that makes a massive difference in curb appeal.
Ignoring the Temperature on Installation Day
Finally, don't forget to check the weather forecast. The temperature when you're installing directly impacts how you cut and space your panels, especially where they meet trim pieces like J-channel and corner posts.
- On a cold day (below 40°F): The vinyl is at its smallest. You need to leave a bigger gap—about 3/8-inch—to give it room to expand in the summer.
- On a hot day (above 80°F): The vinyl is already expanded. A smaller 1/4-inch gap is all you need.
Making this small adjustment ensures your panels won't pop out of the channels in the winter or buckle against them in the summer. Avoiding these common mistakes is the key to a beautiful, durable vinyl siding installation that you can be proud of.
Answering Your Top Siding Questions
Even with a solid plan, a few questions always pop up before starting a big project like installing vinyl siding. Let's tackle some of the most common ones I hear from homeowners, so you can move forward with confidence.
What’s the Typical Cost for a Professional Siding Job?
When you hire a pro, you can expect the cost to land somewhere between $4 and $12 per square foot. That price usually includes both the materials and the labor.
So, for a standard 2,000-square-foot house, you're looking at a total project cost of roughly $8,000 to $24,000.
Of course, several things can push your price to the higher or lower end of that spectrum. Your location plays a big part, as do the quality and style of siding you pick. The complexity of your home is another major factor—a simple, single-story ranch is far less work than a multi-story home with lots of gables and dormers. Don't forget to account for the cost of tearing off and disposing of the old siding, as that will add to the final bill. My best advice? Get at least three detailed quotes from trusted local installers to see what a fair price looks like in your area.
Can I Just Put New Siding Over the Old Stuff?
It can be tempting to take a shortcut and install new vinyl right over your old wood or fiber cement siding, but this is one area where you really don't want to cut corners. Any experienced pro will tell you that a complete tear-off is the only way to go, and for good reason.
Removing the old siding is your only opportunity to see what's happening with the wall sheathing underneath. This is your chance to catch and fix hidden issues like water damage, rot, or pests before they turn into major structural headaches.
Think of it this way: covering up old siding is like putting a bandage on a broken arm. You're hiding a potentially serious problem. Trapped moisture between the layers can lead to mold and decay, and the extra bulk makes for an awkward, unprofessional finish around windows and doors. Starting with a clean, sound surface is non-negotiable for a job that will last.
How Do I Keep My New Vinyl Siding Looking Good?
This is the easy part. One of the best things about vinyl is how little maintenance it needs. For the most part, a quick wash once a year is all it takes to keep it looking sharp.
Here's a simple cleaning routine:
- Grab a soft-bristle brush on a long pole.
- Mix a mild, all-purpose cleaner in a bucket of water.
- Use a garden hose to rinse everything down when you're done.
If you run into tougher spots like mildew, a mixture of 30% white vinegar and 70% water is a fantastic, gentle solution. You can use a pressure washer if you're careful—just be sure to use a low-pressure setting and always aim the nozzle at a downward angle. Never spray upward, as you could force water up behind the panels.
It's also smart to walk around the house every so often and check the caulk around windows and doors to make sure the seals are still tight. Stick to gentle cleaners, and your siding will look fantastic for years.
Ready to transform your home with a beautiful, durable, and low-maintenance exterior? The expert team at Breeze Siding has been providing top-quality vinyl siding installation services across the Seattle area since 2007. Contact us today for your free, no-obligation estimate.