
That ugly brown spot on your ceiling is more than just an eyesore. It’s a warning sign, a clear signal from your house that something’s amiss. Most of the time, these water stains on ceilings are the handiwork of a leaky roof, a faulty pipe, or maybe even condensation from your HVAC system. Figuring out what that stain means is the first, and most important, step in stopping a small problem from turning into a full-blown disaster.
What That Ceiling Stain Is Trying to Tell You
Finding a water stain on your ceiling can definitely be a heart-sinking moment. But before you panic and reach for the paint, take a minute to play detective. The look and location of that stain are your best clues to what’s really going on, guiding you to the right fix before things get worse.
Believe me, you’re not alone in this. Water getting into a home is a huge issue for homeowners everywhere. Roof leaks are a major culprit, often because of old materials giving out or damage from a storm. In the U.S. alone, severe weather damages the roofs of nearly 5 million homes annually. For many, the first sign of a missing shingle or busted flashing is that tell-tale stain on the ceiling. You can read more about the primary causes of ceiling water stains to get a better sense of what you might be up against.
Before you start tearing things apart, a quick visual inspection can tell you a lot. Here’s a little cheat sheet to help you make a preliminary diagnosis.
Quick Guide to Identifying Ceiling Stain Sources
| Stain Characteristic | Likely Cause | Common Location |
|---|---|---|
| Yellow or Light Brown Halo | Slow, intermittent leak | Anywhere, but often points to a plumbing fixture used occasionally or a minor roof leak. |
| Dark Brown or Black | Constant, active leak | Directly below bathrooms, kitchens, or under a severely damaged roof section. |
| Large, Irregular Shape | Water traveling from a source | Top floor ceilings, suggesting water is running along rafters from a roof leak. |
| Small, Concentrated Circle | Direct drip | Beneath a specific pipe, P-trap, or condensation line. |
| Appears Near Vents | Condensation | Near HVAC registers or in rooms with high humidity like bathrooms or laundry rooms. |
This table is a great starting point, but remember that water can travel in tricky ways. Use these clues to narrow down the possibilities before you investigate further.
Decoding the Color and Shape
The color of the stain is one of your best guides. If you see a stain with a distinct yellow or light brown ring around it, you're likely looking at a slow, on-and-off leak. This is what happens when water gets in, dries out a bit, and then leaks again, leaving behind mineral deposits that look like a halo. Think of a pipe under a sink that only drips when you run the water, or a small roof issue that only shows up during a downpour.
Now, if the stain is a dark, solid brown or even blackish color, that’s a sign of a much more consistent water problem. This usually points to a steady plumbing leak or some serious roof damage that’s keeping the drywall constantly soaked. These darker stains are the ones you need to jump on immediately, as they mean a much higher risk of mold and structural rot.
The shape tells a story, too. A big, sprawling stain that looks like a map often means a roof leak. Water is getting in and running along the ceiling joists before it finally drips through. A tighter, rounder stain? That’s more likely a direct drip from a plumbing fixture or a condensation point right above it.
Considering the Location
Where the stain shows up is another huge piece of the puzzle. Is it on the top floor, right under the roofline? Your prime suspects are the roof itself, the gutters, or the flashing around chimneys and vents. Here in the Sacramento, Davis, and Elk Grove areas, our winter rains can expose any weakness in your home's outer shell, particularly if water gets behind your siding.
If the stain is on a lower floor, and there’s a bathroom or kitchen right above it, you can bet it’s a plumbing issue. I’ve seen it a hundred times. The most common culprits are:
- Leaky toilet wax rings: A classic cause for stains on the ceiling directly below a bathroom.
- Failing shower pan liners: These can create slow, sneaky leaks that might not show up for months.
- Cracked drain pipes: These are often hidden inside walls or between floors, making them tricky to spot.
Finally, if you see stains popping up near HVAC vents or in rooms that get steamy—like a laundry room or a bathroom without a good exhaust fan—it could just be condensation. This is a common problem in the humid summer months around Northern California, where moisture in the air can collect and eventually soak into the drywall.
How to Pinpoint the Source of the Leak
Alright, you’ve sized up the stain. Now for the real detective work. Finding where the water is actually getting in is the single most important part of this whole process. Slapping some paint over the spot without fixing the source is a waste of time—that stain will be back with a vengeance. Think of the stain as just the symptom; our job is to find the cause.
Water is a tricky thing. It rarely just drips straight down. More often, it’ll run along a rafter, follow a pipe, or travel down a wire before it finally decides to soak through your ceiling. That means the real problem is often nowhere near where the stain shows up. The best way to tackle this is with a methodical search, starting with the most likely suspects and working your way down the list.
Starting Your Investigation Above the Stain
The first place to look is always the area directly above the water damage. If the stain is on your top floor, that means you're heading up to the attic. If it's on a lower level, you'll be checking out the room upstairs, paying close attention to any plumbing or appliances.
Once you’re in the attic, don't just look for a puddle. Grab a good, bright flashlight and scan for subtle clues:
- Damp or discolored insulation: Once insulation gets wet, it’s useless and becomes a perfect spot for mold to take hold.
- Dark stains on the wood: Look closely at the underside of the roof deck, the rafters, and the joists for any dark "water tracks."
- Frost on roofing nails: On a cold day, you might see frost on the tips of the nails poking through the roof sheathing. This tells you that warm, moist air from inside your house is hitting the cold metal and condensing, which can then melt and drip.
For stains that appear under a bathroom, you can bet it's a plumbing issue. I’ve seen this countless times. Check the caulk around the tub and shower, look for any signs of a leak at the base of the toilet (a failed wax ring is a classic culprit), and peek under the sink for any slow drips from the water lines or drain trap. Even a tiny, persistent drip can create a massive stain over a few months.
Trade Secrets for Finding Elusive Leaks
Sometimes, the source just isn't obvious. This happens a lot with roof leaks that only show up during a hard, driving rain—a common event during Northern California winters. When you can't spot the problem with a visual check, you have to force the leak to show itself.
Here's a pro tip for finding a stubborn roof leak: grab a buddy and a garden hose. One person gets on the roof to methodically wet down small sections at a time, while the other stays in the attic, watching for the first sign of a drip. Always start low on the roof and work your way up, hitting spots around vents, flashing, and anything else that pokes through the shingles. This is so much more effective than just waiting for the next storm.
Another great tool to have in your arsenal is a moisture meter. These gadgets take the guesswork out of the equation by measuring the actual water content inside your drywall or wood. You can take readings in and around the stained area, following the trail of higher moisture levels right back to the entry point. It’s like following a set of wet footprints directly to the source of those frustrating water stains on ceilings.
The True Cost of Ignoring a Ceiling Stain

It’s easy to look at that small, yellowish spot on your ceiling and think, "I'll get to that later." It seems like a simple cosmetic problem, maybe something a fresh coat of paint can fix. But trust me, ignoring it is like hearing a faint smoke alarm and deciding to finish your movie first.
What begins as a minor inconvenience can quickly spiral into a full-blown crisis for your home and your wallet.
Water is a silent destroyer. It doesn't just stain; it soaks. It seeps into the drywall, turning a sturdy barrier into a soft, mushy mess. From there, it works its way to the wooden joists and beams—the very bones of your house. This is where the real trouble starts, inviting wood rot that can compromise the entire structure.
From a Quick Fix to a Major Overhaul
The speed at which repair costs escalate is what catches most homeowners by surprise. A simple paint job for a tiny, fresh stain might set you back a couple hundred dollars. But once that water has had time to do its work, the price tag skyrockets.
Drywall Replacement: Once drywall is saturated, there's no saving it. You're looking at cutting out the damaged sections, hanging new board, taping, mudding, and then matching the texture. This kind of project can easily run over $1,000.
Structural Repairs: If the water has reached your wooden joists and rot has set in, you're facing a much bigger problem. These structural elements may need to be reinforced or completely replaced—a complex and invasive job that can cost thousands.
Electrical Hazards: Let's not forget the dangerous combination of water and wiring. Moisture can short out light fixtures, create a serious fire risk, and necessitate hiring a licensed electrician to make things safe again. That's another major expense added to the bill.
A damp, dark space is the perfect breeding ground for mold. In just 24-48 hours, black mold can start growing on wet surfaces. This isn't just ugly; it's a health hazard that requires expensive, specialized remediation to get rid of safely.
Looking at the Numbers
Don't just take my word for it. The data shows that roughly 70% of water stains on ceilings come from a leaky roof, and the average cost to fix the resulting damage falls somewhere between $500 and $2,500.
Here's the kicker: catching that leak early can cut those costs by as much as 45%. You can discover more insights about these repair costs and see just how much proactive homeowners save.
The message here is simple. Dealing with water stains on ceilings right away isn't about keeping up appearances. It's a smart financial move that protects your home's structure, your family's health, and the value of your biggest investment. The real cost of ignoring that stain is never just the price of paint—it's the price of everything that comes after.
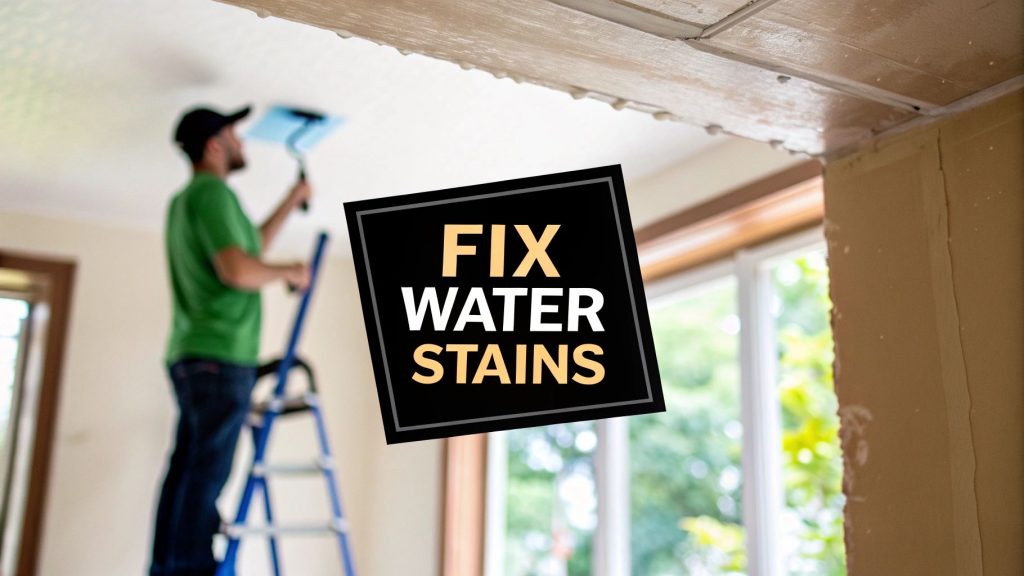
Your Step-by-Step Ceiling Repair Guide
Alright, so you've tracked down the source of the leak and stopped the water. That's a huge win. Now you can turn your attention to the cosmetic damage that pesky water stain left behind.
But hold on. Before you even think about grabbing a paintbrush, there's one critical step that absolutely cannot be rushed: making sure the area is completely, 100% bone-dry. I've seen it time and time again—people get impatient, paint over a still-damp spot, and a few weeks later, the paint is peeling and the stain is bleeding right back through. Don't let that be you.
If you have a moisture meter, now’s the time to use it. You’re looking for a normal reading for drywall. If you don't have one, just give it time. A good rule of thumb is to wait at least 48-72 hours after the leak is fixed. To speed things up, get some air moving with a fan or bring in a dehumidifier.
When dealing with water damage, moving quickly is key to avoiding bigger problems like mold.

As you can see, you have a crucial 24 to 48-hour window to get things dry before mold spores really start to take hold.
Prepping the Surface for a Flawless Finish
With a perfectly dry canvas, it's time to prep. This part can get messy, so start by laying down drop cloths to protect your floors and any furniture you couldn’t move out of the room.
Grab a putty knife and gently scrape off any paint that’s bubbling, flaking, or peeling away from the ceiling. You need a solid, stable base for your repair to last. Once you’ve scraped it smooth, give the area a quick wipe-down. A simple mix of one part bleach to three parts water works great to kill any mildew and clean off any grime. Let it dry completely.
Heads Up: If the drywall feels soft, spongy, or starts to crumble when you touch it, stop right there. That’s a sign of significant structural damage. A coat of paint isn't going to fix this. You'll need to cut out the compromised section and patch it with a new piece of drywall.
Before you can get to painting, you'll need the right supplies on hand. Having everything ready to go makes the job much smoother and helps you get a professional-looking result.
Essential Tools and Materials for Ceiling Stain Repair
| Tool/Material | Purpose | Pro Tip |
|---|---|---|
| Drop Cloths | Protect floors and furniture from dust and paint. | Plastic-backed canvas cloths are best; they won't slip and paint won't bleed through. |
| Putty Knife | Scrape away loose, peeling paint. | A flexible 2-inch knife is perfect for this kind of delicate work. |
| Safety Goggles & Mask | Protect your eyes and lungs from dust and fumes. | Always wear them, especially when scraping overhead or using oil-based primers. |
| Bleach & Water Solution | Kill any mildew and clean the surface. | Mix in a spray bottle for easy application. |
| Stain-Blocking Primer | Seal the stain and prevent it from bleeding through. | Go for a shellac-based or oil-based formula. Kilz or Zinsser are trusted brands. |
| Ceiling Paint | The final topcoat to match the rest of the ceiling. | Buy a flat sheen paint specifically designed for ceilings to hide imperfections. |
| Paint Brushes & Rollers | Apply primer and paint. | Use a brush for cutting in edges and a roller with an extension pole for the main surface. |
| Aerosol Texture Spray | (Optional) Match the existing ceiling texture. | Practice on a piece of cardboard first to get the spray pattern right. |
Gathering these items beforehand will save you from making extra trips to the hardware store mid-project.
Blocking the Stain and Matching the Texture
This is the most important part of the entire cosmetic repair. To make sure that ugly stain never sees the light of day again, you have to use a stain-blocking primer. Let me be clear: your standard latex wall primer will not cut it here. Water stains are notoriously stubborn and will bleed right through it.
You have two main choices, and both are excellent:
- Oil-based primers: These are the old-school workhorses for a reason. They create an incredible seal that locks in even the toughest water stains on ceilings.
- Shellac-based primers: These are my personal favorite for bad stains. They dry super fast and have phenomenal stain-blocking power.
Apply a solid, even coat of your chosen primer over the entire stained area. A good trick is to "feather" the edges—use a lighter touch as you brush outward from the center of the stain. This helps it blend seamlessly into the rest of the ceiling. If you had a really dark stain, don't be surprised if you need a second coat. Just let the first one dry completely before applying it.
Now for what is often the trickiest step: matching the texture. If your ceiling isn't perfectly smooth, you'll need to replicate the existing texture on your patch. You can find aerosol cans of spray texture at any home improvement store that mimic common finishes like "orange peel" or "knockdown." My advice? Practice on a scrap piece of cardboard first until you get a feel for the nozzle and spray pattern.
Once the primer (and texture, if needed) is fully cured, you’re finally ready for paint. For the best result, I always recommend painting the entire ceiling from one wall to the other. Just touching up the spot often leaves a noticeable, patchy look because the new paint will never match the old paint perfectly.
Apply one or two even coats with a quality flat ceiling paint, and your ceiling will look like that leak never even happened.
Smart Prevention for a Stain-Free Home

Fixing a water-damaged ceiling always feels like a win, but let’s be honest—the best repair is the one you never have to make in the first place. The real secret to protecting your home is shifting from a reactive "fix-it" mode to a proactive "prevent-it" mindset.
A few routine checks can save you from that sinking feeling of discovering new water stains on ceilings and the expensive, time-consuming repairs that always seem to follow. Think of it as a simple home maintenance schedule, your strongest defense against water getting where it doesn’t belong.
Your Proactive Home Maintenance Checklist
Instead of waiting for a drip to turn into a disaster, a little foresight goes a long way. This simple routine is especially important for navigating the climate here in the Sacramento Valley.
Annual Roof Inspections: At least once a year, get up on a ladder (safely!) and look for shingles that are damaged, curling, or missing entirely. I always tell homeowners to pay extra attention to the flashing—the metal seals around chimneys, vents, and skylights. That’s where leaks love to start.
Regular Gutter Cleaning: Clogged gutters are one of the most common culprits behind roof leaks. When water has nowhere to go, it backs up and seeps under the eaves, eventually staining your ceiling. A good cleaning in the spring and again in the fall keeps water flowing freely away from your house.
Appliance Hose Checks: Don't forget the indoors. Routinely check the hoses on your washing machine, dishwasher, and refrigerator ice maker. They get brittle and crack over time, often causing slow, hidden leaks you won't notice until the damage is done.
Upgrading Your Home's First Line of Defense: Siding
Where you live has a huge impact on your home's weak spots. The most likely causes of ceiling stains change dramatically depending on the local climate. Homes in humid, subtropical areas are constantly fighting stains from HVAC condensation. Meanwhile, houses in colder northern climates have to deal with ice dams that can force water right under the shingles. You can discover more about how climate impacts ceiling stains from Legacy Roofs to get a better handle on your home's specific risks.
Here in the Sacramento region, our cycles of intense sun and seasonal rain mean that a home’s exterior, especially its siding, takes a beating. Compromised siding is a direct pathway for water intrusion, which can lead to ceiling stains and hidden structural damage. Upgrading to modern siding isn't just about curb appeal; it's an essential best practice for waterproofing your home.
Choosing the right siding is crucial. Fiber cement siding, for example, is renowned for its durability and resistance to water, rot, and pests—making it an ideal choice for the Northern California climate. When properly installed with a high-quality house wrap, it creates a robust, seamless barrier against moisture. This proactive upgrade can prevent countless future headaches, from repainting water-stained ceilings to dealing with mold and rot within your walls. It's a long-term investment in your home's health and integrity.
By understanding these environmental pressures and investing in a superior exterior defense, you can drastically reduce the risk of water ever finding its way in. This proactive approach doesn't just keep your ceilings looking clean—it protects the structural integrity and value of your entire home for years to come.
Common Questions About Ceiling Water Stains
Finding a water stain on your ceiling can definitely set off some alarm bells. You’re probably wondering how bad it is, what you should do right now, and what the repair will look like. Let's walk through the questions I hear most often from homeowners.
Is a Water Stain on a Ceiling Always Serious?
The short answer? Yes. You should always treat a water stain seriously. Even a small, dry spot is a red flag that water got in somewhere it shouldn’t have.
A wet ceiling is a weak ceiling. Over time, it can lead to sagging, or in worst-case scenarios, a total collapse. Beyond the structural risk, damp drywall is a perfect breeding ground for mold, which can start growing in as little as 24 to 48 hours. Tackling water stains on ceilings the moment you spot them is the only way to keep a small leak from turning into a massive headache.
Why Is There a Stain but No Obvious Leak?
This is a classic head-scratcher, but it happens all the time. If you see the watermark but can't find a single drip, you're likely dealing with either an intermittent leak or condensation.
An intermittent leak is sneaky. It might only show up when rain is lashing against a particular side of your house or when someone uses the upstairs shower. Condensation is another common culprit, especially in steamy rooms like bathrooms or poorly ventilated laundry rooms. The warm, moist air hits the cooler ceiling, condenses, and slowly soaks into the drywall, leaving a stain behind without ever forming a drip.
Don't make the mistake of thinking 'no drip, no problem.' Whatever caused that stain is still there, and it will cause more damage if you ignore it.
What Causes a Brown Water Stain on the Ceiling?
That ugly brown or yellowish ring comes from all the stuff the water picks up on its journey through your home's structure. As water travels through your roof, attic insulation, and wood joists, it dissolves minerals, dirt, and natural wood tannins.
When that water finally reaches your ceiling and evaporates, all those dissolved particles get left behind. That's what creates the stain. Generally, a darker stain means the area has been wet for longer or has been exposed to more water over time.
How Do You Fix a Straight Line Water Stain?
A stain that forms a perfectly straight line is a dead giveaway that water is running along a ceiling joist or a drywall seam. The water follows the path of least resistance before it finally soaks through to the visible surface.
Fixing it follows the same process as any other stain, but finding the source is the real trick.
- Play Detective: Follow that line. It can often lead you to a leaky pipe or a spot on the roof that's surprisingly far from where the stain appeared.
- Stop the Leak: This is non-negotiable. You have to fix the source before doing anything else.
- Dry and Prep: Once it's bone dry, scrape away any loose material, clean the area well, and make sure it's smooth.
- Prime and Paint: This is the most important step for a good finish. Use a quality stain-blocking primer. If you don't, that line will eventually bleed right through your fresh coat of paint.
Acting quickly is always your best defense when it comes to protecting your home.
Persistent moisture can sometimes point to bigger issues with your home’s exterior, like its siding. If you think the problem might be more than just a simple leak, it's worth getting a professional opinion. You can contact Breeze Siding for a free on-site estimate. We're here to help protect your home from the inside out. Find out more at https://breezesiding.com.